INTRODUCTION ...............................................................2
PRECAUTIONS.................................................................2
PREPARATIONS ...............................................................2
Covering method ............................................................2
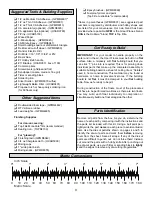
Suggested tools and supplies.........................................3
Other suggested items....................................................3
Get ready to build ...........................................................3
Parts identification ..........................................................3
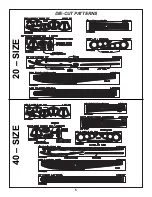
Die-cut patterns........................................................4 & 5
60 FLOATS PREASSEMBLY ............................................6
Spine...............................................................................6
Forward keel ...................................................................6
Sides and deck ...............................................................6
CONSTRUCTION OF 20, 40, 60 SPORT FLOATS ...........6
Framing...........................................................................6
Aft stringers ....................................................................8
Forward stringers ............................................................8
Prepare for sheeting .......................................................9
Aft bottom sheeting.........................................................9
Forward bottom sheeting ................................................9
Nose block and finishing ...............................................10
COVERING......................................................................11
Covering method ..........................................................11
MonoKote film ...............................................................11
Glass cloth & resin........................................................11
POSITIONING OF FLOATS ............................................12
Prepare your airplane to accept the floats ....................13
60 FLOATS ONLY ...........................................................14
Notes about soldering...................................................14
Solder the cross braces ................................................14
Mount the struts to the floats
and solder the diagonal braces.....................................15
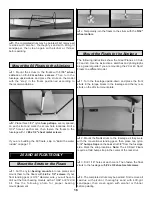
Mounting the 60 floats ..................................................16
20 AND 40 FLOATS ONLY..............................................16
Mount the struts to the floats ........................................16
Mount the floats to the airplane ....................................16
ALL MODELS .................................................................17
Build the rudder ............................................................17
Pushrod hookup............................................................17
Connect the rudder ......................................................18
(20 and 40 floats)......................................................18
(60 floats)..................................................................19
VENTRAL FIN .................................................................19
BEFORE GOING TO THE LAKE.....................................20
WATERPROOFING .........................................................20
FLYING ............................................................................20
Thank you for purchasing the Great Planes Sport Floats.
During our first flight tests with our Piper Cub 60 and Cub
20 on floats, we were amazed by the superb handling
characteristics on the water and ultra–smooth, realistic
takeoffs. Of course, the Great Planes Sport Floats will work
well with other models too.
The 20, 40 or 60 Sport Floats may be properly assembled
from this single manual. Although the Great Planes Piper
Cubs are used as examples, the same procedures and
guidelines apply if you are installing your floats on a
different model.
Please inspect all parts carefully before starting to
build! If any parts are missing, broken or defective, or if
you have any questions about building or flying these
floats, please call us at (217) 398-8970. If you are
calling for replacement parts, please look up the part
numbers and the kit identification number (stamped on
the end of the car ton) and have them ready
when calling.
Remember: Take your time and follow directions to end
up with a sturdy, well-built set of floats that are straight
and true.
After the floats are built, you will have to decide how you
will finish them. Iron-on film such as Top Flite
®
MonoKote
®
covering is our recommended method. The alternative is
3/4 oz. fiberglass cloth and epoxy resin, then paint.
You do not have to make this decision immediately, but
refer to the Finishing section in this instruction manual
for more information. This is something you can ponder
during construction.
Covering Method
PREPARATIONS
PRECAUTIONS
INTRODUCTION
TABLE OF CONTENTS
2
Summary of Contents for Sport Floats
Page 4: ...4 DIE CUT PATTERNS 60 SIZE...
Page 5: ...5 DIE CUT PATTERNS 20 SIZE 40 SIZE...
Page 21: ......


