❏
2. Use the landing gear included with your airplane for
the front struts unless you are building a Great Planes
Cub 60. For the Cub 60, you will use the front landing gear
strut and cross brace provided with the floats. For some
models, the front landing gear mounting location on the
fuselage may have to be moved to allow the step in the
float to be placed according to the recommendations.
❏
1. Remove any oily residue from the wire struts by
wiping them with alcohol. Roughen the area to be soldered
with 150-grit sandpaper.
❏
2. Silver solder, such as Great Planes Silver Solder
(GPMR8070), is highly recommended.
❏
3. For soldering the heavy gauge wire struts, higher heat
is required than for normal electrical soldering. A torch is
recommended but some heavy duty soldering irons may
work as well. The higher the temperature of the heating
source applied to the joint, the quicker the solder will flow
and the less time the wire will have to draw heat away from
the area.
❏
4. Avoid a “cold” solder joint which will not have the
shiny appearance of a proper solder joint. A cold joint may
be caused by disturbing the pieces before the molten
solder has solidified or by a joint that never had enough
heat to let the solder flow.
❏
5. Read the instructions provided by the manufacturer of
the solder.
❏
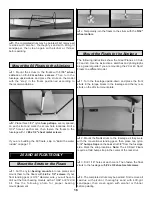
1. Match the shorter front strut with the front cross
brace and the taller rear strut with the rear cross-brace.
The matching struts and cross-braces are the ones that fit
together the best. Note: If you are mounting the floats on a
model other than the Great Planes Cub 60, you may use
the main landing gear included with your model to mount
the front of the floats, and the rear struts included with this
kit to mount the rear of the floats. You may have to relocate
your main landing gear in order to place the step on the
floats at the required position.
❏
2. Wrap each joint neatly and tightly with the
reinforcement wire.
A. For ease of handling, apply thin CA to the joint to
temporarily hold the pieces together.
Solder the Cross-Braces
Notes about Soldering
60 FLOATS ONLY
This section pertains to the 60 Sport Floats only. If
you are building the 20 or 40 Sport Floats, skip to
the “20 And 40 Floats Only” section now.
60 FLOATS ONLY
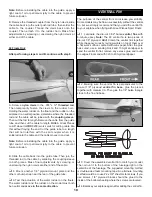
C. Use 30-minute epoxy to glue the die-cut 1/8" plywood
float mount plate gussets to the fuselage side and
former. Note: The bottom of the gussets may have to be
beveled so they are flush with the bottom of the
fuselage side.
D. Trial fit the aft float mount plate, cut it to the correct
length, then use 30-minute epoxy to securely glue it in
position. When the epoxy has cured, use a sanding block
and 150-grit sandpaper to blend the aft float mount plate
to match the contour of the fuselage bottom. Cover the
bare wood to match you model.
14
Summary of Contents for Sport Floats
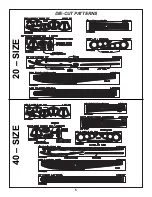
Page 4: ...4 DIE CUT PATTERNS 60 SIZE...
Page 5: ...5 DIE CUT PATTERNS 20 SIZE 40 SIZE...
Page 21: ......


