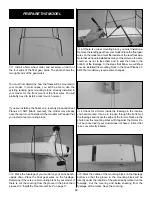
about 3/8" [9.5mm] from the sides of the floats. Drill 1/16"
[1.6mm] pilot holes for the screws.
❏
2. Mount the floats to the float gear wires, making sure
the right float is on the right side. Note the orientation of the
wires on the floats.
❏
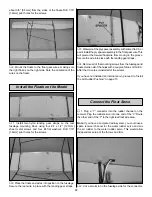
1. Install two nylon landing gear straps on the rear
fuselage mounting block using four #4 x 1/2" [12.7mm]
sheet metal screws and four #4 flat washers. Drill 1/16"
[1.6mm] pilot holes for the screws.
❏
2. Place the floats and wires into position on the fuselage.
Secure the rear wire in place with the landing gear straps.
❏
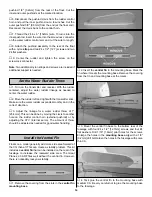
3. Waterproof the ply spacer assembly with some thin CA or
paint. Install the ply spacer assembly in the front gear wire. This
will prevent the forward float wire from moving in the groove.
Secure the wire into place with the landing gear straps.
❏
4. Remove all of the mounting screws from the fuselage and
floats. Harden all of the holes with a couple of drops of thin CA.
After the CA cures, reinstall all of the screws.
If you have not installed an internal servo, proceed to “Install
the Air Rudder Pushrod” on page 13.
❏
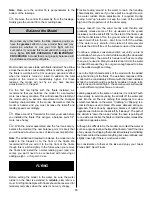
1. Plug a “Y” connector into the rudder channel on the
receiver. Plug the rudder servo into one end of the “Y.” Route
the other end of the “Y” to the right rear float wire area.
Note: If you have a computer radio system, you could use a
spare receiver channel for the water rudder servo and mix
the air rudder to the water rudder servo. This would allow
independent setup of the throws and trim.
❏
2. Cut a small slot in the fuselage side for the connector.
Connect the Float Servo
Install the Floats on the Model
12


