


❏
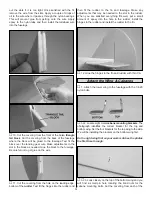
14. Install the tray as shown and secure it to the rails with
the #2 x 3/8" [9.5mm] sheet metal screws and #2 washers.
Plug your servos and battery into the receiver. Route the
receiver antenna into the antenna tube located under the
servo tray. Slide the antenna completely into the tube. The
fuselage and antenna tube are long enough that the
antenna will not exit the fuselage.
❏
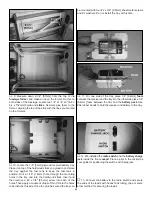
1. Paint the cockpits flat black.
❏
2. Locate two pieces of black cockpit coaming. Look
closely and you will see that there is a slit in it. Slide the
coaming onto the edge of the cockpits. Glue it in place with
R/C 56 canopy glue. This glue sticks well to MonoKote,
eliminating the need to cut any covering in order to expose
wood for a good bond.
❏
3. Cut the windscreens on the cut lines. Glue them in
place with R/C 56 canopy glue.
❏
4. Your kit includes two pilots. Make a bottom for the pilots
from balsa or other scrap you may have. Glue the pilot base to
the pilots. Glue one pilot in each cockpit with 6-minute epoxy.
The photos on the box show optional flying wires installed
on the plane. The materials we used for this are not included
in the kit but are readily available at any fabric store for less
than $10.00. The wires are made from an elastic cord
typically used for sewing an elastic cuff in a sleeve. The
material is commonly called, “Beading Cord Elastic.”
You will need approximately seven yards, two small
packages. The method described here will provide a
Optional Flying Wire Installation
Finishing Touches
26