24
❏
5. If you plan to install retracts later, glue the retractable
nose gear wheel well cover in place using several dots of
medium or thick CA glue around the perimeter. Otherwise,
thoroughly glue the cover in place.
INSTALL THE ELECTRONICS
❏
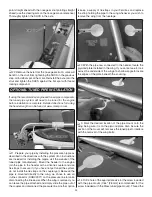
1. Install the receiver switch and optional charge jack
receptacle onto the sides of the fuselage. If space allows, install
the switch and charge jack on the side opposite the muffl er.
❏
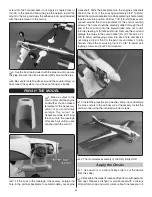
2. Connect your servos and switch to the receiver. If you
plan to connect the aileron servos to one channel on your
receiver, connect a Y-harness to the aileron channel on your
receiver. Otherwise, connect servo extensions to the channels
you will mix together for the ailerons. Wrap your receiver in 1/4"
[6.4mm] foam rubber (not included). Fit the receiver into the
cavity in the fuselage above the servo tray. Cut a piece from
the included balsa stick and glue it between the fuse sides
against the receiver to secure it in place.
❏
3. Mount your receiver pack in front of the receiver in the
same way.
❏
4. Use tie straps or something similar to bundle the servo
wires out of the way of the pushrods and servos.
❏
5. If you have installed a 2.4GHz receiver, scrap pieces of
fuel tubing can be used to support the dual receiver antennas
in the orientation described in your radio manual. If you have
installed an FM receiver, route the antenna into the antenna tube.


