


10
Cabling and Connections
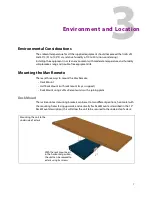
Mav Remote Connections
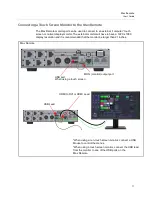
The “
Monitor
” connector takes a mini HDMI lead. To make sure that the lead stays in place,
there is a cable tie fitted to secure the body of the HDMI lead to a plate above the connector
socket (as shown below).
MAV-GUI Connections - continued
Fit the HDMI lead to the Monitor port.
Then place the cable tie around
the bracket and cable and pull the cable tie
to secure
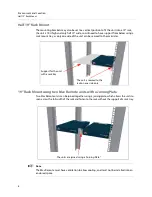
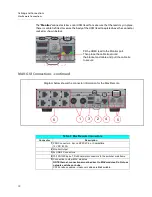
Diagram below shows the connector information for the Mav Remote
1
2
3
4
5
5
Table 1: Mav Remote Connectors
Connector
Description
1
PSU Connectors - Kycon KPPX 4Pin or Compatible
12V DC 8.33A
2
Monitor Output
3
2x USB 2 Connectors
4
10/100/1000 base T, RJ45 network connectors to the switcher mainframe
5
Connection to other MAV modules
NOT Ethernet, connections must be direct to MAV modules. Do Not use
network switches or hubs.
CAT5 or above cables - crossover cables are
Not
suitable.
Summary of Contents for MAV REMOTE
Page 4: ...iv Table of Contents 8 Specifications 25 Mav Remote Specifications 25 Contact Us 27 ...
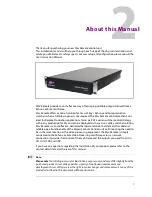
Page 10: ...6 About this Manual What is supplied with Kahuna Maverik ...
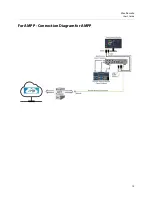
Page 19: ...15 Mav Remote User s Guide For AMPP Connection Diagram for AMPP ...
Page 20: ...16 Cabling and Connections For AMPP Connection Diagram for AMPP ...
Page 22: ...18 Power Supplies Mav Remote External Power Supplies ...
Page 28: ...24 Dimensions Mav Remote Dimensions ...