


8
Environment and Location
Half 19" Rack Mount
Half 19" Rack Mount
The mounting brackets may also be set to a vertical position to fit the unit into a 19" rack,
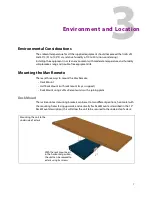
the unit is 1RU high and only half 19" wide, so will need to have support from below using a
rack mount tray, as only one side of the unit can be secured to the rack sides.
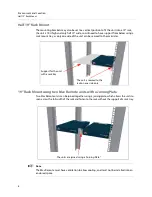
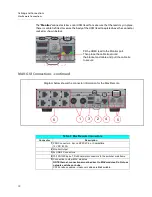
19” Rack Mount using two Mav Remote units with a Joining Plate
Two Mav Remote units can be joined together using a joining plate, which allows the units to
span across the full width of the rack and fasten to the rack without the support of a rack tray.
+
Note
+ ☞
Note
The Mav Remote must have ventilation to allow cooling, and must not be installed into an
enclosed space.
The unit is secured to the
rack on one side only.
Support for the unit
with a rack tray
The units are joined using a “Joining Plate”
Summary of Contents for MAV REMOTE
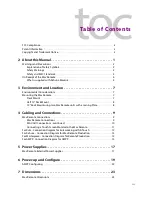
Page 4: ...iv Table of Contents 8 Specifications 25 Mav Remote Specifications 25 Contact Us 27 ...
Page 10: ...6 About this Manual What is supplied with Kahuna Maverik ...
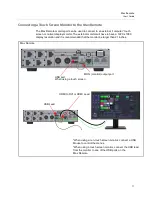
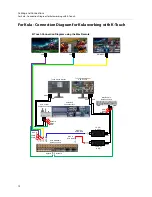
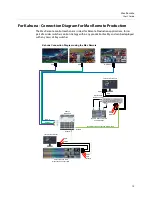
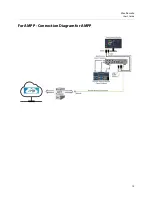
Page 19: ...15 Mav Remote User s Guide For AMPP Connection Diagram for AMPP ...
Page 20: ...16 Cabling and Connections For AMPP Connection Diagram for AMPP ...
Page 22: ...18 Power Supplies Mav Remote External Power Supplies ...
Page 28: ...24 Dimensions Mav Remote Dimensions ...