


5-2
Operator's Manual - LDK 5000
Shooting
Using the Camera
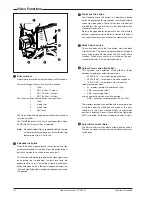
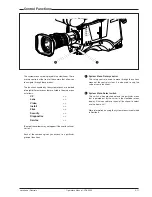
Lens preferences
Set up the lens according to the manufacturer's instructions.
Select the lens type from two predefined settings; standard or
wide angle. Choose and, if necessary, adjust the iris
parameters to suit the lens and your personal preferences.
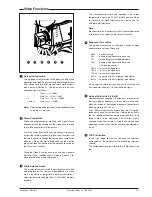
Video preferences
The camera is now ready for use, however, the ambient
conditions must now be taken into account and the appropriate
adjustments made on the camera:
a. Recall the standards settings.
b. Switch off the colour bar (when on).
c. Select the gain.
d. Select a neutral density optical filter if required.
e. Set a preset colour temperature or carry out the automatic
white balance procedure.
f.
Select the correct exposure time.
Note: The number of functions available depends on the
user level that has been set. Refer to Section 6 for
more information on setting the user level.
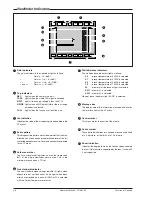
The camera is operated via the viewfinder text display and the
control system switches on the front panel. You have great
detail and selection at your disposal when changing all the
functions that are available in the camera. Refer to Section 6
- Operating the Menu System - for an explanation of the use
of the menu selection structure and the viewfinder text
display.
This section describes the operational functions that are
available when using the camera via the viewfinder display
and the switches at the front. These offer a convenient way of
accessing the menu system which provides full control of the
camera.
There are a number of steps that must be carried out before
satisfactory shots can be obtained:
a. The camera must be set up and powered.
b. The standard settings must be recalled.
c. Adjustments must be made for ambient lighting.
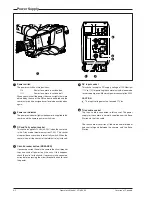
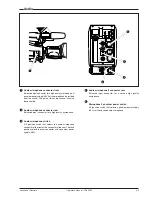
Physical set-up and power supply
Attach lens, viewfinder, microphone and any other accessories
to the camera as described in Section 2 - Assembling the
Units.
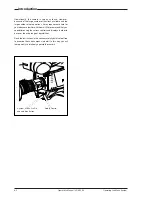
Connect the triax cable to the triax connector and the camera
operator's headset to the headset socket on the rear panel of
the camera. Connect the audio microphone to either the
audio socket on the right side of the camera or the socket on
the rear. The camera is powered by the base station via the
triax cable. Set the power switch on the left side of the camera
to the on position.
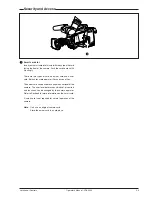
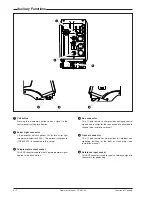
Operator preferences
With the owner card or the PIN code set the user level. The
recommended minimum user level is 1. Setting the camcorder
to level 0 is too restrictive for normal circumstances. For full
control set the level to 3.
Viewfinder preferences
Set up the viewfinder according to your own preferences;
select markers, message boxes and on-screen display times.