Introduction
1-5
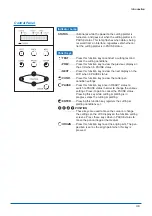
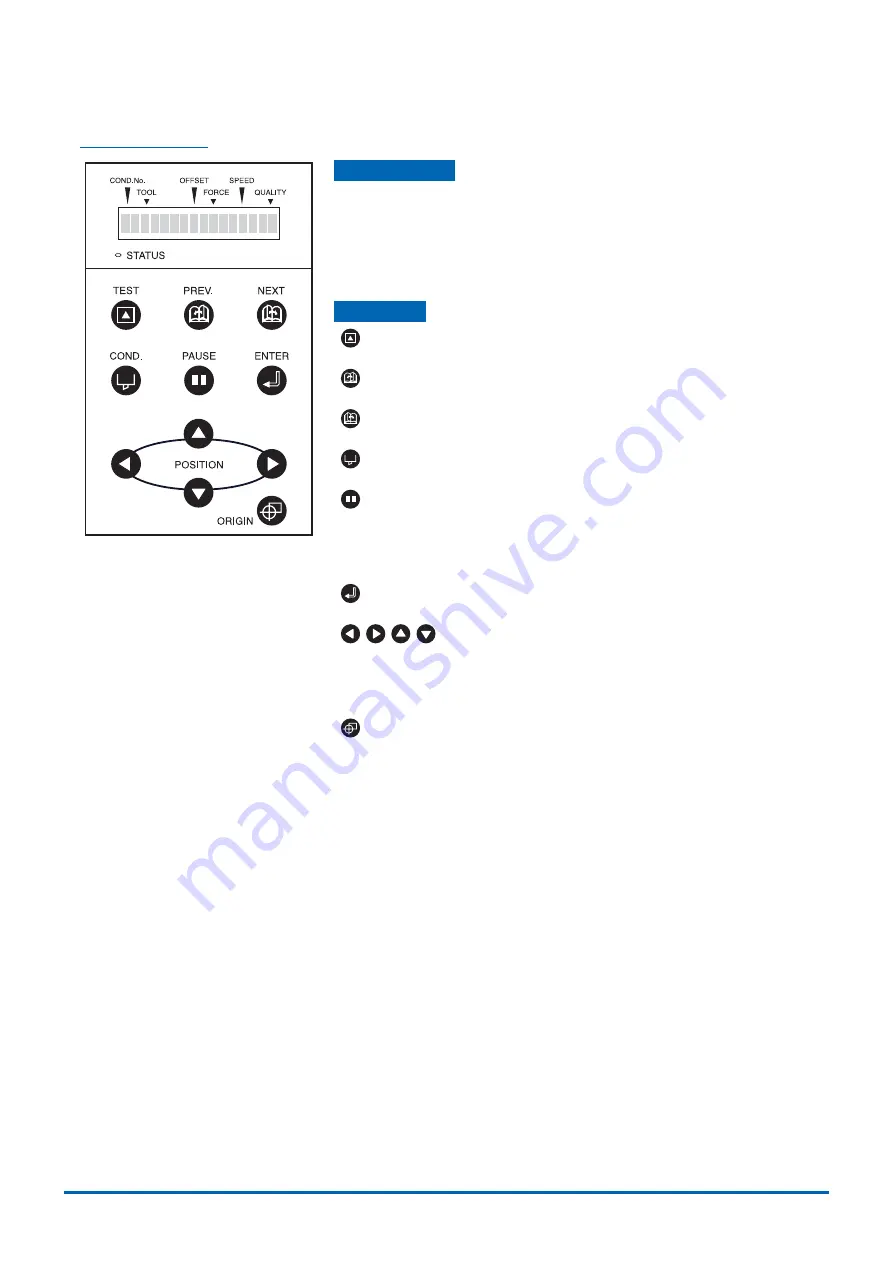
Control Panel
Indicator Lamp
STATUS
.......... Illuminates while the power to the cutting plotter is
turned on, and goes out when the cutting plotter is in
PAUSE status. This lamp flashes when data is being
received from an interface, regardless of whether or
not the cutting plotter is in PAUSE status.
Panel Keys
TEST
......... Press this function key to conduct a cutting test and
check the cutting conditions.
PREV.
....... Press this function key to view the previous display on
the LCD when in PAUSE status.
NEXT
........ Press this function key to view the next display on the
LCD when in PAUSE status.
COND.
...... Press this function key to view the cutter-pen
condition settings.
PAUSE
...... Press this function key once in READY status to
switch to PAUSE status in order to change the various
settings. Press it again to cancel the PAUSE status.
Pressing this key while cutting or plotting is in
progress stops the cutting or plotting.
ENTER
...... Pressing this function key registers the cutting or
plotting conditions set.
POSITION
.............. These keys are used to move the cursor or change
the settings on the LCD display on the function setting
screens. Press these keys when in PAUSE status to
move the pen carriage or the medium.
ORIGIN
..... Press this function key to set the origin point. The pen
position is set as the origin point when this key is
pressed.


