


12
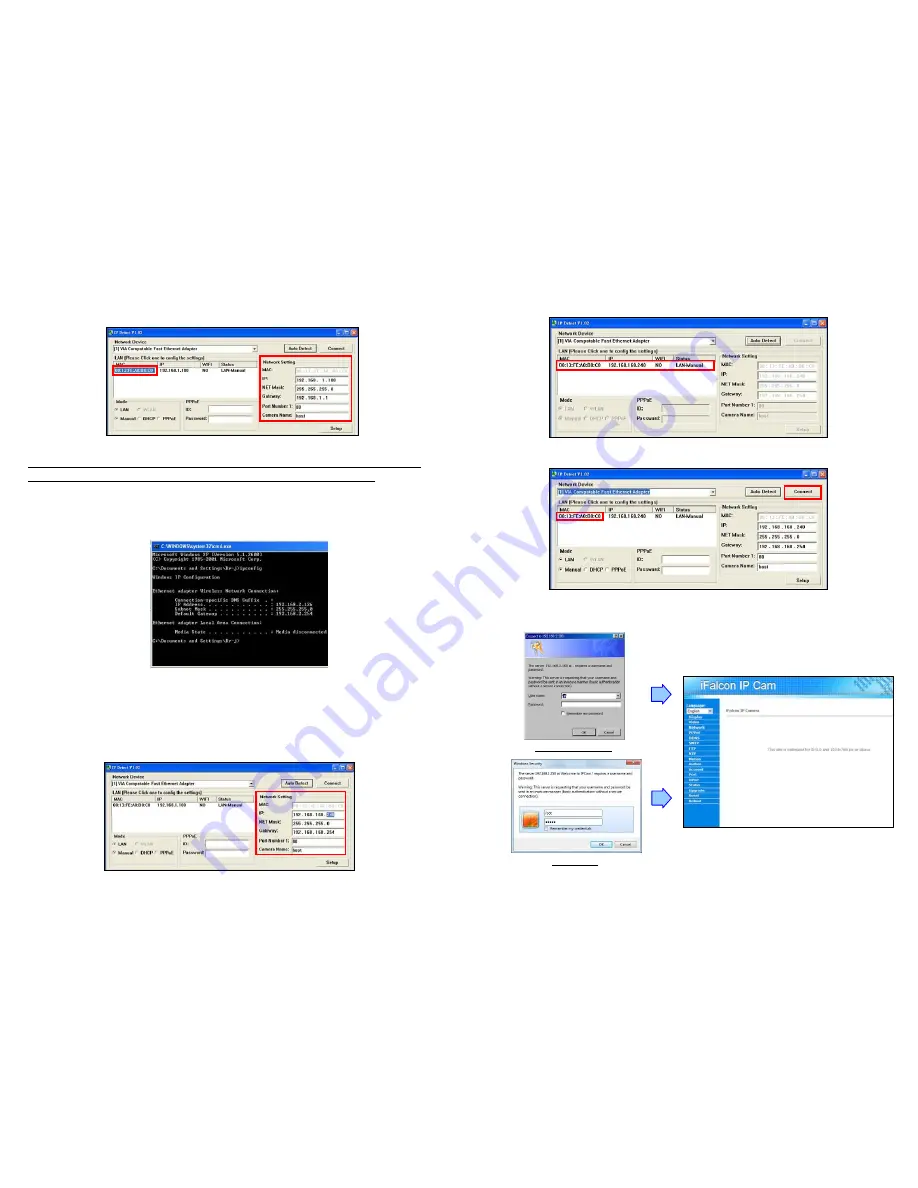
Step 3:
Click on the “MAC”, and then the “IP”, “Net Mask”, “Gateway”, “Port Number 1” and “Camera
Name” of network camera will be displayed in the “Network Setting” area.
NOTE:
The IP Address, Net Mask and Gateway must be corresponding with your network settings for
you to access the camera. You can follow the steps below to get your network information.
-
Open the Microsoft DOS
Command Prompt
shell window.
Windows XP/ Vista
: <Start>
→
<Programs>
→
<Accessories>
→
<Command Prompt>
Windows 7
: <Start>
→
<All Programs>
→
<Accessories>
→
<Command Prompt>
-
Type “ipconfig” and then press “Enter” to get your network information.
-
Assign IP Address, Netmask (Subnet Mask) and Gateway (Default Gateway) for the network
camera. (You must use the same Net Mask (ex. 255.255.255.0) and Gateway (192.168.2.254).
You can use any IP address between 192.168.2.1-254, but make sure that the IP Address has
never been used or is used by another IP addressable device.)
Step 4:
Directly modify the “IP”, “Net Mask” and “Gateway”, and click “Setup” to save.
13
Step 5:
Click the “Auto Detect” button again, and the new network information will be shown.
Step 6:
Click on the “MAC” and click the “Connect” button to connect the network camera.
Step 7:
When the login screen appears, enter the user name and password (default user name:
root
,
default password:
admin
), and click the “OK” button to login your camera.
Windows XP/ Vista
Windows 7


