background image

EN


28

Cleaning

PLEASE NOTE!


Surfaces could be damaged!

 Do not use any corrosive or abrasive cleaning agents 

or scouring sponges to clean the device. 

Clean the cooking bowl and the accessories used immediately after each use to prevent 
germ formation. Do not allow food residues to dry on.
1.  Wait until the cooking bowl has cooled down. Then remove it from the main unit.
2. 

Do not immerse the main unit in water or other liquids! Do not clean in the 
dishwasher!

 Clean all other used parts with mild detergent and warm water or in 

the dishwasher. Remove the sealing ring from the lid if necessary before cleaning in 
order to preserve it. 

3.  Wipe down the main unit with a damp cloth if necessary and then dry it with a soft 

cloth.

4.  Allow all parts to dry completely. Then reinsert the sealing ring on the lid.
5.  Store the device in a dry, clean place that is not accessible to children and animals.

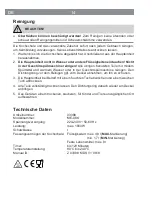
Technical Data

Article number:

03388

Model number:

ME-08K

Voltage supply:

220-240 V~ 50-60 Hz

Power:

max. 1800 W

Protection class

Capacity of the cooking bowl:

Liquids:  max. 4.8 l (

MAX

 marking)

min. 1.7 l (

MIN

 marking)

Solid food: max. 8 l

Timer:

Up to 120 minutes

Temperature setting:

80°C to 240°C

Manual ID:

Z 03388 M DS V1 0818


Summary of Contents for 03388

Page 1: ...Z 03388 M DS V1 0818 03388 DE Gebrauchsanleitung ab Seite 3 EN Instruction manual starting on page 17 FR Mode d emploi à partir de la page 31 NL Handleiding vanaf pagina 45 ...

Page 2: ......

Page 3: ...ikocher entschieden haben Lesen Sie vor dem ersten Gebrauch des Gerätes diese Gebrauchsanleitung sorgfäl tig durch und bewahren Sie diese für spätere Fragen und weitere Nutzer auf Sie ist ein Bestandteil des Gerätes Hersteller und Importeur übernehmen keine Haftung wenn die Angaben in dieser Gebrauchsanleitung nicht beachtet werden Sollten Sie Fragen zum Gerät sowie zu Ersatz Zubehörteilen haben k...

Page 4: ...sonen mit reduzierten physischen sensorischen oder mentalen Fähigkeiten oder Mangel an Erfah rung und oder Wissen benutzt werden wenn sie beaufsichtigt oder bezüglich des sicheren Gebrauchs des Gerätes unterwie sen wurden und die daraus resultierenden Gefahren verstanden haben Das Gerät und die Anschlussleitung sind von Kindern jünger als 8 Jahre fernzuhalten Die Reinigung und Wartung durch den Be...

Page 5: ... zu werden Die Reinigungshinweise im Kapitel Reinigung beachten GEFAHR Stromschlaggefahr Das Gerät nur in geschlossenen Räumen verwenden und lagern Das Gerät nicht in Räumen mit hoher Luftfeuchtigkeit betreiben Sollte die Haupteinheit ins Wasser fallen sofort die Stromzufuhr unterbrechen Nicht versuchen das Gerät aus dem Wasser zu ziehen während es am Stromnetz angeschlossen ist Vor erneuter Inbet...

Page 6: ... nicht auf oder neben Wärmequellen wie Herdplatten oder Öfen stellen Offenes Feuer z B brennende Kerzen von dem Gerät und der Anschlussleitung fernhalten Das Gerät keinen extremen Temperaturen lang anhaltender Feuchtigkeit direkter Sonneneinstrahlung oder Stößen aussetzen Kein kaltes Wasser in die heiße Kochschale oder auf den heißen Deckel gießen um Materialschäden zu vermeiden Das Gerät an einem...

Page 7: ...chte zeigt an dass das Gerät eingeschaltet ist 3 TIME Drehknopf zum Ein Ausschalten Position ON bzw OFF und zum Einstel len der Garzeit in Minuten 4 Lüftungsöffnungen auf der Unterseite 5 HEAT Heizkontrollleuchte zeigt an dass das Gerät heizt Wenn die eingestellte Temperatur erreicht ist erlischt die Heizkontrollleuchte 6 TEMP Drehknopf zum Einstellen der Gartemperatur in C Position OFF Heizen aus...

Page 8: ...s der Kochschale benö tigt wird Während der Zubereitung sollte er sich nicht am Frittierkorb befinden damit der Deckel geschlossen werden kann Griff einsetzen Die beiden Metallhalterungen des Griffs zusammendrücken die Enden der Me tallhalterungen zunächst durch die große Öse am oberen Rand des Frittierkorbs und dann in den beiden kleinen Ösen im Frittierkorb stecken An schließend loslassen Griff ...

Page 9: ...ebnahme des Gerätes sollte ohne Nahrungsmittel stattfinden da es auf Grund eventueller Beschichtungsrückstände zu einer Geruchs oder Rauch entwicklung kommen könnte Die Kochschale im Gerät ca 15 Minuten lang ohne Inhalt auf höchster Temperaturstufe aufheizen lassen siehe Kapitel Grundlegende Benutzung des Gerätes Dabei für einen gut durchlüfteten Raum sorgen z B über weit geöffnete Fenster 4 Die K...

Page 10: ...edlichen Zubereitungsarten wählen und in die Kochschale geben Bei Bedarf den Deckel auf die Kochschale setzen 6 Den TEMP Drehknopf im Uhrzeigersinn drehen und die gewünschte Temperatur wählen 7 Einschalten ohne Timer Den TIME Drehknopf gegen den Uhrzeigersinn auf Posi tion ON drehen Einschalten mit Timer Den TIME Drehknopf im Uhrzeigersinn drehen und die ge wünschte Garzeit einstellen Daraufhin be...

Page 11: ...it und ggf weitere Zutaten in die Kochschale geben Darauf achten dass die Menge zwischen der MIN und MAX Markierung liegt Die MAX Markierung nicht überschreiten 2 Den Deckel auf die Kochschale legen 3 Mit dem TEMP Drehknopf zum Aufkochen zunächst 120 C bis 140 C einstellen 4 Das Gerät mit dem TIME Drehknopf einschalten 5 Das Gerät während des Kochens nicht unbeaufsichtigt lassen Wenn die Flüssigke...

Page 12: ...n 5 Die Temperatur auf 80 C reduzieren 6 Den Rost auf seine kurzen Standbeine in die Kochschale stellen 7 Das Fleisch auf den Rost legen 8 Die Kochschale mit dem Deckel verschließen und das Fleisch garen lassen Die Garzeit hängt von der Fleischsorte und der Größe der Fleischstücke ab Bei Rind fleisch beträgt sie ca 60 Minuten Anfangs zwischendurch überprüfen ob das Fleisch gar ist Wenn man die opt...

Page 13: ...iter nicht überschreiten 2 Mit dem TEMP Drehknopf die geeignete Temperatur einstellen 3 Das Gerät mit dem TIME Drehknopf einschalten 4 Den Deckel auf die Kochschale legen 5 Den Griff am Frittierkorb anbringen 6 Wenn die Kochschale bis zur MAX Markierung mit Fett oder Öl gefüllt ist den Frit tierkorb maximal zu mit Lebensmitteln befüllen damit sie genügend Platz haben um gleichmäßig zu garen Bei we...

Page 14: ...el und warmem Wasser oder in der Geschirrspülmaschine reinigen Den Dichtungsring vor dem Reinigen ggf vom Deckel abnehmen um ihn zu schonen 3 Die Haupteinheit bei Bedarf mit einem feuchten Tuch abwischen und einem weichen Tuch abtrocknen 4 Alle Teile vollständig trocknen lassen Den Dichtungsring danach wieder am Deckel anbringen 5 Das Gerät an einem trockenen sauberen für Kinder und Tiere unzugäng...

Page 15: ... Sicherung des elektrischen Verteilers Sicherungskasten überprüfen Die Sicherung im elektrischen Verteiler Sicherungskasten wird ausgelöst Zu viele Geräte am selben Stromkreis angeschlossen Anzahl der Geräte im Strom kreis reduzieren Kein Fehler feststellbar Den Kundenservice kontaktieren Die Lebensmittel sind nicht gleichmäßig gegart Es wurden verschiedene Le bensmittel mit unterschiedli chen Gar...

Page 16: ...weltgerecht an einem Recyclinghof für elektrische und elektroni sche Altgeräte entsorgen Es gehört nicht in den Hausmüll Kundenservice Importeur DS Produkte GmbH Am Heisterbusch 1 19258 Gallin Deutschland Tel 49 38851 314650 0 30 Ct Min in das dt Festnetz Kosten variieren je nach Anbieter Alle Rechte vorbehalten ...

Page 17: ...ooker Before using the device for the first time please read through these operating in structions carefully and keep them for future reference and other users They form an integral part of the device The manufacturer and importer do not accept any liability if the information in these operating instructions is not complied with If you have any questions about the device and about spare parts acce...

Page 18: ...ence and or knowl edge if they are supervised or have received instruction on how to use the device safely and have understood the dangers re sulting from this The device and the connecting cable are to be kept away from children younger than 8 years of age The cleaning and maintenance by the user may not be carried out by children Animals must be kept away from the device and the connecting cable...

Page 19: ...still connected to the mains power Have the device checked in a specialist workshop before using it again Never touch the device or the connecting cable with wet hands when these components are connected to the mains power WARNING Danger of Fire Do not use the device in rooms containing easily ignitable or explosive substances Do not operate the device in the vicinity of combustible material Do no...

Page 20: ...lid to prevent any material damage Keep the device in a dry place at temperatures of between 0 and 40 C Make sure that the connecting cable is not squashed bent or laid over sharp edges and does not come into contact with hot surfaces e g of the device When removing the mains plug from the plug socket always pull on the mains plug and never the mains cable Do not pull or carry the device by the ma...

Page 21: ...eating control lamp goes out 6 TEMP Rotary knob for setting the cooking temperature in C OFF position switch off heating 7 Socket for the mains cable on the back Cooking Bowl 12 13 8 9 10 11 The cooking bowl is required for all types of food preparation The device cannot be operated with out the cooking bowl The cooking bowl features a MIN and a MAX marking 7 for liquids MAX marking Liquids must n...

Page 22: ...en let go of the holders Detaching handle Press together the two metal holders of the handle and remove from the frying basket Furthermore there are two hooks 14 15 on the frying basket to allow it to hang on the edge of the cooking bowl This allows excess fat to drip down Rack 16 17 The rack is placed in the cooking bowl Depend ing on whether it is placed on its short 17 or longer 16 support legs...

Page 23: ... of the Device chapter During this time make sure the room is well ventilated e g with wide open windows 4 Thoroughly rinse the cooking bowl and any accessories that come into contact with food Follow the instructions in the Cleaning chapter to do this Basic Use of the Device PLEASE NOTE WARNING Danger of Injury Make sure that the connected mains cable does not present a trip hazard The mains cabl...

Page 24: ...ng on without timer Turn the TIME rotary knob anticlockwise to the ON posi tion Switching on with timer Turn the TIME rotary knob clockwise and set the cooking time you want The device will then start to heat and both control lamps go on The HEAT heating control lamp goes out as soon as the set temperature has been reached It goes on again when the device continues to heat 8 To switch off the devi...

Page 25: ...ake sure that the amount is between the MIN and MAX marking Do not exceed the MAX marking 2 Place the lid on the cooking bowl 3 Use the TEMP rotary knob to initially set a temperature of 120 C to 140 C to bring to the boil 4 Switch on the device with the TIME rotary knob 5 Do not leave the device unattended during cooking If the liquid boils reduce the tem perature Stir it around from time to time...

Page 26: ... and the size of the pieces of meat For beef it is around 60 minutes At first check in between times whether the meat is cooked Once you have discovered the optimum cooking time you can set the timer the next time Baking Casseroles and similar dishes can be baked directly in the cooking bowl with the lid closed Otherwise the rack should be used for baking 1 Place the rack in the cooking bowl on it...

Page 27: ...the MAX marking with fat or oil fill the frying basket no more than full with food so that it has enough room to cook evenly If you use less fat or oil pour correspondingly less food into the frying basket 7 Once the HEAT heating control lamp has gone out and the deep frying fat has melt ed open the lid and carefully place the frying basket into the cooking bowl Make sure that all the items for fr...

Page 28: ...gent and warm water or in the dishwasher Remove the sealing ring from the lid if necessary before cleaning in order to preserve it 3 Wipe down the main unit with a damp cloth if necessary and then dry it with a soft cloth 4 Allow all parts to dry completely Then reinsert the sealing ring on the lid 5 Store the device in a dry clean place that is not accessible to children and animals Technical Dat...

Page 29: ...present Check the fuse of the electrical distributor fuse box The fuse in the elec trical distributor fuse box is triggered Too many devices connect ed to the same circuit Reduce the number of devices in the circuit No error can be identified Contact our customer service department The food has not been cooked evenly Different items of food with different cooking times have been prepared at the sa...

Page 30: ...friendly manner at a recycling centre for used electrical and electronic devices It should not be disposed of in the reg ular domestic waste Customer Service Importer DS Produkte GmbH Am Heisterbusch 1 19258 Gallin Germany Tel 49 38851 314650 Calls to German landlines aresubject to charges The cost varies depending on the service provider All rights reserved ...

Page 31: ...nt la première utilisation de l appareil et le conserver précieusement pour toute question ultérieure ainsi que pour les autres utilisateurs Il fait partie intégrante de l appareil Le fabricant et l importateur déclinent toute responsabilité en cas de non observation des instructions qu il contient Pour toute question concernant l appareil et ses pièces de rechange et accessoires vous pouvez conta...

Page 32: ...és physiques sensorielles ou mentales sont réduites ou man quant d expérience et ou de connaissances lorsqu elles sont sous surveillance ou qu elles ont été instruites quant à l utilisa tion sécurisée de l appareil et qu elles ont compris les risques en découlant Tenez l appareil et le cordon de raccordement hors de portée des enfants de moins de 8 ans Le nettoyage et la maintenance de l utilisate...

Page 33: ...de commande à distance séparé Respectez les consignes de nettoyage mentionnées au para graphe Nettoyage DANGER risque d électrocution Utilisez et entreposez l appareil uniquement dans des pièces fermées Ne faites pas fonctionner l appareil dans des pièces à fort taux d humidité Si le corps de l appareil devait tomber à l eau coupez immédiatement l alimentation électrique N essayez pas d extraire l...

Page 34: ...r et s endommager Ne placez pas l appareil sur ni à côté de sources de chaleur telles que des plaques de cuisson ou un four Tenez l appareil et son cordon de raccordement éloignés de toute flamme ouverte comme par ex des bougies allumées N exposez pas l appareil à des températures extrêmes à une humidité prolongée ou au rayonnement direct du soleil et veillez à ce qu il ne soit pas soumis à des ch...

Page 35: ...ue l appareil est enclenché 3 TIME minuterie Bouton rotatif de mise en marche arrêt position ON marche ou OFF arrêt du réglage du temps de cuisson en minutes 4 Orifices de ventilation en face inférieure 5 HEAT chauffe Témoin lumineux de chauffe indiquant que l appareil chauffe Le té moin lumineux de chauffe s éteint dès que la température sélectionnée est atteinte 6 TEMP température Bouton rotatif...

Page 36: ... pas rester sur le panier à friture durant la préparation afin de pouvoir fermer le couvercle Mise en place de la poignée pressez les deux supports métalliques de la poignée l un vers l autre insérez les extrémités des supports mé talliques tout d abord dans le grand œillet sur le bord supérieur du panier à friture puis dans les deux petits œillets à l intérieur du panier Relâchez maintenant les s...

Page 37: ... imputables au transport En cas de dommages n utilisez pas l appareil mais contactez le service après vente 2 Enlevez de l appareil les éventuels films protecteurs adhésifs et protections de trans port N ôtez jamais la plaque signalétique de l appareil ni les éventuelles mises en garde apposées 3 La première mise en service de l appareil doit être effectuée à vide donc sans ali ments en raison du ...

Page 38: ...s le corps de l appareil Veuillez respecter la bonne position les contacts en face inférieure du réci pient de cuisson et ses pieds doivent se loger dans les ouvertures correspondantes du corps de l appareil L ap pareil ne fonctionne pas si le récipient de cuisson n est pas correctement en place 3 Déroulez intégralement le cordon d alimentation électrique puis raccordez le au corps de l appareil 4...

Page 39: ...de plats variés selon vos recettes préférées De manière générale il n est pas nécessaire de préchauffer l appareil Si vous souhaitez cuire les aliments à point nous recommandons de préchauffer l appareil à vide puis d y déposer les aliments à cuire une fois que le témoin lumineux de chauffe HEAT chauffe s est éteint Étant donné que les plats sont de natures très diverses et que la provenance la ta...

Page 40: ...urts dans le récipient de cuisson 2 Réglez le bouton rotatif TEMP température sur 220 C à 240 C 3 Enclenchez l appareil en actionnant le bouton rotatif TIME minuterie 4 Une fois que le témoin lumineux de chauffe HEAT chauffe est éteint placez les aliments sur la grille Une fois cuits d un côté retournez les Si nécessaire réduisez la température Cuisson préservatrice La viande est particulièrement ...

Page 41: ...s aliments conservent leur goût naturel leur forme et leur couleur propres La cuisson à l étouffée est particu lièrement appropriée pour les aliments délicats ou riches en nutriments comme les petits légumes la volaille le poisson et les mollusques 1 Remplissez d eau le récipient de cuisson jusqu au repère MIN Pour aromatiser les aliments il est également possible d utiliser du bouillon ou un méla...

Page 42: ...e sur le bord du récipient de cuisson Lais sez s égoutter l excédent de graisse d huile avant de servir Nettoyage À NOTER Risque d endommagement de surfaces N utilisez pas d éponges abrasives ni de produits nettoyants corrosifs ou abrasifs pour l entretien Nettoyez le récipient de cuisson et les accessoires ayant servi immédiatement après chaque utilisation afin de prévenir toute formation de germ...

Page 43: ...tionne pas Le témoin lumineux de fonction nement ne s allume pas Le cordon de raccordement n est pas correctement enfiché dans l appareil ou à la prise de courant Enfoncez la fiche du cordon de raccordement jusqu en butée dans la douille de l appareil ou dans la prise Le récipient de cuisson n est pas correctement en place dans le corps de l appareil Corrigez la position du récipient de cuisson Le...

Page 44: ...ont trop remplis Réduisez la quantité d aliments Une odeur désa gréable se dégage en cours d utilisation L appareil est utilisé pour la première fois Une odeur se dégage souvent lors de la première utilisation d appareils neufs L odeur de vrait disparaître après plusieurs utilisations de l appareil Mise au rebut Débarrassez vous des matériaux d emballage dans le respect de l environne ment en les ...

Page 45: ...ze multikoker Lees vóór het eerste gebruik van het apparaat deze gebruiksaanwijzing zorgvuldig door en bewaar deze voor latere vragen en andere gebruikers Deze is een bestand deel van het apparaat Fabrikant en importeur aanvaarden geen aansprakelijkheid wanneer de informatie in deze gebruiksaanwijzing niet in acht wordt genomen Neem bij vragen over het apparaat en over reserveonderdelen toebehoren...

Page 46: ...hamelijke zintuiglijke of geestelijke vermogens of kinderen die niet beschikken over ervaring en of kennis wanneer zij on der toezicht staan en instructies hebben gekregen over hoe het apparaat op veilige wijze kan worden gebruikt en wanneer zij de daaruit voortvloeiende gevaren hebben begrepen Het apparaat en het netsnoer moeten uit de buurt worden ge houden van kinderen jonger dan 8 jaar Reinigi...

Page 47: ...tructies in het hoofdstuk Reinigen dienen in acht te worden genomen GEVAAR gevaar voor een elektrische schok Het apparaat uitsluitend gebruiken en bewaren in gesloten ruimten Het apparaat niet gebruiken in ruimten met een hoge luchtvochtigheid Als de hoofdeenheid in het water valt moet u onmiddellijk de stroomtoevoer onderbreken Probeer niet om het apparaat uit het water te trekken terwijl het is ...

Page 48: ...ververhit en beschadigd kunnen raken Het apparaat niet op of naast warmtebronnen zoals kookplaten of ovens plaatsen Open vuur bijv brandende kaarsen uit de buurt houden van het apparaat en het netsnoer Stel het apparaat niet bloot aan extreme temperaturen lang aanhoudend vocht di rect zonlicht of schokken Giet geen koud water in de kookschaal of op het hete deksel om materiaalschade te voorkomen B...

Page 49: ...ngescha keld 3 TIME TIJD draaiknop voor het in uitschakelen stand ON AAN resp OFF UIT en voor het instellen van de gaartijd in minuten 4 Ventilatieopeningen aan de onderkant 5 HEAT WARMTE verwarmingscontrolelampje geeft aan dat het apparaat aan het opwarmen is Zodra de ingestelde temperatuur is bereikt gaat het verwarmingscon trolelampje uit 6 TEMP draaiknop voor het instellen van de gaartemperatu...

Page 50: ...in uit de kookschaal nodig is Tij dens de bereiding zou deze zich niet aan de fri tuurmand moeten bevinden zodat het deksel kan worden gesloten Greep aanbrengen de twee metalen houders van de greep samendrukken de uiteinden van de metalen houders eerst door het grote oog aan de bovenste rand van de frituurmand en vervolgens in de twee kleine ogen in de frituurmand steken Daarna loslaten Greep losh...

Page 51: ...nbedrijfstelling van het apparaat zou zonder levensmiddelen moeten plaatsvinden omdat eventuele coatingrestanten een geur en rookontwikkeling zou den kunnen veroorzaken Laat de kookschaal in het apparaat ca 15 minuten zonder inhoud in de hoogste temperatuurstand opwarmen zie hoofdstuk Basisgebruik van het apparaat Zorg daarbij voor een goed geventileerde ruimte bijvoorbeeld door de ramen wijd open...

Page 52: ...zen en in de kookschaal doen Indien nodig het deksel op de kookschaal plaatsen 6 De TEMP draaiknop rechtsom draaien en de gewenste temperatuur instellen 7 Inschakelen zonder timer de TIME TIJD draaiknop linksom in de stand ON AAN zetten Inschakelen met timer de TEMP draaiknop rechtsom draaien en de gewenste tem peratuur instellen Vervolgens gaan beide controlelampjes aan en begint het apparaat op ...

Page 53: ...grediënten in de kookschaal doen Zorg ervoor dat de hoeveelheid tussen de MIN en MAX markering staat De MAX markering niet overschrijden 2 Leg het deksel op de kookschaal 3 Met de TEMP draaiknop eerst 120 C tot 140 C instellen 4 Schakel het apparaat in met de TIME TIJD draaiknop 5 Laat het apparaat tijdens het koken niet zonder toezicht Stel een lagere temperatuur in zodra de vloeistof kookt Af en...

Page 54: ...n de kookschaal aanbraden Haal ze er daarna uit 5 Breng de temperatuur omlaag tot 80 C 6 Het rooster op zijn korte standpoten in de kookschaal zetten 7 Leg het vlees op het rooster 8 Sluit de kookschaal met het deksel af en laat het vlees gaar worden De gaartijd hangt af van de vleessoort en de grootte van de stukken Bij rundvlees bedraagt dit ca 60 minuten Proef eerst of het vlees ook echt goed g...

Page 55: ...een met 4 8 liter niet overschrijden 2 Stel met de TEMP draaiknop de geschikte temperatuur in 3 Schakel het apparaat in met de TIME TIJD draaiknop 4 Leg het deksel op de kookschaal 5 De greep op de frituurmand aanbrengen 6 Als de kookschaal tot aan de MAX markering met vet of olie is gevuld de frituurmand maximaal met levensmiddelen vullen zodat ze genoeg ruimte hebben om goed gaar te worden Bij m...

Page 56: ...middel en warm water of in de vaatwasser reinigen De afdichtring voor het reinigen evt van het deksel halen om deze te ontzien 3 De hoofdeenheid indien nodig afnemen met een vochtige doek en afdrogen met een zachte doek 4 Alle onderdelen volledig laten drogen De afdichtring daarna weer op het deksel aan brengen 5 Berg het apparaat op een droge schone voor kinderen en dieren onbereikbare plaats op ...

Page 57: ...en netspanning aanwezig De zekering in de zekerings kast controleren De zekering in de zekeringskast is ge sprongen Te veel apparaten op dezelf de stroomkring aangesloten Aantal van de apparaten in de stroomkring verminderen Geen fout vast te stellen Neem contact op met de klantenservice De levensmiddelen zijn niet gelijkmatig gegaard Er zijn verschillende levens middelen met verschillende gaartij...

Page 58: ... naar een recyclingbedrijf voor afgedankte elektrische en elek tronische apparaten Het hoort niet bij het huisvuil Klantenservice importeur DS Produkte GmbH Am Heisterbusch 1 D 19258 Gallin Duitsland Tel 49 38851 314650 Bellen naar Duitsevaste lijnen is niet gratis Kosten variëren per aanbieder Alle rechten voorbehouden ...

Page 59: ......

Page 60: ......

Reviews: