background image

-  

15

  - 

Product Information Helpline 0870 873 0080 


Switching the power ON 


To switch the player 

ON

 first ensure the HOLD switch is in the Off (pushed fully 

towards the left) position then press and hold the 

 POWER

 button for more than 

2 seconds. 
 
The start-up screen logo appears and the hard disk starts to load information.   


The first music track will appear together with track and file information ready for 
playback, if no files have been loaded onto the player “

No Music File

“ will show in 

the display. 


Switching the power OFF 


To switch the player 

OFF

 firstly ensure the Hold switch is in the Off (pushed fully 

towards the left) position then press and hold the

   POWER

 button for more than 

2 seconds, the hard disk will take few seconds to save last status data and the 
player will then power down.  


Please also note that the player has an auto power off function whereby if no 
music is playing or no menu actions are taken the player will power down in

 1 

minute to preserve battery life. 


Getting Started (contd.) 

-  

16

  - 

Product Information Helpline 0870 873 0080 


Playing transferred music 


Power on the unit. 
 
To locate the desired portion: 

Press and hold the 

 button for 

Fast Forward (FF)

 during playback. 

Press and hold the


 button for 

Fast Rewind (FR) 

during playback. 

 
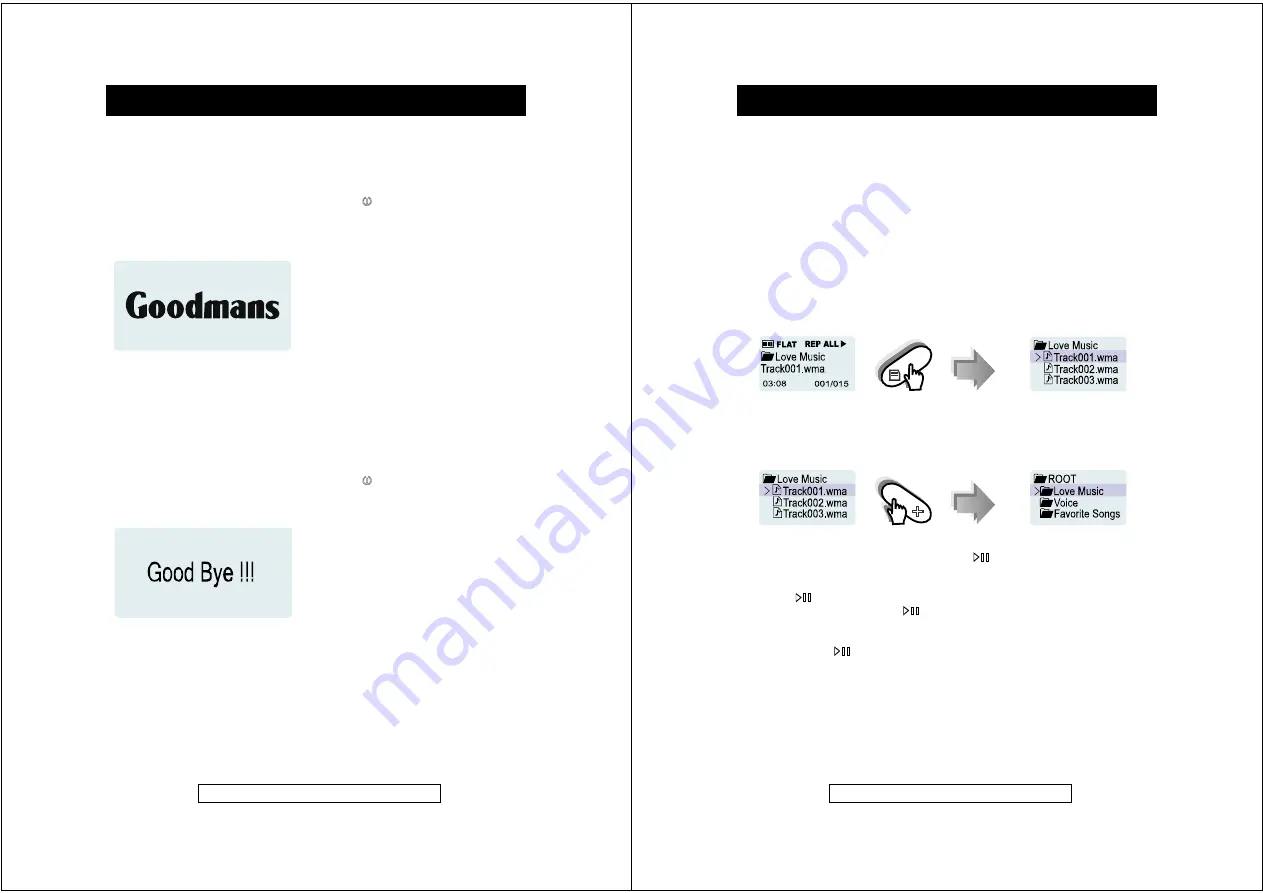
To select tracks for playback: 

To select music or recorded voice tracks using the 

FOLDER BROWSER

 function.


1. Press the 

MENU

 button ONCE to enter the 

FOLDER BROWSER

 during 

playback. 


2. Use the 

 or 

 buttons to browse the available tracks. Select the desired 

FOLDER

 or track and press 

Jog_ENTER

 button. 

3.  Using the same method as in point 

2

 any subfolders can be accessed. 

4. 

Use VOL+ button to return to the Upper Level/Folder or ROOT Directory

.  


5. Use the 

 or 

 buttons to browse the available tracks. To select a track to 

playback press the 

Jog_ENTER

 button or 

 PLAY/PAUSE


To interrupt playback: 

Press the 


PLAY/PAUSE 

or

 Jog_ENTER

 button. 

To resume playback, press the 

 PLAY/PAUSE

 or 

Jog_ENTER

 button again. 


To stop playback: 

Press & hold the  


PLAY/PAUSE

 or 

Jog_ENTER

 button for more than 2 

seconds. 


Getting Started (contd.) 

Summary of Contents for GMP32005

Page 1: ...GMP32005 INSTRUCTION MANUAL Before operating this unit Please read this Instruction Manual carefully GOODMANS Product Information Helpline 08708730080 ...

Page 2: ...onnect operate and adjust the unit for best performance It can also save money it shows simple things to do and check before calling us for assistance Introduction Note Services and applications must be Windows Media audio compliant and support Digital Rights Management Windows XP required Apple iTunes music content is NOT supported 2 Product Information Helpline 0870 873 0080 Table of Contents In...

Page 3: ...tandard installation only z Depending on the Windows version more free space maybe necessary Music data also requires more space 4 Product Information Helpline 0870 873 0080 CAUTIONS Precaution Safety Notes Safety Notes Power Sources Be sure that the local voltage is corresponding with the supplied AC Power Adapter before using this product If the AC Power Supply exceeds the limit it may cause mal...

Page 4: ...t recording z If the HDD malfunctions the contents recorded on the HDD maybe lost To save contents permanently it is recommended to copy the content to a PC etc as backup Audio data z Backup data stored on this product periodically in case of loss or malfunction z Goodmans cannot be held liable for any damages or loss of data resulting from defects in this product or your computer General Informat...

Page 5: ...w the battery indicator starts flashing when battery is Full Notes z The unit may get warm during or after charge This is normal z When charging battery for the first time or after a long period of disuse battery life may be shorter Repeat charge discharge cycle 4 to 5 times to restore the full capacity 8 Product Information Helpline 0870 873 0080 Connecting the unit to a PC 1 Connect the unit to ...

Page 6: ... PC Windows 98 Second Edition Win98SE 1 Click Safely Remove Hardware icon on the taskbar 2 Select Stop USB Card Reader 3 Then Device is removed successfully appears Click OK button and disconnect the USB connection cable form the PC When the player is disconnected from the PC the following message appears in the display and the player shuts down PC Connection contd 10 Product Information Helpline ...

Page 7: ...ouble click Install to run the installer 4 Follow the onscreen instructions to install the plug in driver Software Installation contd 12 Product Information Helpline 0870 873 0080 The Sync feature in Windows Media Player 10 enables synchronization of secured music files in categories to the library of the player 1 Connect the player to the PC and start Windows Media Player 10 2 Select the music fi...

Page 8: ...ormation Helpline 0870 873 0080 Display Icons Play Status Getting Started Battery Indicator Folder Name Playback Information Track Name Title Artist Playtime Track Number Current Track Total Tracks Playmode NORMAL REPEAT ONE REPEAT FOLDER REPEAT ALL RANDOM FOLDER RANDOM ALL EQ Mode FLAT CLASSIC JAZZ ROCK POP PLAYBACK ll PAUSE STOP ...

Page 9: ...ayer will power down in 1 minute to preserve battery life Getting Started contd 16 Product Information Helpline 0870 873 0080 Playing transferred music Power on the unit To locate the desired portion Press and hold the button for Fast Forward FF during playback Press and hold the button for Fast Rewind FR during playback To select tracks for playback To select music or recorded voice tracks using ...

Page 10: ... z Whilst recording the backlight will be turned off automatically z It is possible to change the recording quality as required Please refer to the section of Customized Settings z Whilst recording with the in built microphone data is written to the hard disk at regular intervals High quality at 128 kbps Medium quality at 64 kbps and Low quality at 32 kbps Some mechanical noise may be heard during...

Page 11: ...mation Helpline 0870 873 0080 Equalizer EQ Mode The unit has FIVE preset equalizer effects FLAT CLASSIC JAZZ ROCK and POP Select an effect according to a music genre or personal preference Note indicates the default setting 1 Press the MENU button TWICE during playback 2 Use the Jog Up Down control or to browse the MAIN MENU options and select EQ MODE press Jog_ENTER button 3 Select the Equalizer ...

Page 12: ...ight remains OFF Notes 10 seconds is default setting The higher the value selected the more the battery life will be reduced as the backlight consumes a higher level of power when it is ON 22 Product Information Helpline 0870 873 0080 Customized Settings contd Contrast 1 Press the MENU button TWICE during playback 2 Use the Jog Up Down control or to browse the MAIN MENU select SETTING and press Jo...

Page 13: ...ic voice files are automatically generated by the player and are managed separately from downloaded music Whilst renaming them you have to move them to the VOICE folder under the ROOT FOLDER 24 Product Information Helpline 0870 873 0080 Maintenance Moisture condensation If condensation forms inside the unit the unit may not function properly In the following cases condensation may form inside the ...

Page 14: ...8 320 kbps and VBR Playback Formats WMA supports PDDRM WMA 9 Sampling Frequency 8 48 KHz File System FAT32 for Hard Disk Display 128x64 Mono LCD with Blue Backlight Voice Recording Bit Rate 32 kbps Low 64 kbps Mid 128 kbps High Input Output Connections Earphone USB 2 0 High Speed Built in Microphone DC In 5 Volts Headphone Frequency response 20Hz to 20KHz Maximum Output Power 5mW per channel on 32...

Reviews: