background image

28

D

VD+R /R

W

 Re

cor

de

r

RW

DD


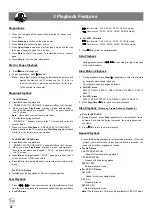
fast forword  : FF2X, FF 4X, FF 6X, FF 8X(4 steps).


 fast reverse : FR 2X, FR 4X, FR 6X, FR 8X(4 steps).


n


  For VCD / CD discs


fast forword : FF 2X, FF 4X, FF 8X, FF 16X(4 steps).


 fast reverse : FR 2X, FR 4X, FR 8X, FR 16X(4 steps).

2.  Press 

/ll

 to return to normal playback.

Skip Playback


During playback press  

l

 / 

  repeatedly to skip to previous

      or next track/chapter.

Slow Motion Playback

1.  


 During playback press 

Slow


l  


repeatedly to select the forward

(or reverse) slow speed playback.

      The playback speed changes as follows :


n


  For DVD  discs

SF2X


SF4X


SF8X


→ 

SR2X


SR4X


SR8X


PLAY


SF2X


n


  For VCD  discs

SF1X


SF2X


SF3X


→ 

STEP BWD


SF1X


SF2X


...

2.  Press 

Play/Pause


/ll

 to return to normal playback.

Step Playback 

( Frame by Frame Advance Playback )


n


Only for DVD / VCD

1.  During playback, press 

Step 

repeatedly to view playback


frame

     by frame. Each time the button is pressed, the picture advances

     one frame.

2.   Press 

/ll

 to return to normal playback.

Repeat Playback

    Press 

1/ALL

 during playback (or programmed playback) of the title

     (or track ) you want to repeat. Each time the button is pressed ,  the

     repeat mode will be  changed as follows :


n


 For DVD discs

      CHAPTER REPEAT ON:

           Repeat of the chapter being played

      TITLE REPEAT ON:

           Repeat of the title being played

      REPEAT  OFF

           Normal playback mode


n


 For VCD / CD discs

      REP-ONE:

           Repeat of the track being played

     REP-ALL:

           Repeat all tracks

      REPEAT OFF:

           Normal playback mode


Note : 

The function for VCD discs only available for PBC OFF mode.

Preparations

1.  When you complete all the connections, plug the AC power cord

     of the player.

2.  Press 

Standby

 to switch on the main power.

3.  Press 

Source

 to select the input source.

4.  Press 

Open/Close

 to open the disc tray, insert a disc into the tray,

     then press it again to close the  disc tray.

5.  Press 

Mute

 to shut off the sound. To restore the volume , press it

     again.

6.  Press 

Help

 to view the help informations.

Start or Pause Playback

n


Press 

/ll

 to start palyback.

n


   To pause playback, press 

/ll 

again.

      Note : 

 Some discs will start playing automatically, and others will

                  display  the menu on the TV screen. use the 

3

/

4

/

5

/

6

                  to select the track, or press the number keys (

0 ~ 9

) to go

                   to the desired track/chapter.

Stopping Playback


For DVD discs


n


  Press 

n

 once during playback.

1.   

 PRESS PLAY TO CONTINUE  

appears briefly on the TV screen.

2.   When you press  

Play/Pause

,  playback  starts  automatically

      from the point where you stopped.  

PLAY 

 appears briefly on

       the TV screen.


Note :

 Some discs may not resume playback.


n


  Press 

n

 twice during playback.

1.  

 MONITOR  

appears briefly on the TV screen and enter into

monitor mode.

2.   When you press 

Play/Pause

PRESS PLAY TO CONTINUE  

     appears briefly on the TV screen,press 

Play/Pause

 again,playback

starts from the point where you stopped.


For DVD+RW / DVD+R discs


n


  Press 

n

 once during playback.

1.   

 PRESS PLAY TO CONTINUE  

appears briefly on the TV screen.

2.   When you press  

Play/Pause

,  playback  starts  automatically

      from the point where you stopped.  

PLAY 

 appears briefly on

       the TV screen.


n


  Press 

n

 twice during playback, 

STOP 

appears briefly on the TV

screen and then TITLE menu return.


n


  Press 

n

 third time during playback, the recorder enter into monitor

mode.


For VCD / CD discs

n


  Press 

n

  once during playback. The unit stops completely.

Fast Playback

1.   Press  


or


  to do fast reverse or fast forward search. Each

      time the button is pressed, the playback speed changes as follows:


n


  For DVD discs

3

 Playback Features

Summary of Contents for GDVD303R

Page 1: ...1 D VD R R W R e c o r d e r RW D D GDVD303R Digital Versatile Disc Recorder with Remote Control User Guide ...

Page 2: ...o Output Setting 19 Angle Mark Setting 19 1 5 System Setup 20 Clock Setting 20 Rating Setting 20 Choose Rating 21 Set Password 21 Factory Defaults Setting 21 Version Setting 21 Recording Functions 2 1 Before Recording 22 2 2 Recording 22 Recording TV Programs 22 Timer Recording 23 Set the record program s first 23 Setting Record Time 23 Setting Frequency 23 Setting Input Source 23 Setting Channel ...

Page 3: ...ug or Adaptor or on the Distribution Board This symbol means that this unit is double insulated An earth connection is not required DANGER LASERSAFETY CAUTION USE OF CONTROLS OR ADJUSTMENTS OR PERFORMANCE OF PROCEDURES OTHER THAN SPECIFIED HEREIN MAY RESULT IN HAZARDOUS RADIATION EXPOSURE INVISIBLE LASER RADIATION WHEN OPEN AND INTERLOCK FAILED OR DEFEATED AVOID DIRECT EXPOSURE TO BEAM This unit e...

Page 4: ...room away from traffic 50dB Normal conservation quiet office light traffic 60dB Electric sewing machine 70dB Vacuum cleaner hair dryer noisy restaurant THE FOLLOWING NOISE CAN BE HARMFUL UNDER CONSTANT EXPOSURE 80dB Average city traffic alarm clock buzzer at 2 feet food mixer 90dB Motorcycle heavy goods vehicle petrol lawn mower 100dB Pneumatic drill chair saw garbage truck discotheque night club ...

Page 5: ... cause serious damage to the unit Do not attempt to disas Important Safety Instructions Precautions semble the unit n Do not put any foreign object on the disc tray n Keep away from water magnet n Keep the unit away from flower vases tubs sinks etc If liquids are spilled into the unit serious damage could occur n Never bring a magnet or magnetized object near the unit n Stacking n Place the unit i...

Page 6: ...nual that was included with this unit You should have the items listed in the section 2 Get acquainted with the recorder Refer to the sections of Function Overview in the manual It will let you get familiar with the parts and buttons on the main unit and remote control as you proceed throughout the manual 3 Make the necessary connections Refer to the section of Basic Connection in the manual It wi...

Page 7: ... OSD menu display n Full function remote control n Scart loop through DVD region code DVD recorders and discs are designed with region numbers which dictate the region printed on the rear panel If the region number does not match the region number in your DVD recorder you will not be able to play the disc If you try to play the DVD the message WRONG REGION NUMBER will appear on OSD This unit is se...

Page 8: ... 5 AUDIO IN L Audio input jack left channel 6 AUDIO IN R Audio input jack right channel 7 S VIDEO IN S video input jack 8 STANDBY ON To switch the unit to standby and power on mode 1 2 3 5 6 7 8 9 10 11 4 1 ANTENNA Connect TV aerial and RF loop through cable here 2 S VIDEO IN S video input jack 3 AUDIO IN Left and Right Audio input jacks 4 SCART OUT TO TV Scart output jack 5 S VIDEO OUT S video ou...

Page 9: ... Subtitle access various subtitle language in DVD 20 PR press to select upper lower TV program channel 21 Angle access various camera angles on DVD 22 Zoom press to enlarge the picture 23 Mute press to shut off the sound or to restore the sound 24 Return return back to the menu VCD only 25 Program program the tracks in your own order only VCD and CD 26 A B repeat a certain segment betweeen A and B...

Page 10: ... Connect scart cable to the scart out socket of the recorder Connect the other end to the Scart AV socket located on the TV 1 3 2 Note Scart cable supplied All other cables shown are not supplied These cables may be purchased from most hifi electrical stockists ...

Page 11: ...e following 1 a receiver with Dolby Surround Prologic 2 a recerver with two channel analogue stereo Connect your DVD recorder to additional devices using Video socket Configuration B C You can connect additioanl devises such as decorders camcorders etc to the S video Video and Audio in then you can see the picture from the additional device on your TV set At same time you can recorder the program ...

Page 12: ... connect the Video AV 2 of the DVD recorder to the Video output on the camcorder you must aslo connect the audio input L AUDIO R on the DVDrecorder to Audio output on the camcorder Connect your DVD recorder to VCR or a similar recording equipment You can use this unit as the source player or as the recording deck Connection for recording from other equipment You can connect additional devises such...

Page 13: ...n press the AV button on your TV until the Picture shown below is seen Select Language 1 Easy Setup screen appears on the TV screen press Enter to confirm Language is highlighted 2 Press5 6 repeatedly to select language then press Enter to confirm Country is highlighted Select Country 1 Select Country and press5 6 repeatedly to select country 2 Press Enter to confirm Set Clock is highlighted Setti...

Page 14: ...doing Auto Scan make sure your TV connections has been made properly n For Details on how to make TV connection to your DVD Re corder please refer to the Basic Connection 1 Select Auto Scan 2 Press Enter or4 a message screen appears Yes is highlighted Note If you want to cancel it press4to select No and then press Enter 3 Press Enter auto memory channel scanning screen appears and starts to memori...

Page 15: ...onfirm Note If it is not necessary select Cancel and then press Enter Channel Setup continued 1 3 Record Disc Setup The Record Disc Setting OSD will vary when a disc is not inserted a DVD R or a DVD RW disc Rec Disc Record Quality Auto Chapter Erase Format Disc Protect Disc Rename Disc Finalize Disc 1 Press Record Disc Rec Disc screen appears on the TV screen 2 Press Enter or4 Record Quality is hi...

Page 16: ...ct the item you want 3 Press Enter appears 4 Press 3to return to Auto Chapter Erase Format Disc Setting DVD RW You can erase all titles on the disc but the disc name and format will remain the same 1 Select Erase Format Disc then press Enter a message appears 2 Press3 to to select Yes Note If it is not necessary select No and then press Enter 3 Press Enter to start to erase then please wait until ...

Page 17: ...sc again once the disc has been finalized with this unit n Depending on the condition of the disc recording or the unit discs may not be played even if the discs are finalized Rename Disc Setting DVD RW DVD R You can enter up to 10 characters for a disc name 1 Select Rename Disc then press Enter New Disc Name screen appears 2 Press 3 4 5 6to select the letter or number then press Enter the charact...

Page 18: ...e Setting the wide screen TV to FULL mode is also necessary Notes n The screen size may differ depending on the DVD video discs n If you select Wide TV to get rid of the black bands on screen when wide screen disc is played back picture may be slightly distorted n In some discs even if Normal PS is selected the black bands may remain on the screen 3 Press Enter appears the TV type is set 4 Press 3...

Page 19: ...en press 5 6 to select Scart RGB S Video or YCbCr Scart RGB Select Scart RGB when you have connected the Scart Out of this recorder to TV via Scart cable This will provide a better viewing result S Video Select S Video when you have connected S Video Out jacks of this recorder to S Video In jacks of your TV Select S Video Only if your TV does not provide Progressive nor component jacks 3 Press Ent...

Page 20: ...en you select 5 level the unit will not play di scs with ratings of 6 7 8 Note DVD video discs may or may not respond to the parental lock se ttings Make sure this function works with your DVD video discs System Set Clock Rating Factory Defaults Version 1 Press System System screen appears on the TV screen 2 Press Enter or4 Set Clock is highlighted 3 Press 5 6 repeatedly to select the item Clock S...

Page 21: ...ct Version 2 Press Enter or4to enter 3 Press 3to return to Version Choose Rating 1 Select Choose Rating 2 Press Enter or4to select the sub menu then press 5 6 to select the parental lock level 3 Press Enter appears Note After inserting a parental disc and loading you should be requested to enter the password again to double confirm your playback Set Password 1 Select Set Password 2 Press Enter or4...

Page 22: ...ec Quality on the remote control and set Auto Scan 1 Press TV DVDR to receive the TV program MONITOR appears briefly on the TV screen indicating the DVD recorder is searching the input signal which you want to record 2 To select the channel do one of the following n Press PR or n Press the number button s and then press Enter Examples To select Channel 6 Press 0 and 6 To select Channel 12 Press 1 ...

Page 23: ...he start and end time screen appears 3 Press 5 6 or the number buttons on the remote control to set the start and end times and press3 4to move the cursor My Record List Record Show Record Show 5 5 6 6 4 Press 4to select DONE then press Enter the record time is set The Record Show screen returns Setting Frequency 1 Select Frequency 2 Press Enter the Record Show screen appears 3 Press 5 6 to selec ...

Page 24: ... RGB AV1 AV2 S Video1 S Video2 4 Press Enter or 4to select DONE then press Enter the recording input source is selected The Record Show screen returns Setting Channel 1 Select Channel 2 Press Enter the Channel screen appears 3 Press 5 6 to select your desired channel 4 Press Enter or 4to select DONE then press Enter the recording channel is selected The Record Show screen returns Setting Quality 1...

Page 25: ...o check and or change the disc after every timer re cording has been completed My Record List My Record List 2 2 Recording continued Timer Recording continued All the information needed by the DVD recorder for programing is contained in the video plus numbers This 9 digit video plus number is found in most TV listing magazines Pls follow the steps below 1 Press Timer V VCR Plus Record screen appea...

Page 26: ...c You may not watch TV program while closing CAUTION Almost all videos and DVD softwares on sale have a copyprote ction You cannot record them using this unit Recording from an External Source One Touch Recording OTR Use this function to make a one touch recording which means that the recording quality is not needed to set for record During the recording you can repeatedly press the Rec button on ...

Page 27: ...Select TITLE DELETE then press Enter a message appears 2 3 Editing 2 Press3 to to select Yes Note If it is not necessary select No and then press Enter 3 Press Enter then please wait until PLEASE WAIT disappears on the TV screen n The title menu with DELETED screen returns Title Rename DVD RW DVD R 1 Select TITLE RENAME then press Enter Rename screen appears 2 Press 3 4 5 6to select the letter or ...

Page 28: ...wer 3 Press Source to select the input source 4 Press Open Close to open the disc tray insert a disc into the tray then press it again to close the disc tray 5 Press Mute to shut off the sound To restore the volume press it again 6 Press Help to view the help informations Start or Pause Playback n Press ll to start palyback n To pause playback press ll again Note Some discs will start playing auto...

Page 29: ...on you want 2 Press A B again at the end portion you want The specific section will now repeat continuously 3 Press A B the third time to return to normal playback Notes n The A and B can be set only within the same chapter track n After performing repeat play be sure to press the Stop button Otherwise the disc will play continuously Using DVD Title menu Some DVD discs may contain two or more titl...

Page 30: ...reversed image picture 6 Change it to the mirror reversed image picture n If you press l l during the slide show it skips to the previous picture or next picture n To stop the slide show press n The thumbnail pictures appear This operation works only with discs on which multiple subtitle languages are recorded 1 Press Subtitle repeatedly during playback to select the different subtitle language 2 ...

Page 31: ...m 1 Press ll at the desired picture 2 Press Zoom ZOOM ON appears briefly on the TV screen 3 Press to select the desired picture size 4 To return to the original size press Zoom again ZOOM OFF appears briefly on the TV screen MP3 CD Playback 1 Load the disc with the label facing up on the disc tray n File list screen appears 2 Press 5 6 to select the folder or file and press Enter or press number b...

Page 32: ...ter checking your connections please try connecting your DVD system directly to your TV S Video input if your TV is equipped with this input The aspect ratio of the screen cannot be ch anged even though you set TV Type in the Video menu when you play a wide picture n The aspect rate is fixed on your DVD disc n If you connect the system with the S Video cable connect dire ctly to the TV Otherwise y...

Page 33: ...ular scratches are likely to occur which will cause noise If the disc is brought from a cold to a warm environment moisture may form on the disc Wipe this moisture off with a soft dry lint free cloth before using the disc Improper disc storage You can damage discs if you store them in the following places n Areas exposed to direct sunlight n Humid or dusty areas n Areas directly exposed to a heat ...

Page 34: ...o achieve double sided play sometime in the future for even longer duration play DVD R This means DVD Recordable These Discs can be recorded and finalized only once DVD RW This means DVD ReWritable These Discs can be recorded on repeatedly Subtitles These are the printed lines appearing at the bottom of the screen which translate or transcribe the dialogue They are recorded on DVD discs Time Digit...

Reviews: