IP G+
WEB CLIENT EL632/G+/48
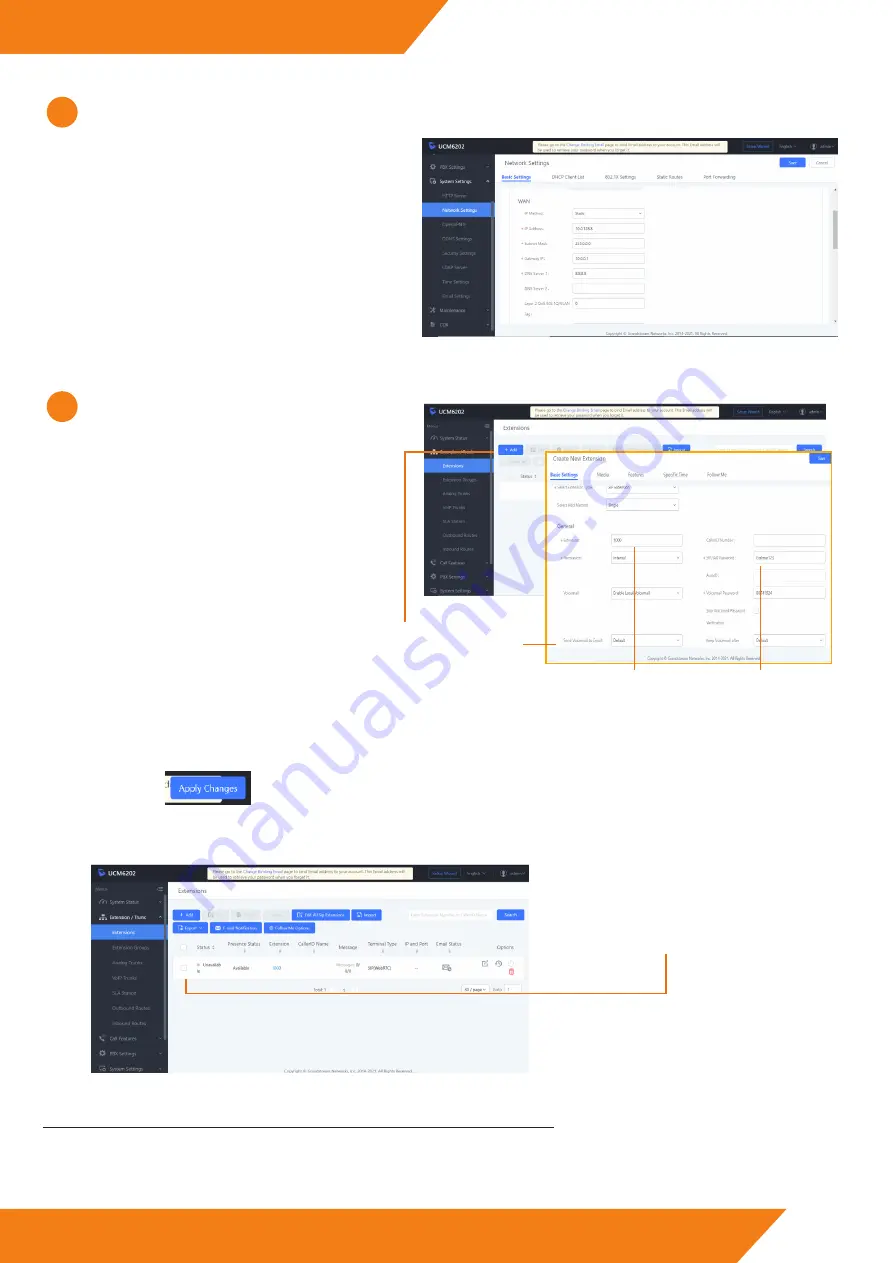
Having already configured the WAN network to work
in the same IP range as our system, the next step will be
to create an extension in the switchboard for our device.
For this, we deply the “Extension/Trunk” section and we
access the “Extensions” section.
In this screen will appear all the created extensions in
the switchboard.
The “
+Add
” option will allow us to create a new
extension for our device.
We will add the desired
extension
and a
password
.
To confirm the new extension created, we will press on “Save”.
NOTE: Remember the password, you will need it later.
3
When we have added the extension, it will be necessary to save the applied changes. On the top of the screen will appear
the icon . We will press on it and the new extension will have been saved.
Having saved the changes made, the screen will
show us that exists a created extension in the
switchboard, which we will use for our device,
but this one has not yet been registered.
8
www.golmar.es
Once we have accessed the switchboard web server, we
deploy the system settings pressing on “System Settings”
and we will access to the “Network Settings”.
In the WAN section, we will set an IP address which is
in the IP range of our system. We will also have to set the
subnet mask and the corresponding Gateway address.
2
IMPORTANT: Connect the PABX to our network through the WAN output of this one.


