


26
2000225005B
Diagram 10.4
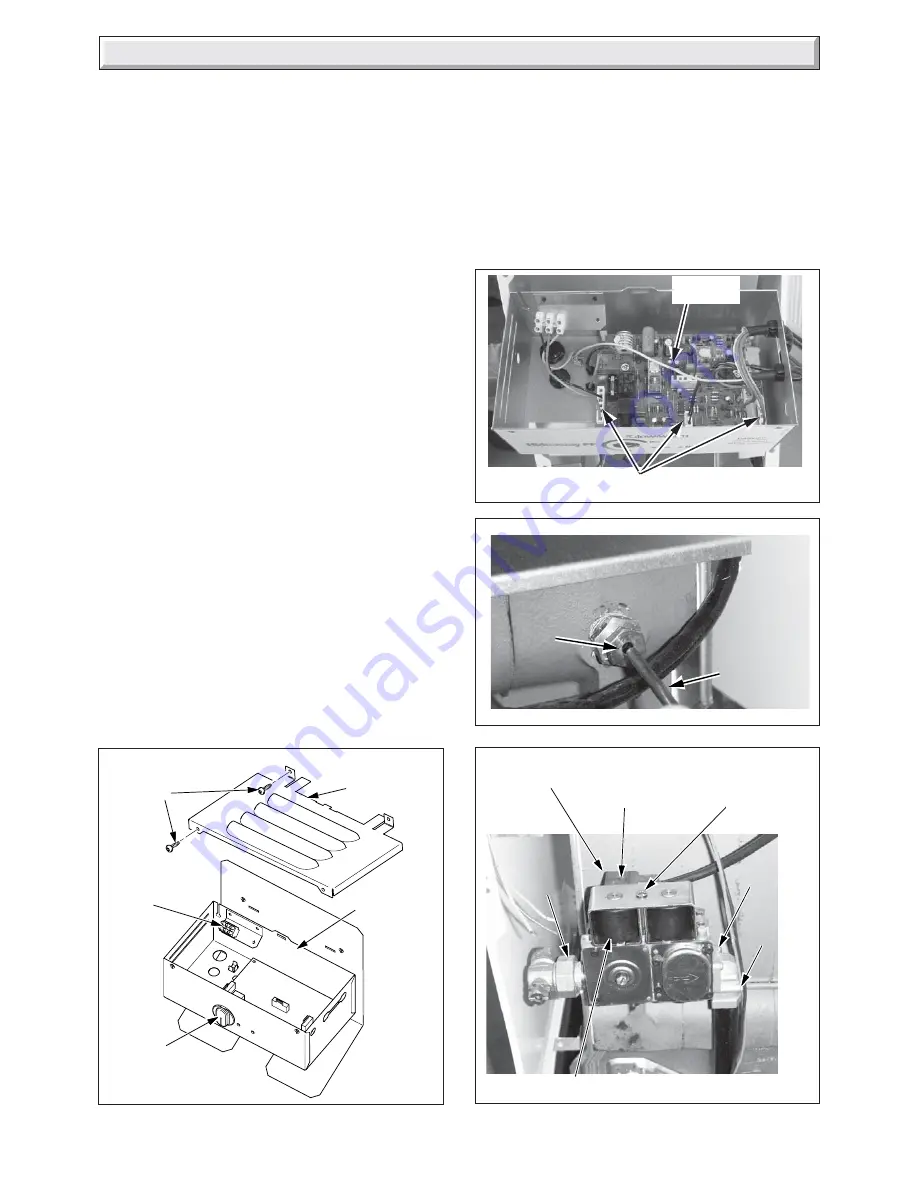
GAS
SERVICE
COCK
UNION
ELECTRICAL
PLUG
SHORT
SCREWS (2)
LONG
SCREWS
(2)
SOLENOID
SECURING
SCREW
SOLENOID ASSEMBLY
ELECTRICAL
PLUG SECURING
SCREW
10 Replacement of Parts
IMPORTANT NOTES
REMEMBER, When replacing a part on this appliance, use only
spare parts that you can be assured conform to the safety and
performance specification that we require. Do not use
reconditioned or copy parts that have not been clearly authorised
by Hepworth Heating Ltd.
Replacement of parts must only be carried out by a competent
person.
Before removing or replacing any parts, turn off the gas supply
at the gas service cock, see diagram 10.2 and isolate the
electrical supply to the appliance.
Unless stated otherwise, all parts are replaced in the reverse
order to removal.
After replacing any parts always test for gas soundness and if
necessary carry out functional check of controls.
10.1 Electrical Thermistor
Remove front panel to gain access, see section 6.8.
Remove control box cover by undoing the four securing screws
(two on control box, two on the heat shield) and lift off, see
diagram 10.1.
Remove thermistor lead from retaining clip, located on the
control box support bracket, see diagram 8.3.
Release strain relief grommet securing thermistor lead at the
side of control box.
Disconnect the thermistor electrical plug from the control board
(P.C.B) slightly bending back the retaining latch to allow
withdrawal, see diagram 10.2.
Remove the retaining wire and withdraw the electrical thermistor
from its phial, see diagram 10.3.
Draw the thermistor lead followed by the thermistor out though
the control box case.
Re-assembly note. When fitting the thermistor make sure it is
fully inserted into the phial, see diagram 10.3. Take care when
re-threading retaining wire so as not to damage thermistor.
10.2 Control Board (P.C.B)
Remove front panel to gain access, see section 6.8.
Remove control box lid by undoing the four securing screws
(two on control box, two on the heat shield) and lift off, see
diagram 10.1.
CONTROL
BOX
COVER
CONTROL
BOX
SECURING
SCREWS
TERMINAL
BLOCK
Diagram 10.1
9905
ELECTRICAL PLUGS
Diagram 10.2
Diagram 10.3
PHIAL
POCKET
THERMISTOR
BOILER
TEMPERATURE
CONTROL
Carefully pull the boiler temperature control knob away from the
P.C.B.
Disconnect the electrical plugs from the control board (PCB)
slightly bending back the retaining latches to allow withdrawal,
see diagram 10.2.
Disconnect the ignition lead.
Carefully pull the board away from its supports bending back
slightly the retaining latches.
When refitting refer to wiring diagram 9.4.
Take care when replacing the burner temperature control knob
by supporting the potentiometer on the P.C.B.
PCB