GJD D-TECT 3 IP GJD260 Manual Download Page 6

INSTALLATION AND CONFIGURATION

Detector configuration
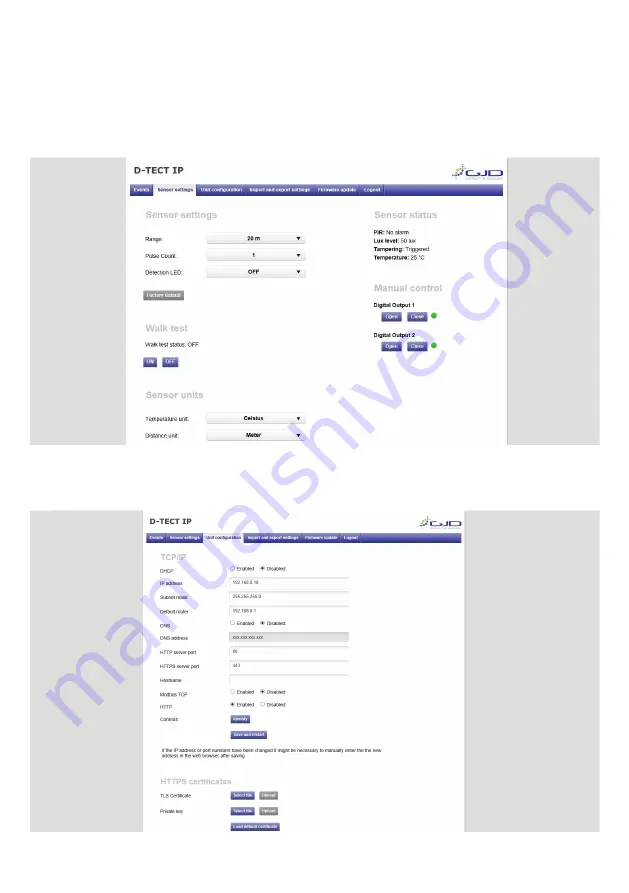
1. 

Open the sensor settings tab.

2. 

Pressing the Factory default button then the Save settings button will restore the default range,  pulse count and LED 

settings.

3. 

To change any of the detectors settings use the  drop down boxes to select the required setting changes are saved 

automatically.

4. 

To enable walk test mode press the Walk test ON button and to disable walk test mode press the Walk test OFF 

button.

Unit configuration

1. 

Open the unit configuration tab. 

2. 

Current settings are shown.

3. 

Enter desired settings and press the save button. Remember to reload the page with the new IP address if changed.

Summary of Contents for D-TECT 3 IP GJD260

Page 1: ...ed TOP D TECT 3 IP GJD260 IP Motion Detector PACKAGE CONTENTS 1 x D TECT 3 IP 1 x Drilling template for fixing holes 3 x 31 75mm wall plugs 3 x 31 75mm screws 2 x Spare sliding curtains 2 x Tamper fee...

Page 2: ...er of times for the required new setting 5 The indicator blinks twice and the changes are stored in the D TECT 3 IP s non volatile memory Example To change the LED setting from OFF to ON 1 Press the p...

Page 3: ...O 20 METRE SECTION 11 0 5 15 1 5m 2 deg 30 10 25 20 MASK THIS SECTION OFF FOR PET ALLEY APPLICATIONS UP TO 25m 0 5 10 15 20 25 30 0 2 4 6 8 10 12 14 16 18 20 22 24 26 28 30 m 0 2m 4m 6m 8m 10m 12m 2m...

Page 4: ...ely when you install or service it Exercise care not to bump the product against nearby objects or drop it inadvertently Caution Only use approved Power over Ethernet power supplies Never try to power...

Page 5: ...sed user interface All that is needed is a modern web browser to access and change settings The instructions for the user interface described below are valid for firmware 1 32 FACTORY DEFAULT SETTINGS...

Page 6: ...of the detectors settings use the drop down boxes to select the required setting changes are saved automatically 4 To enable walk test mode press the Walk test ON button and to disable walk test mode...

Page 7: ...backup purposes and to copy the settings to other units IP address and Login settings are not included in this file 1 Open the import and export settings tab 2 Export all current alarm settings and I...

Page 8: ...ng a setting file will overwrite all current settings FIRMWARE UPDATE The D Tect IP firmware can be updated to add new functions or resolve software issues 1 Open the Firmware update tab The current f...

Page 9: ...me for which the alarm conditions must be continuously fulfilled before the alarm is enabled Default value is 0 seconds maximum is 120 seconds Timeout Timeout specifies the time before the alarm is di...

Page 10: ...off when the alarm clears Output 2 This turns output 2 on when the detector is activated and turns it off when the alarm clears Partner list The products listed have a built in wizard in the D Tect I...

Reviews: