GJD D-TECT 3 IP GJD260 Manual Download Page 10

Create alarm actions

1. 

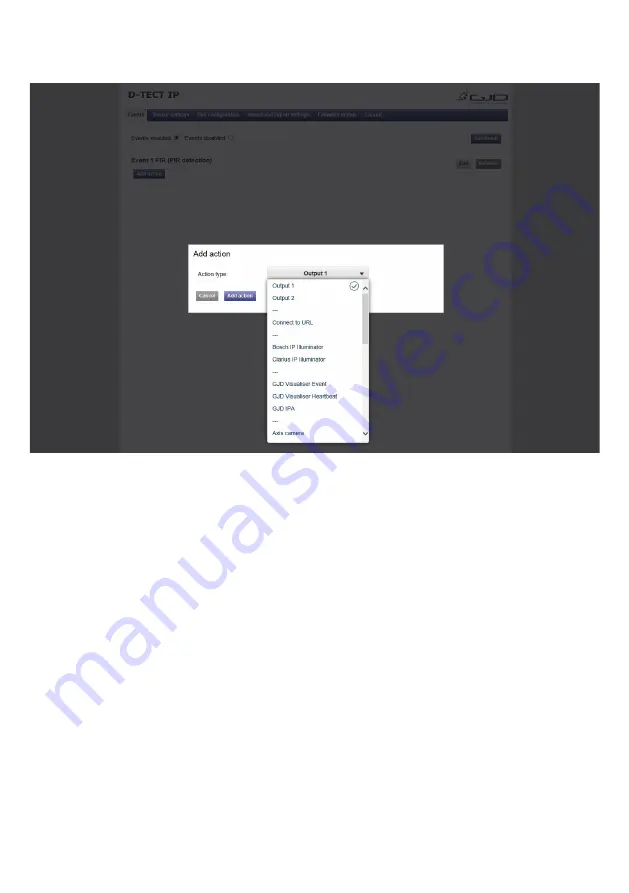
Press + Add action under the desired alarm. Input fields appear to the right.

2. 

Choose action type from the Event type dropdown menu.

Connect to URL


Connect to URL is used to create any type of network alarm. This allows one URL  


request at alarm enable and one URL request at alarm disable. 

Output 1


This turns output 1 on when the  detector is activated and turns it off when the alarm clears.  


Output 2


This turns output 2 on when the  detector is activated and turns it off when the alarm clears.           


Partner list 

The products listed have a built-in wizard in the D-Tect IP that creates the specific URL request  


needed for the application. This list is continuously expanding. Please refer to separate  


documents regarding integration of these products.

3. 

Fill in required data fields for the selected Event type.

4. 

Press the Add action button to save the action.

5. 

Press Test next to the action for an alarm to test the action.

6. 

Repeat step 1-5 for each alarm.

Summary of Contents for D-TECT 3 IP GJD260

Page 1: ...ed TOP D TECT 3 IP GJD260 IP Motion Detector PACKAGE CONTENTS 1 x D TECT 3 IP 1 x Drilling template for fixing holes 3 x 31 75mm wall plugs 3 x 31 75mm screws 2 x Spare sliding curtains 2 x Tamper fee...

Page 2: ...er of times for the required new setting 5 The indicator blinks twice and the changes are stored in the D TECT 3 IP s non volatile memory Example To change the LED setting from OFF to ON 1 Press the p...

Page 3: ...O 20 METRE SECTION 11 0 5 15 1 5m 2 deg 30 10 25 20 MASK THIS SECTION OFF FOR PET ALLEY APPLICATIONS UP TO 25m 0 5 10 15 20 25 30 0 2 4 6 8 10 12 14 16 18 20 22 24 26 28 30 m 0 2m 4m 6m 8m 10m 12m 2m...

Page 4: ...ely when you install or service it Exercise care not to bump the product against nearby objects or drop it inadvertently Caution Only use approved Power over Ethernet power supplies Never try to power...

Page 5: ...sed user interface All that is needed is a modern web browser to access and change settings The instructions for the user interface described below are valid for firmware 1 32 FACTORY DEFAULT SETTINGS...

Page 6: ...of the detectors settings use the drop down boxes to select the required setting changes are saved automatically 4 To enable walk test mode press the Walk test ON button and to disable walk test mode...

Page 7: ...backup purposes and to copy the settings to other units IP address and Login settings are not included in this file 1 Open the import and export settings tab 2 Export all current alarm settings and I...

Page 8: ...ng a setting file will overwrite all current settings FIRMWARE UPDATE The D Tect IP firmware can be updated to add new functions or resolve software issues 1 Open the Firmware update tab The current f...

Page 9: ...me for which the alarm conditions must be continuously fulfilled before the alarm is enabled Default value is 0 seconds maximum is 120 seconds Timeout Timeout specifies the time before the alarm is di...

Page 10: ...off when the alarm clears Output 2 This turns output 2 on when the detector is activated and turns it off when the alarm clears Partner list The products listed have a built in wizard in the D Tect I...

Reviews: