English
W466 / W566 NOTEBOOK SERIES USER’S MANUAL
1.8 Storage
►Hard Disk◄
W466 / W566 notebook computer is equipped with a built-in large
capacity 2.5 inch IDE hard disk drive where you store or install
your computer operating system as well as software programs. The
internal hard disk is normally assigned as Drive C after formatting.
If you wish to replace your hard disk, contact your local
vendor for information about your notebook computer’s
hardware setup.
You can increase the system’s storage capacity by replacing
the standard hard disk drive with a drive of a greater capacity.
Always turn off your notebook computer before removing the
hard drive. Failure to do so will damage the computer and the
hard disk. Avoid jarring or moving your computer while the
hard disk is still being accessed.
►Optical Disc Drive (ODD)◄
W466 / W566 notebook computer is equipped with one of the DVD
Super Multi
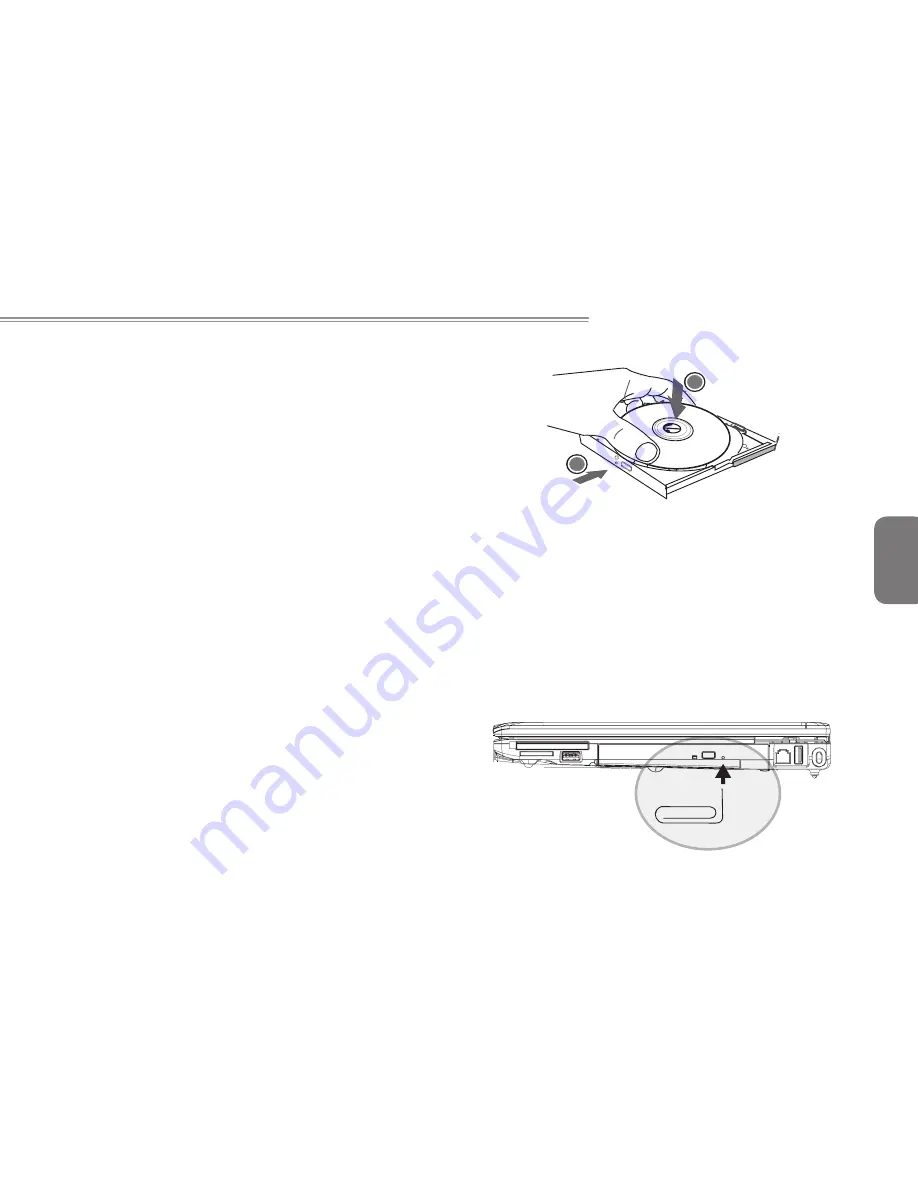
The optical drive is normally used for installing operating system
and software programs. To insert and remove a disc from the drive:
1. Press the button on the front of the drive to eject the disc tray
and gently pull out the tray.
2. Place the disc on the tray with label side up.
3. Place the disc on the spindle and press it down gently until the
disc clicks into place.
4. Slide the tray back until it clicks shut.
Warning: When the computer is reading from the optical drive, the
indicator light for ODD will flash on. Do not attempt to remove the
disc while the indicator light is still active.
Warning: Do not insert any foreign objects into the disc tray. Do not
force the tray to open or close. When the drive is not in use, keep
the tray closed in order to prevent dust or dirt from entering the drive.
If you experience difficulty when removing a disc, stick a paper clip (or
use a pin or a thin metal rod) into the emergency eject hole, the CD
disc tray should eject immediately. This procedure can also be used
to remove a CD from the drive when the notebook is powered off.
Please refer to figure below.
1
2


