


System Hardware Installation
- 32 -
3-8 Removing and Installing the Hard Disk Drive
Read the following guidelines before you begin to install the hard disk drive:
• Take note of the HDD tray orientation before sliding it out.
• The tray will not fit back into the bay if it is inserted incorrectly.
• Make sure that the hard disk drive is connected to the connector on the backplane.
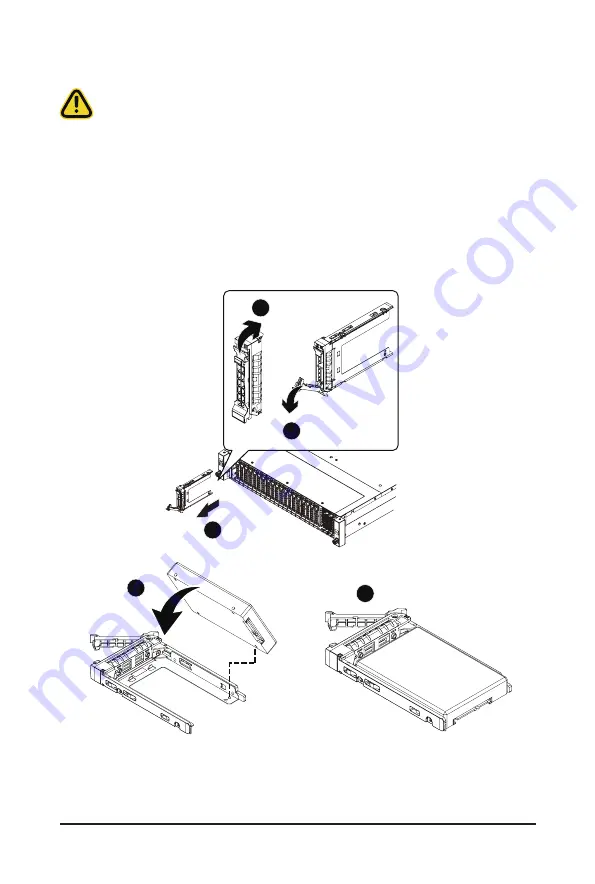
Follow these instructions to install a 2.5" hard disk drive:
1. Press the release button.
2. Extend the locking lever.
3. Pull the locking lever in the direction indicated to remove the HDD tray.
4. Align the hard disk drive with the positioning stub on the HDD tray.
5.
Secure the hard disk drive with five screws.
6. Reinsert the HDD tray into the slot and close the locking lever.
1
2
3
4
5
Summary of Contents for 20-Bay
Page 10: ... 10 This page intentionally left blank ...
Page 24: ... 18 System Appearance This page intentionally left blank ...
Page 35: ... 29 System Hardware Installation 2 3 2 3 2 2 7 4 5 5 5 4 4 6 6 7 7 ...
Page 46: ...System Hardware Installation 40 CNV3022 NMVe Card 12 15 Cable NMVe Card 16 17 Cable CNV3134 ...
Page 47: ... 41 System Hardware Installation CNVP143 NMVe Card 18 19 Cable NVMe Card Power Cable ...
Page 50: ...System Hardware Installation 44 Onboard SATA Cable ...
Page 54: ...Motherboard Components 48 This page left intentionally blankThis ...
Page 71: ... 65 BIOS Setup 5 2 8 PCI Subsystem Settings ...
Page 76: ...BIOS Setup 70 5 2 11 SATA Configuration ...
Page 81: ... 75 BIOS Setup 5 2 16 Intel R I350 Gigabit Network Connection ...


