GF-8 Xten Crane System Instruction Manual
Page: 35
Rigging system
The rigging system must be mounted as of Standard Versions 2 onwards i.e. versions with
more than 1 x 150cm section to the front. For each extension section there is a matching
pair of rigging rods. The rods for the 150cm sections are all identical. In principle, mounting
the rigging requires connecting the respective rods starting at the turnbuckles on the
rigging harness and finishing at the connection on the last arm section or in some cases
the second last section.
100cm / 3’ 3” arm section
127cm / 4ft arm section
150cm / 5ft arm section
160cm / 5’ 3” arm section
=
75 cm / 2’ 6” rigging rod
115cm / 3’ 9” rigging rod
142cm / 4’ 7” rigging rod
142cm / 4’ 7” and 115cm / 3’ 9” rigging rod
The following example describes the assembly procedure for Versions 17 & 18
1. Connect 2 x 142cm / 4’ 7” rigging rods to the turnbuckles on the front side of the
standard rigging harness. Ensure that the locking pins are inserted fully.
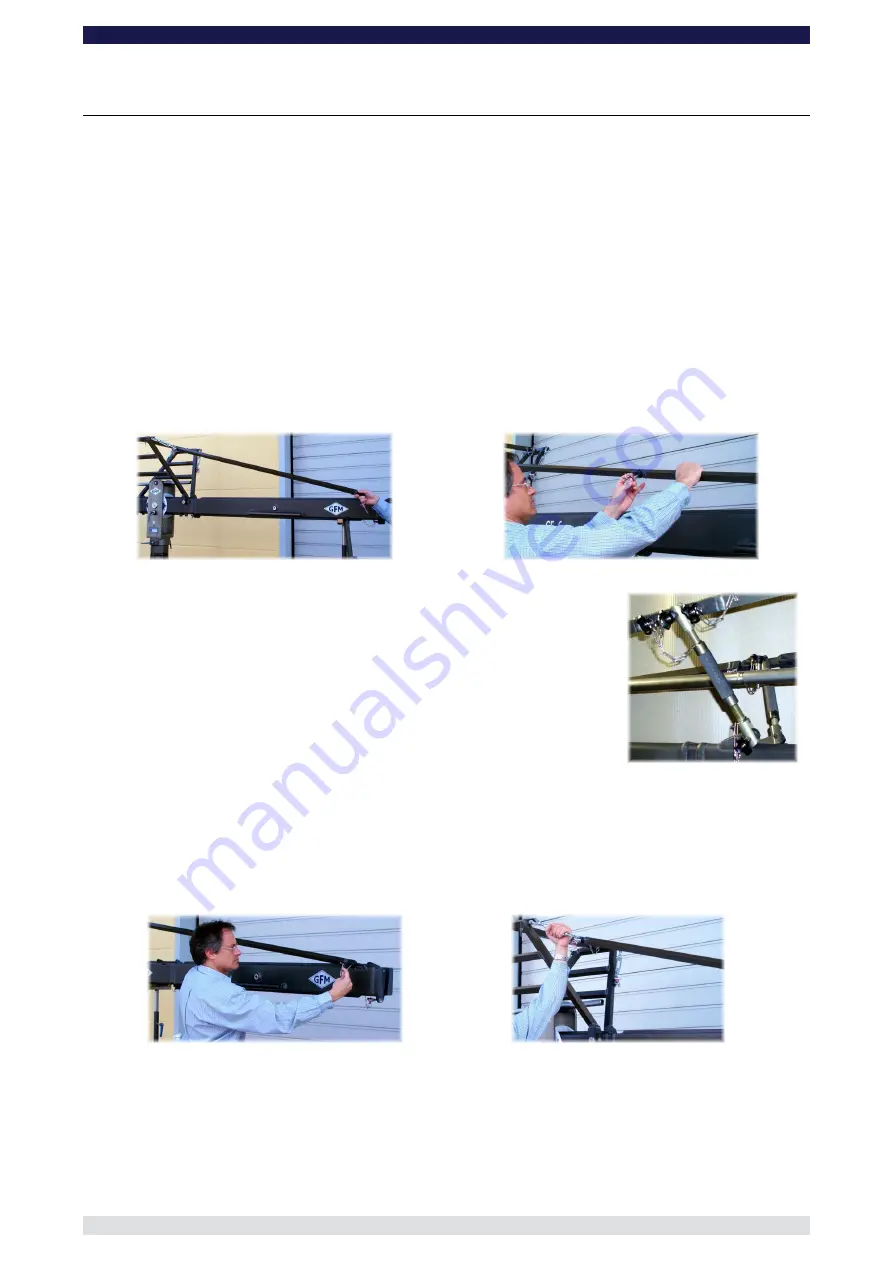
Connecting 2 x 142cm rigging rods to the turnbuckles
Connecting the rods together
2. Connect another 2 x 142cm / 4’ 7” rigging rods to the first 2
rigging rods. Ensure that the locking pins are inserted fully.
3. Connect a Rigging Rod Connector to each of the second
Rigging Rods. In turn connect the 2 Adjustable Rigging Rod
Supports to the Rigging Connections on the second 150cm
/ 5ft arm section and then to the Rigging Rod Connectors
ensuring that the locking pins are inserted fully.
Note
: This positioning applies to versions 7, 8 and
versions 15 to 18.
4. Connect 2 x 142cm / 4’ 7” rigging rods to the Rigging Rod Connectors and in turn
connect another 2 x 142cm / 4’ 7” rigging rods to the 3rd Rigging Rod. Ensure that the
locking pins are inserted fully.
5. Connect 2 x 115cm / 3’ 9” rigging rods to the last 142cm / 4’ 7” rigging rods and in
turn to the Rigging Rod Connections on the 127cm / 4ft arm section. Ensure that the
locking pins are inserted fully.
Connect the rigging rod to the end section and secure
with a locking pin.
Tensioning the turnbuckle
6. Hand tighten the turnbuckles until the rigging rods are taut and secure with the locking
nuts. The rigging should provide the support needed to keep the arm straight. If the
arm is hanging downwards then the rigging is too loose. If the arm is bent upwards
then the rigging is too tight.
Before operation, all locking pins, locking screws etc should be inspected to ensure
that all assembly sections are securely fastened.


