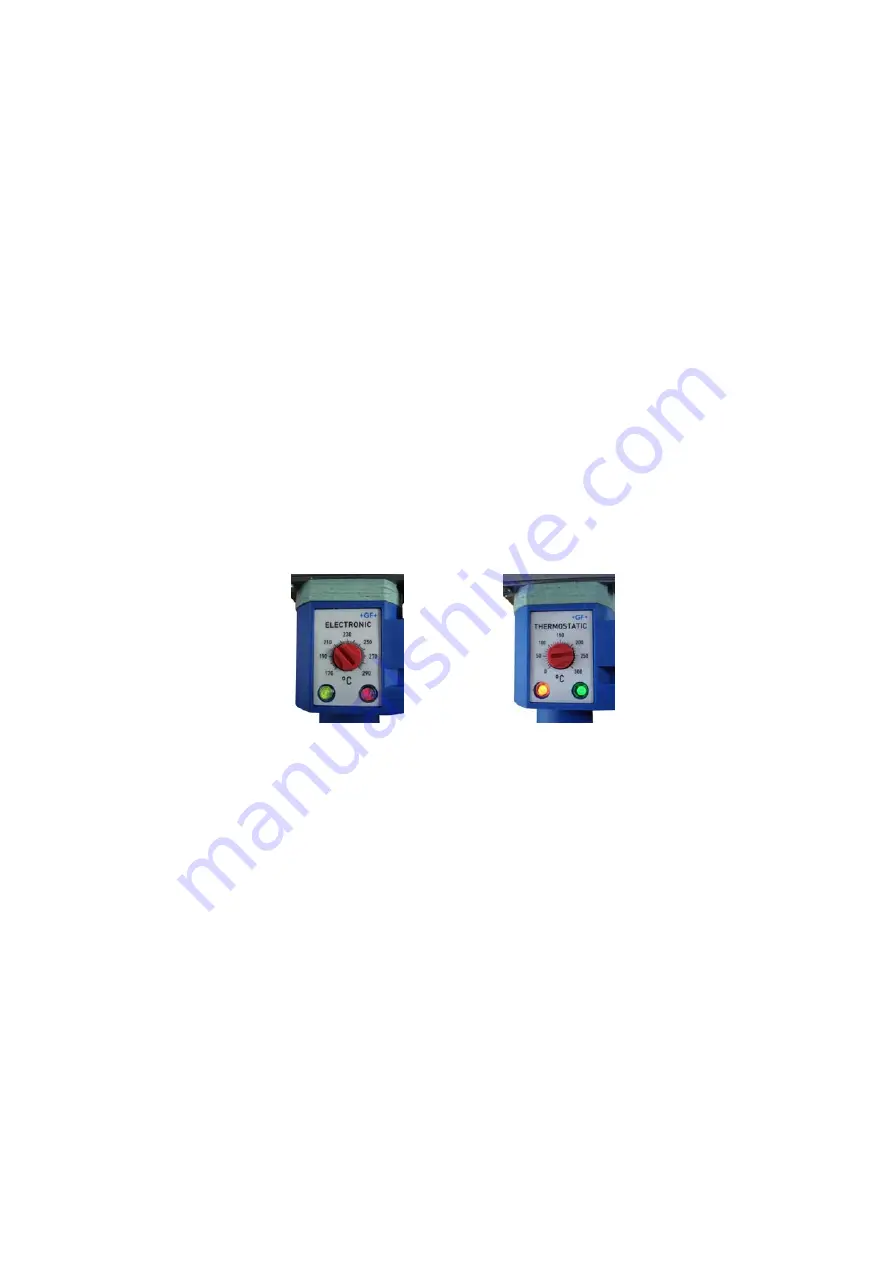
The machine is now ready to use.
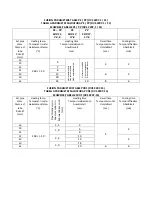
Insert the pipe and the fitting axially
along the full length of the bushings
and keep them in this position for
the time indicated in the following
table.
Upon completion of the heating
time, remove pipe and fitting from
the element/bushings. Immediately
slide the pipe into the fitting, in
accordance with the insertion time
(dwell) as specified in the table
The weld is fully completed once
the welded areas are completely
cooled down (approx. one hour).
rossa inizierà a lampeggiare. Nella
versione termostatica, una volta
raggiunta la temperatura impostata,
la spia verde si spegnerà. Per avere
una distribuzione uniforme della
temperatura nella piastra è
consigliabile attendere almeno 10
minuti dal raggiungimento della
temperatura.
Si può ora procedere alla saldatura
vera e propria introducendo
assialmente il tubo e il raccordo
sino alla battuta delle bussole. E’
necessario rimanere in questa
posizione per il tempo indicato nella
tabella
seguente
.
Trascorso il tempo di riscaldamento
sfilare tubo e raccordo dalle bussole
e, senza farli ruotare, introdurli
immediatamente l’uno all’interno
dell’altro osservando i tempi esposti
in tabella.
Sconnettere quindi l'apparecchio ed
attendere il necessario tempo di
raffreddamento.
Einstellknopf (260 °C für PE, PP
und PVDF) am Heizelement
einstellen, die grüne und rote LED
leuchtet konstant während des
Aufheizens, bei Erreichen der
Solltemperatur, blinkt die rote LED.
Wir empfehlen, nach Erreichen der
Schweiss- Solltemperatur bis zur
gleichmässigen
Temperaturverteilung, mit dem
ersten Schweissvorgang ca. 10
Minuten zu warten.
Das Gerät ist nun einsatzbereit.
Nun das Rohr und den Fitting axial
komplett in die Buchse bzw. auf den
Stutzen schieben. Diese Position
entsprechend der Tabellenwerte
halten. Nach Ablauf der
Anwärmzeit, Rohr und Fitting von
den Heizelementen abziehen und
gleichförmig ineinander schieben,
beachten Sie dazu die
Tabellenwerte (Umstellzeit).
Die Verbindung vollständig
abkühlen lassen (1 Stunde).

