10
10
2.2.2.2 Ver. 2.3.1 e-Bus Driver (Recommended)
Install the GEViCAM SDK
ver. 2.3.1.
If you have the ver. 2.2.0 or older one installed, uninstall the
driver at first and make sure iPort file of “Pleora Technologies”
in the Program file is empty.
The installation creates two application icons. One is Coyote
and another is Ethernet Bus Driver Tool. To allow e-Bus Driver
Installation Tool to see all NICs, please make sure all the NICs
have their original Window driver installed.
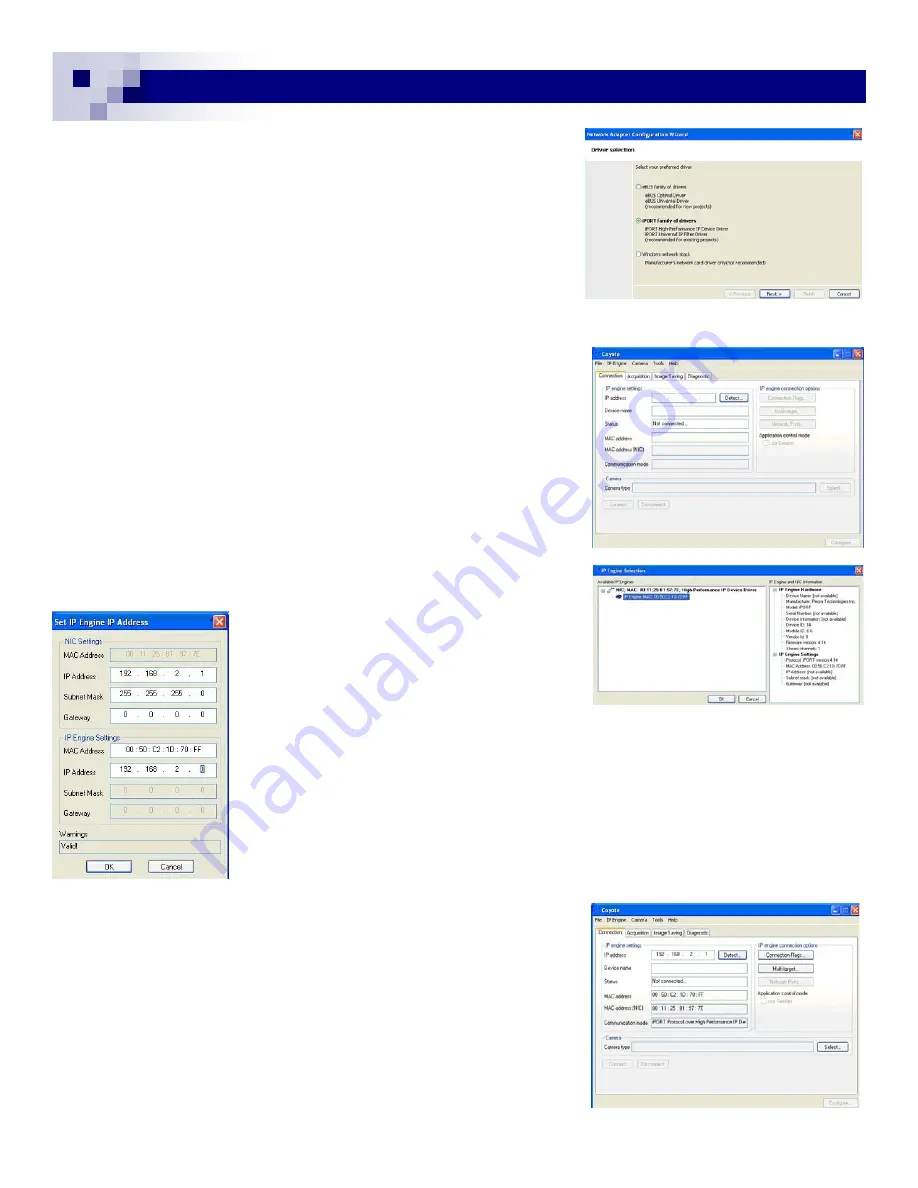
Follow the Ethernet Bus Installation Tool instruction and select the best driver for your system. The
High performance driver is the best choice for Intel NICs. The good alternative is the e-Bus Driver with
“optimal” for Intel NICs and with “universal driver” for other NICs.
(Fig. 7)
Each time you change the driver, you are required to reboot the
computer.
Also when you change the non-Window stack
driver, you have to install Window stack (original driver) at
first, then change to the e-Bus or High-performance Driver
through the Windows stack
.
The driver installation method described in 2.2.2.1 can be also
applied for the High Performance Driver of ver. 2.3.1. By doing
so, you do not have to reboot your computer.
2.2.2.3 Open Coyote Application
Connect the camera and PC with an Ethernet cable (CAT-5e or
CAT-6) and power up the camera. LEDs of RJ-45 connector will
be steadily ON. If not, make sure an Ethernet
cable is connected to the PC. Open the Coyote
Application. Coyote window appears. (Fig. 8)
Press “Detect” button. It may take for a while (5
to 10 seconds) to show up IP address. (Fig. 9)
Click OK.
Make sure there is
no Firewall
protection to this application. In order to check, go to
“Control Panel“ and find “Windows Firewall” icon and add the exception for Coyote
application.
If it warns “subnet do not match”, change the IP address of your camera to match the
network address (Left two major blocks must match. Number must be from 1 to 255).
In this (Fig. 10) picture, it indicates address “0” is used and you need to change to
any number except for 0. Type 1 for the example.
Next is to select the camera type and select “standard camera link camera”. GigE
cameras are not camera link but the internal camera structure is
using Camera Link interface signaling. (Fig. 11)
Once all connections and detections are done, you are ready to
see the image by opening the “Acquisition” tab and click “Start”.
For detailed camera configuration, see section 4.4.
For users who do not have GigE NIC cards but have a normal
Fast Ethernet NIC, the same filter driver can be used with limited
bandwidth. Regardless, the Coyote Filter Driver must be used
(cannot use TCP-IP driver).
GEViCAM Inc
Fig. 7
Fig. 8
Fig. 9
Fig. 10
Fig. 11
Summary of Contents for GP-151400
Page 39: ...39 39 GEViCAM Inc MEMO ...


