Batteries
Zone20 H
| 21
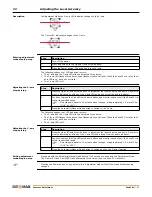
Changing the Li-Ion
batteries step-by-step
With the rechargeable Li-Ion battery pack the battery indicator on the Zone20 H LCD display shows when
the battery pack is low and needs to be charged.
The charge indicator LED on the Li-Ion battery pack indicates when the pack is being charged (flashing
slowly) or fully charged (on, not flashing).
Changing the alkaline
batteries step-by-step
With alkaline batteries the battery indicator on the Zone20 H LCD display flashes when the batteries are
low and need to be replaced. If no battery icon is shown, the batteries are okay.
Step
Description
The batteries are inserted in the front of the laser.
The rechargeable battery pack can be recharged without being removed from the laser. Refer
to " Charging the Li-Ion battery pack step-by-step" for further information.
1.
Slide the locking mechanism on the battery compartment to the right and open the cover of
the battery compartment.
2.
To remove the batteries:
Remove the batteries from the battery compartment.
To insert the batteries:
Insert the batteries into the battery compartment.
3.
Close the cover of the battery compartment and slide the locking mechanism to the left until
it locks into position.
011257_001
1
2
3
Step
Description
The batteries are inserted in the front of the laser.
1.
Slide the locking mechanism on the battery compartment to the right and open the cover of
the battery compartment.
2.
To remove the batteries:
Remove the batteries from the battery compartment.
To insert the batteries:
Insert the batteries into the battery compartment, ensuring that the contacts are facing in the
right direction.
The correct polarity is displayed on the battery holder.
3.
Close the cover of the battery compartment and slide the locking mechanism to the left until
it locks into position.
011258_001
1
2
3
Summary of Contents for ZONE20 H
Page 1: ...GeoMax Zone20 H User Manual Version 1 0 English ...
Page 29: ......


