63
APPENDIX J. WATERPROOF LC-2
J.1 Initial Deployment
1)
Remove the brass Swagelok nut from the Swagelok bulkhead using a 9/16” wrench. A
second 9/16” wrench should be used on the bulkhead to prevent it from rotating while
loosening or tightening the Swagelok nut. (Note: The white plastic dowel can be placed
inside the logger for future use if the cable is removed and the logger needs to be stored. This
will prevent water damage.)
2)
Remove the screws from the top of the unit and carefully pull off the cover using the handle
provided.
3)
Make a mark on the cable 15 inches from the bare leads.
4)
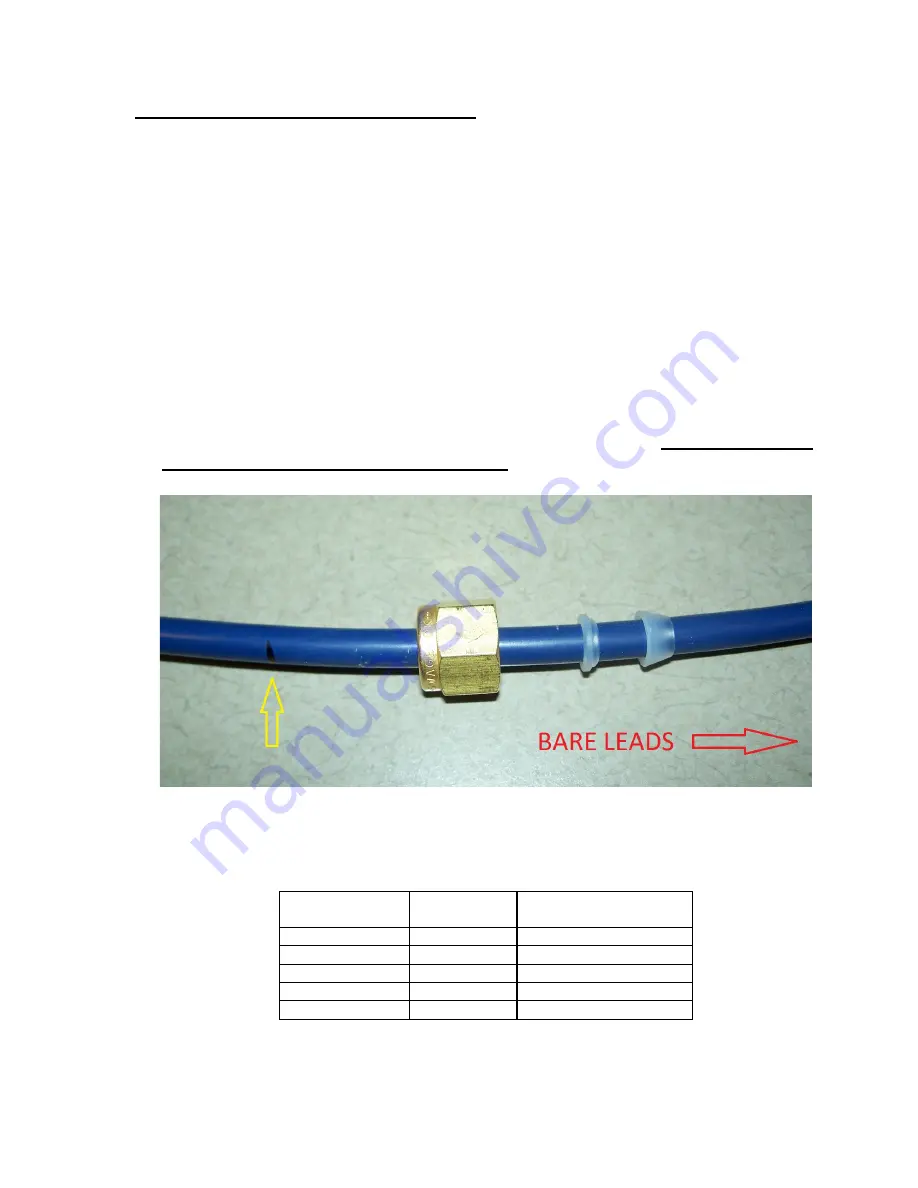
Slide the Swagelok nut and the two-part ferrule onto the cable as shown in Figure 28. It is
important to note the positon of each part to ensure a watertight seal.
Failure to do so will
result in water entry and datalogger damage.
Figure 28 - Swagelok and Ferule Orientation
Feed bare leads of instrument cable through the Swagelok bulkhead in the cover. Wire the
cable’s conductors into the terminal block per Table 19.
Terminal block
Position
Cable Wire
Color
Description
VW+
RED
Vibrating Wire +
VW-
BLACK
Vibrating Wire -
TH+
WHITE
Ther
TH-
GREEN
Thermistor -
S
BARE WIRE
Analog Ground (shields)
Table 19 - Transducer Cable Connections


