Geo Solo II CT User Manual Download Page 6

Solo II CT: Consumption

6

Configuring your display

Before you start using your Solo II

 we need to 

take you through a few simple set-up steps. 

The Solo II has two sets of configuration – 

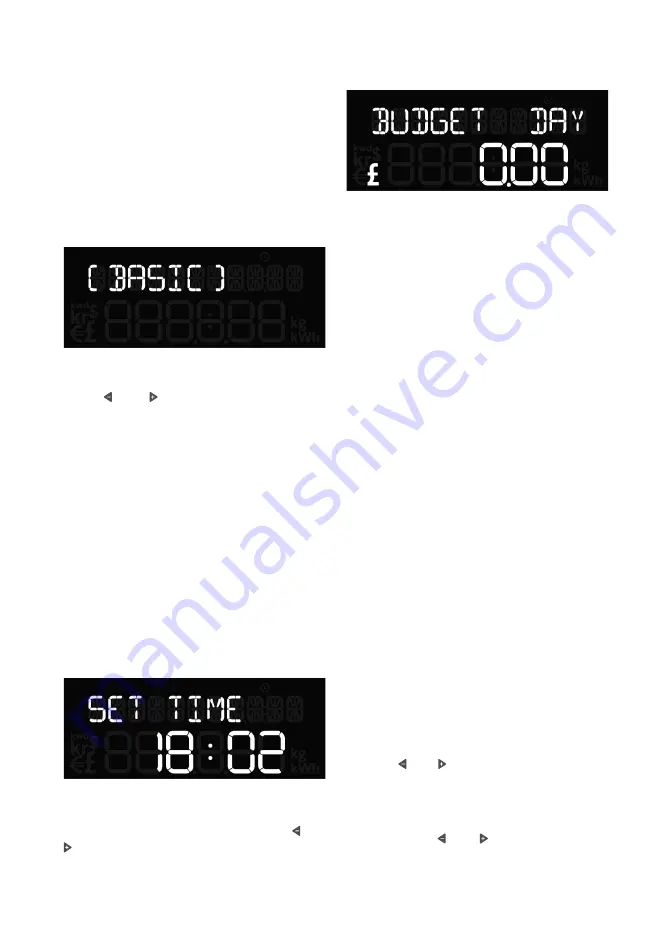
[BASIC]  configuration  items  that  you  may 

wish  to  change  often,  and  [ADVANCED] 

configuration  items  that  you  may  only  set 

up once or alter occasionally. 

Basic configuration

Press and hold the centre button for three 

seconds to enter configuration mode then 

press 

 and 

  to  choose  [BASIC]  mode 

and  press  the  centre  button  to  select 


[BASIC] settings. 
You will be asked to set the following:

• 

[SET TIME]

• 

[SET YEAR]

• 

[SET MONTH]

• 

[SET DAY]

• 

[BUDGET]

• 

[TARIFF 1]

• 

[TARIFF 2]

• 

[TARIFF 3]

• 

[STANDING CHARGE]

• 

[SET-POINT]

Time and date

If you’ve already set the time and date then 

press the centre button to confirm all. If you 

need to set the time and date then use

   and 


to  adjust  the  time  and  date  accordingly. 

Press the centre button to confirm.

Budget

You  can  set  yourself  a  daily,  weekly  or 

monthly  personal  budget  which  the 

display will use to help you manage your 

electricity.  The  display  can  then  tell  you 

whether you’re on target to be within your 

budget,  and  how  you’ve  compared  over 

the past few days, weeks or months. 
You  can  enter  your  budget  as  a  daily, 

weekly  or  monthly  figure.  Whichever 

you  enter  the  Solo  II  will  automatically 

calculate  for  the  other  two.  i.e.  if  you 

enter a daily budget the Solo II will know 

what  that  means  for  the  week  and  the 

month and so on.
You can get an idea of what to set as your 

budget in one of the following ways:
1.  If  you  pay  monthly  by  direct 

debit,  enter  that  figure  into  your 


monthly budget

2.  If  you  pay  quarterly  by  direct  debit, 

divide  that  by  three  and  enter  that 

into  monthly  budget  (or  twelve  and 

into the weekly budget etc.)

3.  Look  at  your  recent  bills  (and  the 

period  they  cover)  and  work  out  an 

average  of  how  much  you’ve  been 

paying  each  month  then  enter  that 

into the monthly budget

If  you  have  a  standing  charge  remember 

to include this in your budget.
Use the 

 and 

 buttons to select whether 

you want a daily, weekly or monthly budget, 

then press the centre button to confirm.
Next adjust the value of budget you would 

like  using  the 

 and 

  buttons  and  press 

the centre button to confirm. 

Summary of Contents for Solo II CT

Page 1: ...Solo II CT Consumption 1 Solo II CT Consumption USER MANUAL...

Page 2: ...d preferences Currency Temperature units Calibration Sleep mode Week start Internet bridge 10 Display overview 11 Reading your display 12 Icons Speedometer Upper numbers Lower numbers Budget bar and p...

Page 3: ...he other If you do you will lose the data you have been collecting from whichever mode you had previously set up If you choose to switch modes the display will reset to day one SAFETY INFORMATION Keep...

Page 4: ...ion 4 What s in the box Power supply 2 supplied with optional web pack Transmitter batteries included CT sensor Ethernet cable with optional web pack Internet bridge with optional web pack Solo II dis...

Page 5: ...ase pack one mains sensor 3 At your electricity meter clip the sensor around the mains live cable Your mains live cable is usually identified by the colour brown red or the letter L You should hear a...

Page 6: ...ou manage your electricity The display can then tell you whether you re on target to be within your budget and how you ve compared over the past few days weeks or months You can enter your budget as a...

Page 7: ...then press the centre button to confirm If you don t have a second tariff then leave TARIFF 2 cost as zero If you do have a second tariff for example cheaper electricity overnight then enter the cost...

Page 8: ...tricity flows You can read more about this under the Electricity meter section below You will be asked to set the following CONSUMPTION or MICRO GEN CURRENCY TEMPERATURE UNITS CALIBRATION DISPLAY OFF...

Page 9: ...eadings to get your Solo II consumption e g 20 150 1 500 18 600 6 Compare the two readings and work out the calibration or correction factor as follows meter consumption Solo II consumption calibratio...

Page 10: ...d at the same time for a few seconds to enter pairing mode the display will show PAIRING MODE for a second then show MAIN SENSOR Press three times to get to BRIDGE If the unit is paired it will show C...

Page 11: ...ength Rewards Speedometer Text Currencies Primary temp Left button Lower digits Heatwave and snowflake Secondary temp Right button Centre button LED indicator Message Upper digits Energy Carbon cloud...

Page 12: ...to tell you which of your tariffs is currently active and are a handy reminder for when your electricity is costing you the least One tariff only one money bag will light up Two tariffs e g day and ni...

Page 13: ...over the time period you have asked it to show You can view this in cost currency or carbon Budget bar and prediction If you have set yourself a budget then the display shows if you are predicted to b...

Page 14: ...the display will show the heatwave icon If the temperature is lower the display will show the snowflake icon You can purchase an additional sensor that you can pair to the second slot on the right Tem...

Page 15: ...relate to Today Energy stopwatch The energy stopwatch mode is entered by pressing the button on any of the consumption screens The energy stopwatch allows you to measure the energy consumption of a t...

Page 16: ...slide the cover off Step 2 Remove the battery tab from the temperature sensor Step 3 Press the pairing button on the temperature sensor Pairing The transmitter display and bridge are supplied pre pai...

Page 17: ...should now read CONN followed by a cloud symbol on the top left hand corner Temperature sensor 1 available separately For when you want two additional temperature sensors The display will show T1 SEN...

Page 18: ...energy use in lots of different ways so you can choose the one that suits you best View your entire consumption history the display holds up to one month of information but your website keeps a comple...

Page 19: ...d corner European plug socket UK plug socket Smart Plugs available separately help you track and control appliances Set up through energynote our online energy management service you can schedule Smar...

Page 20: ...ront for 10 seconds until the button colour changes to amber It will pair with the system after a few seconds Energynote will confirm a successful pairing You can now label the Smart Plug choosing fro...

Page 21: ...l the paired sensors will disconnect Q Can I export the data from my Solo II into Excel A Yes First upload your data from your display onto energynote You can then export it as a csv file into Excel F...

Page 22: ...G MODE for a second and then show MAIN SENSOR Press twice to show BRIDGE If the unit is paired it will show CONN and the signal strength will be shown using the signal strength icon at the top left of...

Page 23: ...ent geo retains the right to make changes to this document including any specifications contained herein at any time without notice Technical information Legal information No part of this document may...

Page 24: ...Solo II CT Consumption 24...

Reviews: