background image


Page: 6 of 16


Copyright © 2013 GenTent Safety Canopies, LLC – All Rights Reserved 

V5 – July, 2013 

Installation Overview 


The GenTent installs in three easy steps***: 


Clamp it:

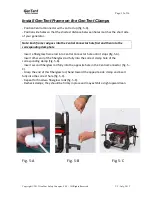
 Install 4 clamps and set the telescoping rod length.  


Frame it:

 Install frame rod to the center connector, then into the correct 

hole in the telescoping rod and repeat. 


Cover it:

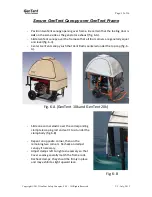
 Slide the GenTent canopy over the frame and secure by sliding the 

elastic straps over and behind the clamp telescoping rod. 


Once the GenTent is installed, it can be left in place during generator 

storage or easily removed and stored separately.  Should you wish to store 

the generator with the GenTent attached, we recommend releasing the 

elastic straps in order to keep them fresh and ready. 


***Note:  In some cases adaptation of the portable generator frame is required to 

create a proper mounting point for the GenTent clamps.  Should your kit include a frame 

extender or frame adapter package (GTX, GTU, GTR, GTH), please follow the instructions 

for installation of the frame extender(s) or frame adapter(s)  prior to installing the 

GenTent. Frame adaptation is generally required when: 

-


A muffler heat shield or other panel is connected to a frame member that 

otherwise blocks the GenTent clamp from attaching directly to the proper 

location. 

-


The portable generator uses a square tubular frame that must be adapted to the 

round openings of the GenTent clamps. 

-


The portable generator is a very small frame and requires length and width 

extension. 

-


In special cases where the frame does not provide 4 cornered mounting points 

such as: 

o


Ridgid RD series generators (except certain 5700W models) which do not 

have vertical frame members at the front of the generator 

o


Honda EU6500is generator which do not have vertical frame members at 

the rear of the generator 

o


Generac GP15000/GP17500 where the fixed handles block the canopy  


Summary of Contents for StormBracer

Page 1: ...Manual Free Installation Tip Videos www GenTent Com Installation THANK YOU Congratulations on your purchase of the GenTent the first ever wet weather safety canopy specifically engineered for portabl...

Page 2: ...ent Accessories and Spare Parts Catalog 16 We are happy to double check your installation at no cost and offer any additional adjustment advice or tips Simply email your pics to support gentent com in...

Page 3: ...clamp base Tightening the knob without using the washer VOIDS the WARRANTY as it risks breakage CAUTION Over tightening clamps should be avoided If you notice the mouth of the clamp pulling aware fro...

Page 4: ...the GenTent that have not been specified by the manufacturer GenTent products or components returned without an RMA and proof of purchase are not covered see How to Get Service Also consequential and...

Page 5: ...lescoping rod set pins 8 GenTent clamp rubber pads for 1 and 1 5 round tubular frames If you purchased a GenTent 20K product code begins with GT20K 1 Product and Safety Manual 1 GenTent 20k Canopy 1 S...

Page 6: ...nting point for the GenTent clamps Should your kit include a frame extender or frame adapter package GTX GTU GTR GTH please follow the instructions for installation of the frame extender s or frame ad...

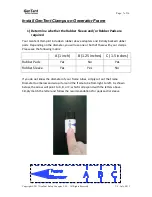
Page 7: ...on the diameter you will use one or both of these with your clamps Please see the following matrix A 1 inch B 1 25 inches C 1 5 inches Rubber Pads Yes No Yes Rubber Sleeve Yes Yes No If you do not kn...

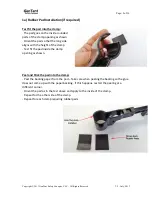
Page 8: ...de aligns with the height of the clamp Test fit the pad inside the clamp opening as shown Peel and Stick the pad into the clamp Peel the backing paper from the pad Take care when peeling the backing s...

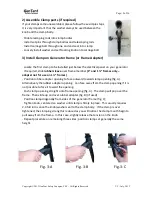
Page 9: ...frames only adapter not for use on 1 frames Position rubber adapter opening to face outward toward clamp opening fig A Alternatively the rubber adapter opening can face away from the clamp opening if...

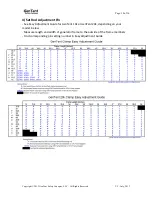
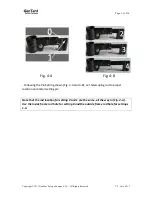
Page 10: ...rved V5 July 2013 4 Set Rod Adjustment Pin See Easy Adjustment Guide for GenTent 10k or GenTent 20k depending on your model below Measure length and width of generator frame to the outside of the fram...

Page 11: ...A Fig 4 B Following the Pin Setting shown Fig 4 A and 4 B set telescoping rod to proper location and install setting pin Note that the rod location for setting 0 and 1 are the same all the way in Fig...

Page 12: ...rresponding clamp hole Insert a fiberglass frame rod into Central Connector hole until it stops fig 5 A Insert other end of the fiberglass rod fully into the correct clamp hole of the corresponding cl...

Page 13: ...equal and level fig 6 A Center GenTent canopy such that Vent Rod is centered under the top cap fig 6 A Fig 6 A GenTent 10k and GenTent 20k Slide one corner elastic over the corresponding clamp telesc...

Page 14: ...short electrical skirt otherwise select the long electrical skirt Only use one skirt Flip the canopy overflap up from corner to corner on the side that is over the electrical outlets fig 6 C Align the...

Page 15: ...y Now press the main skirt body over the electrical outlet to the other corner then wrap that edge around and press firmly in place Proper Door Sealing Tip GenTent now ships with the StormBracer door...

Page 16: ...GenTent clamp from directly connecting to the frame or when a generator frame is small and requires extended length or width GTACCB1U00 Universal Frame Extender injection molded for use with square tu...

Reviews: