background image


42 

Appendix  

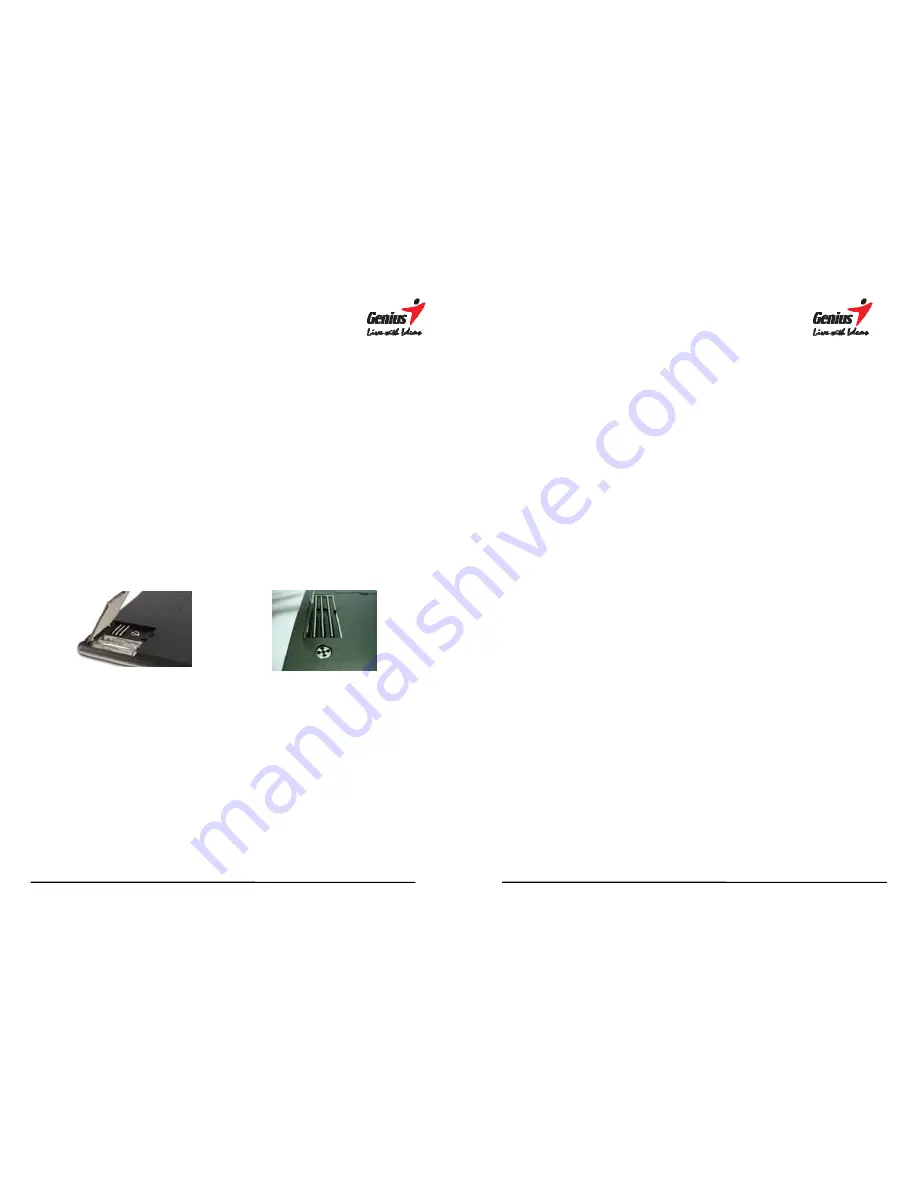
Replacing the ink cartridge of the digital pen 
 

Open the compartment of the G-Note by lifting its cover while pressing the 
release latch inward, and locate the ink cartridge and the notch to extract the 
cartridge from the pen. 
 
1.    Hold the digital pen upright and insert the cartridge tip into the center of the 

notch. 

2.    Gently push the pen inside the notch.   
3.    Gently pull out the ink cartridge from the pen. 
4.    Insert a new cartridge and press the tip firmly against a hard surface until it 

snaps into place.


G-Note 5000 

G-Note 7100 


Replacing the battery of the digital pen


Even though the battery of the digital pen will last for approximately 14 months, 
the battery in the pen may be exhausted if you receive erratically missing, 
lengthened, shortened, or twisted digital ink strokes, or a significant decrease of 
the thickness of the strokes. If so, please replace the battery (refer to section 
1.6 for instructions as to how to replace the pen’s battery).


43 

Taking care of your G-Note 

To assure proper functioning of the G-Note, please observe the following 
precautions: 


Remove the batteries from the G-Note if it is not expected to be used for 
long periods. This will eliminate the possibility of battery liquid leaking from 
the batteries and corroding internal components. 


Remove the button-cell battery from the digital ink pen if it is not expected 
to be used for long periods.   


Avoid placing magnetic media or hot or heavy items on the surface of the 
G-Note. 


Clean the pen and the housing of with a soft cloth lightly dampened with 
water or a neutral detergent. 


Never drop the digital pen or the note recorder. The G-NOTE may 
malfunction if subjected to strong shocks or vibration. 


Avoid cutting or scratching the surface of the G-NOTE. 


Never immerse the pen or digital not recorder in liquid. 


Avoid operating or storing the pen and the recorder in extremely hot or 
cold temperatures, or where the relative humidity is high. 


Never take the G-NOTE or pen apart as this will void warranty. Leave 
service of the device to qualified technicians


Do not use or store the G-NOTE in the vicinity of equipment that 
generates strong electromagnetic radiation or magnetic fields. 


When not in use, please put back on the pen point cap to save energy 
mode. Otherwise, avoid to frequency influenced.


Summary of Contents for G-NOTE 7100

Page 1: ...orrect the interference by one or more of the following measures Reorient or relocate the receiving antenna Increase the separation between the equipment and receiver Connect the equipment to an outle...

Page 2: ...end timer 3 60mins 22 3 6 4 The remaining disk space battery capacity display 23 3 7 TURNING OFF THE G NOTE 23 4 THE DIGITAL ORGANIZER 24 4 1 INSTALLING THE DIGITAL ORGANIZER SOFTWARE 24 4 2 DOWNLOADI...

Page 3: ...ital note recorder 2 1 x A5 notepad 3 1 x black digital ink pen when connect to PC can be pen of G Note as Pen Tablet 1 x red digital ink pen 4 3 x black ink refills stored in the battery compartment...

Page 4: ...0 supports standard A5 notepad with a maximum thickness of 15mm Power on off LCD display Function buttons Normal paper USB port Pen slot Digital ink pen 7 G Note 7100 USB port Ink Refills Battery comp...

Page 5: ...hen the batteries run out of power remove them or insert new batteries 9 Four AAA alkaline batteries can use approximate 100 hours continuously Battery run time varies based on the usage pattern of an...

Page 6: ...and Do not try to force too large notepad into the G Note Working Area G Note 5000 G Note 7100 Maximum Thickness 0 mm 2 5 mm 5 7mm Wide 20mm Wide 10mm 11 2 4 Built in storage device The G Note is equi...

Page 7: ...ill appear 13 Testing the digital ink pen Make sure that you have installed the button cell battery in the digital pen before proceeding with the following tests see section 1 6 for battery installati...

Page 8: ...ress the Page Up button to browse previous sheets and make corrections or additional notes You may turn back several sheets at a time to check earlier notes However if you want to make additions on a...

Page 9: ...allows you to adjust the paper orientation from portrait to landscape or even use the G Note upside down Workbook Start a new workbook e g at the start of a new meeting or after changing a notepad Fo...

Page 10: ...3 6 2 2 The Workbook Format Disk command 1 Press V to select the workbook sub menu 2 Press ENTER to confirm 3 Press V to select the Format Disk command Press to confirm the operation After finish thi...

Page 11: ...econds it will return to note taking mode Enter Esc Return to main menu Return to note taking mode 21 3 6 2 4 The Workbook Tablet Function Selection 1 Press V to select the workbook sub menu 2 Press E...

Page 12: ...Press to confirm and return to the main menu Enter Esc Return to main menu Return to note taking mode 23 3 6 4 The remaining disk space battery capacity display 1 Press V to select the status menu 2...

Page 13: ...recommended and click OK 4 To proceed with the installation click OK wait until the install Latino is completed and click OK again 25 4 2 Downloading digital pages from the G Note 1 Take the G Note US...

Page 14: ...n a much the same way as the stylus of a traditional pen tablet a tablet PC or hand hold computer In pen tablet mode you can hover the pen over the writing area to navigate the cursor across the scree...

Page 15: ...e Notepad pane 29 4 6 The standard toolbar Located at the upper left of the screen the standard toolbar contains icons for all usual desktop functions like opening saving printing files cut copy or pa...

Page 16: ...section 4 8 under Selection techniques and click on the Delete icon in the Standard toolbar Make sure to make back ups of the digital pages in the flash memory of the G Note by copying them to a folde...

Page 17: ...To add files to your selection from other places on your hard disk click on the Add File button in the dialog box and browse to the files you want to add Click on the Move up or Move down buttons to...

Page 18: ...l then appear in a selection box You can now change pen tip colors and shapes and click the OK button to confirm 2 Select the pen tip shape Click the OK button to confirm 35 3 Select the pen color Cli...

Page 19: ...es Use this Pen Properties dialog box to modify the annotations in the Notepad pane 1 Start with selecting the objects you want to modify with the Select tool see above The selection will appear in a...

Page 20: ...mposed page at the point in time where you forgot to press the New page button The result will be two separate and perfectly readable pages again 39 Click on the Untangle icon to open a dialog box con...

Page 21: ...cript Notes FOR U 30 days Trial Version Genius free support MyScript Notes FOR U software that converts your handwritten notes from G Note into digital text support of 13 languages English UK English...

Page 22: ...bserve the following precautions Remove the batteries from the G Note if it is not expected to be used for long periods This will eliminate the possibility of battery liquid leaking from the batteries...

Page 23: ...CD display is either white or black see also section 3 2 in note taking mode to assure a proper reading height distance After you have switched on the device it may take a second or two for the page i...

Page 24: ...a computer in real time 47 Technical specifications G Note 5000 Digital notepad specifications Technology Electromagnetic digitizer Dimensions 281 L x 180 W x 15 H mm Weight 358g not including batter...

Page 25: ...Battery Life About 100 hours continuous use Work Current 3V 20mA 5mA Power Consumption 60mW 15mW Power saving Auto suspend after 15 min default idle time configurable Interface USB 1 1 Digital ink pe...

Reviews: