background image

Operator's Manual

Seventh Edition · First Printing

28

Z-60/34

Part No. 133083

Inspections

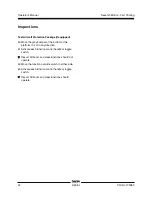
Test the Tilt Sensor

9 Turn the key switch to

platform control. Pull out the
platform red Emergency Stop
button to the on position.

10 Open the control panel side

turntable cover and locate the
tilt sensor next to the control
box.

11 Press down one side of the tilt sensor.

Result: The alarm, located in the platform,

should sound.

Test Auxiliary Controls

12 Turn the key switch to ground control and shut

the engine off.

13 Pull out the red Emergency Stop button to the

on position.

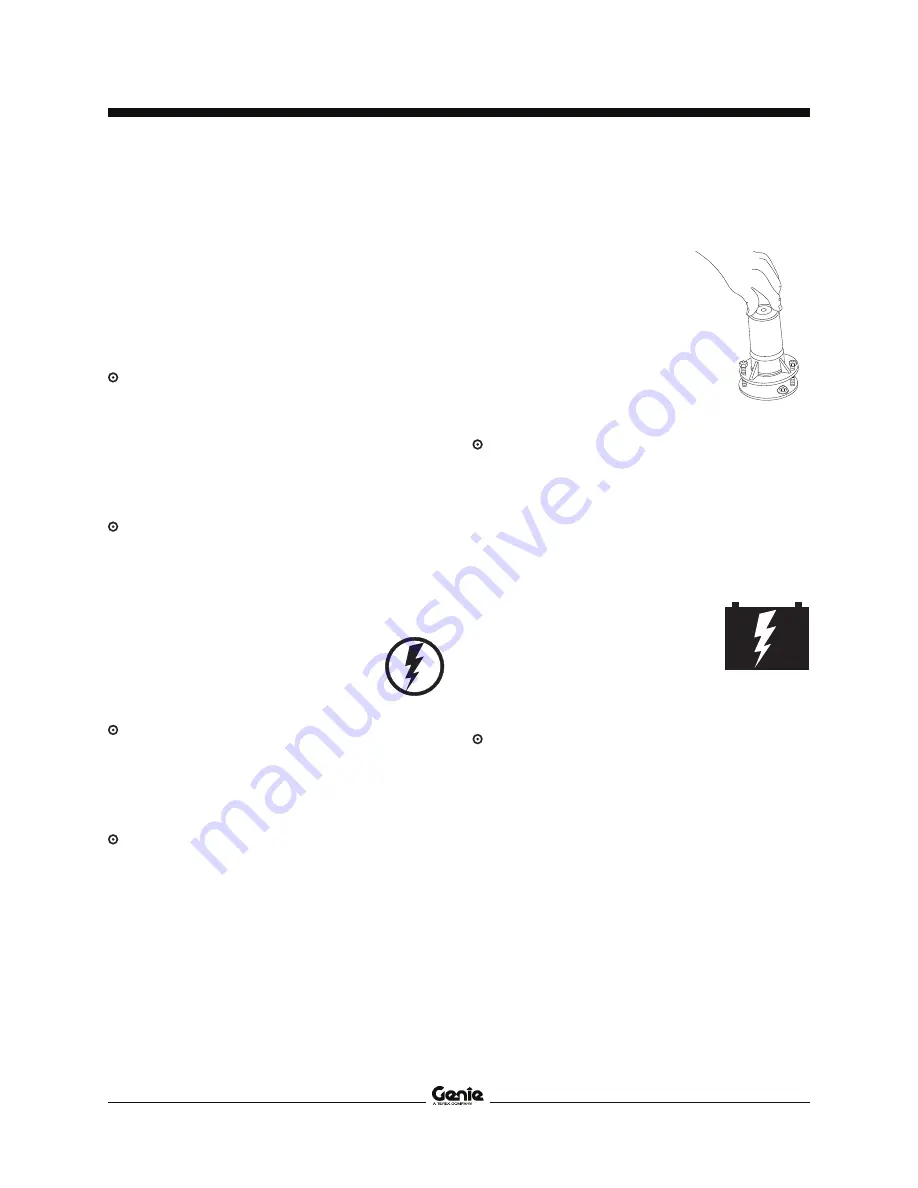
14 Simultaneously hold the

auxiliary power switch on and
activate each boom function
toggle switch.

Note: To conserve battery power, test each

function through a partial cycle.

Result: All boom functions should operate.

1 Select a test area that is firm, level and free of

obstruction.

At the Ground Controls

2 Turn the key switch to ground control.

3 Pull out the red Emergency Stop button to

the on position.

Result: The beacon (if equipped) should flash.

4 Start the engine. See Operating Instructions

section.

Test Emergency Stop

5 Push in the red Emergency Stop button to the

off position.

Result: The engine will shut off after 2 to 3

seconds.

6 Pull out the red Emergency Stop button to

the on position and restart the engine.

Test the Machine Functions

7 Do not hold the function enable

switch to either side. Attempt to
activate each boom and platform
function toggle switch.

Result: All boom and platform functions should

not operate.

8 Hold the function enable switch to either side

and activate each boom and platform function
toggle switch.

Result: All boom and platform functions should

operate through a full cycle. The descent alarm
should sound while the boom is lowering.

Summary of Contents for Z-60/34

Page 1: ...Operator s Manual Z 60 34 Seventh Edition First Printing Part No 133083 with Maintenance Information CE ...

Page 2: ... 5 Personal Safety 8 Work Area Safety 9 Legend 17 Controls 18 Inspections 25 OperatingInstructions 36 Transport and Lifting Instructions 46 Maintenance 49 Specifications 53 Contact us Internet www genielift com E mail techpub genieind com Copyright 1993 by Genie Industries First Edition First Printing February 1993 Second Edition Third Printing September 1996 Third Edition Sixth Printing November ...

Page 3: ...bey employer s safety rules and worksite regulations You read understand and obey all applicable governmental regulations You are properly trained to safely operate the machine Owners Users and Operators Genie appreciates your choice of our machine for your application Our number one priority is user safety which is best achieved by our joint efforts We feel that you make a major contribution to s...

Page 4: ...material Hazard Classification Genie uses symbols color coding and signal words to identify the following Safety alert symbol used to alert you to potential personal injury hazards Obey all safety messages that follow this symbol to avoid possible injury or death Indicates a hazardous situation which if not avoided will result in death or serious injury Indicates a hazardous situation which if not...

Page 5: ...nce Readthe operator s manual Keep off this surface Keep away from moving parts Keep away from path of moving platform No smoking No flame Stopengine Do not use ether or other high energystarting aids on machines equippedwith glow plugs Readservice manual Ratedplatform capacity Platform uphill 1 Lower primary 2 Lower secondary 3 Retract primary Platformdownhill 1 Retract primary 2 Lower secondary ...

Page 6: ...hment point Wheelload Voltage rating for power to platform Pressure rating for air line to platform Avoid contact Tie down instructions Tie down instructions Fireextinguisher Weight of welder reduces capacity Windspeed Turntable lock can shear Keep away from moving parts Collisionhazard Keep away from moving parts Tirepressure ...

Page 7: ...Operator s Manual Seventh Edition First Printing PartNo 133083 Z 60 34 5 General Safety Safety signs and locations ...

Page 8: ...Operator s Manual Seventh Edition First Printing 6 Z 60 34 PartNo 133083 General Safety Safety signs and locations ...

Page 9: ...Operator s Manual Seventh Edition First Printing PartNo 133083 Z 60 34 7 General Safety Safety signs and locations ...

Page 10: ... wear a safety belt or harness in accordance with governmental regulations Attach the lanyard to the anchor provided in the platform Operators must comply with employer job site and governmental rules regarding the use of personal protective equipment All PFPE must comply with applicable governmental regulations and must be inspected and used in accordance with the PFPE manufacturer s instructions...

Page 11: ...r sag and beware of strong or gusty winds Keep away from the machine if it contacts energized power lines Personnel on the ground or in the platform must not touch or operate the machine until energized power lines are shut off Do not use the machine as a ground for welding Do not operate the machine during lightning or storms Tip over Hazards Occupants equipment and materials shall not exceed the...

Page 12: ...he tilt alarm sounds with the platformdownhill 1 Retract the primary boom 2 Lowerthesecondary boom 3 Lowertheprimary boom Do not raise the boom when wind speeds may exceed 12 5 m s If wind speeds exceed 12 5 m s when the boom is raised lower the boom and do not continue to operate the machine Do not operate the machine in strong or gusty winds Do not increase the surface area of the platform or th...

Page 13: ...evented from normal motion by an adjacent structure All personnel must be removed from the platform before attempting to free the platform using the groundcontrols Do not push off or pull toward any object outside of the platform Maximum allowable manual force 400 N Do not alter or disable machine components that in any way affect safety and stability Do not replace items critical to machine stabi...

Page 14: ... before operating Do not enter or exit the platform unless the machine is in the stowed position and the platform is at ground level Operation on Slopes Hazards Do not drive the machine on a slope that exceeds the maximum uphill downhill or side slope rating of the machine Slope rating applies only to machines in the stowed position Maximum slope rating stowed position 2WD Platform downhill 25 14 ...

Page 15: ...n locked out and or precautions have been taken to prevent any potential collision No stunt driving or horseplaywhile operatingamachine Do not lower the boom unless the area below is clear of personnel and obstructions Limit travel speed according to the condition of the ground surface congestion slope location of personnel and any other factors which may cause collision Bodily Injury Hazard Do no...

Page 16: ...ons before each work shift Immediately tag and remove from service a damaged or malfunctioning machine Be sure all maintenance has been performed as specified in this manual and the appropriate Genie service manual Be sure all decals are in place and legible Be sure the operator s safety and responsibilities manuals are complete legible and in the storage container located on the platform Componen...

Page 17: ...movement of the platform with an overhangingload Do not cause a horizontal force or side load to the machine by raising or lowering a fixed or overhangingload Electrocution Hazard Keep pipes away from all energized electrical conductors Panel Cradle Safety Read understand and obey all warnings and instructions provided with the panel cradles Do not exceed the rated platform capacity The combined w...

Page 18: ...latform controls Do not operate unless the weld cables are properly connected and the welder is properly grounded The weight of the welder will reduce the rated platform capacity and must be factored into the total platform load The welder power supply weighs 34 kg Do not operate the welder unless a fire extinguisher is immediately available for instant use per OSHA regulation1926 352 d Weld Line ...

Page 19: ...ing PartNo 133083 Z 60 34 17 Legend 1 Foot switch 2 Manual storage container 3 Sliding mid rail 4 Lanyard anchorage point 5 Non steer tire 6 Steer tire 7 Ground controls 8 Primary boom 9 Jib boom 10 Platform controls 11 Platform 12 Secondary boom ...

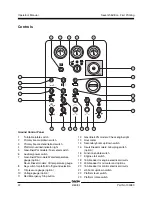
Page 20: ...itch 3 Platform rotate switch 4 Jib boom up down switch 5 Auxiliary power switch 6 Drive speed select switch 7 Glow plug switch option 8 Engine start switch 9 Engine idle rpm control switch Turtle symbol low idle Rabbit symbol high idle 10 Gasoline LPG models Gasoline LPG select switch 11 Red Emergency Stop button 1 2 3 4 5 6 17 18 20 19 ...

Page 21: ...and steer functions 13 Platform overload indicator light 14 Machine not level indicator light if equipped 15 Drive enable indicator light 16 Drive enable switch 17 Proportional control handle for secondary boom up down function 18 Primary boom extend retract switch 19 Optional equipment 20 Dual axis proportional control handle for primary boom up down and turntable rotate left right functions 8 9 ...

Page 22: ...e auxiliary power switch to either side and activate the desired function 6 Drive speed select switch Machine on incline symbol Low range operation for inclines Machine on level surface symbol High range operation for maximum drive speed 7 Glow plug switch Move the glow plug switch to either side and hold for 3 to 5 seconds 8 Engine start switch Move the engine start switch to either side to start...

Page 23: ...tions will operate Remove weight until the light goes off 14 Machine not level indicator light if equipped The machine not level indicator light will come on when the tilt alarm sounds 15 Drive enable indicator light Light on indicates that the boom has moved just past either non steer wheel and drive function has been interrupted 16 Drive enable switch To drive when the drive enable light is on h...

Page 24: ...els Oil temperature gauge 8 Key switch for platform off ground selection 9 Oil pressure gauge option 10 Voltage gauge option 11 Red Emergency Stop button 12 Gasoline LPG models Check engine light 13 Hourmeter 14 Secondary boom up down switch 15 Deutz Diesel models Glow plug switch option 16 Function enable switch 17 Engine start switch 18 15A breaker for engine electrical circuits 19 20A breaker f...

Page 25: ...wer if the primary power source engine fails Simultaneously hold the auxiliary power switch to either side and activate the desired function Controls 7 Gasoline LPGmodels Watertemperaturegauge option Dieselmodels Watertemperaturegauge 8 Key switch for platform off ground selection Turn the key switch to the platform position and the platform controls will operate Turn the key switch to the off pos...

Page 26: ... engine electrical circuits 19 20A circuit breaker for oil cooler and options 20 15A breaker for control electrical circuits 21 Jib boom up down switch Move the jib boom switch up and the jib boom will raise Move the jib boom switch down and the jib boom will lower 22 Platform level switch Move the platform level switch up and the level of the platform will raise Move the platform level switch dow...

Page 27: ...signed to discover if anything is apparently wrong with a machine before the operator performs the function tests The pre operation inspection also serves to determine if routine maintenance procedures are required Only routine maintenance items specified in this manual may be performed by the operator Refer to the list on the next page and check each of the items If damage or any unauthorized var...

Page 28: ...for proper tire pressure Add air if needed See Maintenance section Check the following components or areas for damage improperly installed or missing parts and unauthorized modifications R Electrical components wiring and electrical cables R Hydraulic hoses fittings cylinders and manifolds R Fuel and hydraulic tanks R Drive and turntable motors and drive hubs R Boom wear pads R Tires and wheels R ...

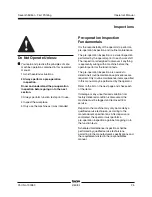
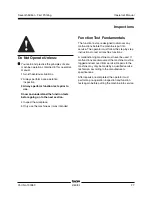
Page 29: ... as it was intended Function Test Fundamentals The function tests are designed to discover any malfunctions before the machine is put into service The operator must follow the step by step instructions to test all machine functions A malfunctioning machine must never be used If malfunctions are discovered the machine must be tagged and removed from service Repairs to the machine may only be made b...

Page 30: ...hould operate 1 Select a test area that is firm level and free of obstruction At the Ground Controls 2 Turn the key switch to ground control 3 Pull out the red Emergency Stop button to the on position Result The beacon if equipped should flash 4 Start the engine See Operating Instructions section Test Emergency Stop 5 Push in the red Emergency Stop button to the off position Result The engine will...

Page 31: ...ngine by moving the start toggle switch to either side Result The engine should not start 25 Do not press down the foot switch and restart the engine Result The engine should start 26 Do not press down the foot switch and test each machine function Result The machine functions should not operate TestMachineFunctions 27 Press down the foot switch 28 Activate each machine function control handle or ...

Page 32: ...one of the non steer wheels Result The drive enable indicator light should come on and remain on while the boom is anywhere in the rangeshown 37 Move the drive control handle off center Result The drive function should not operate 38 Move and hold the drive enable toggle switch to either side and slowly move the drive control handle off center Result The drive function should operate Note When the...

Page 33: ... 51 Drive the left steer tire up onto a 15 cm block or curb Result The three remaining tires should stay in firm contact with the ground 52 Drive both steer tires up onto a 15 cm block or curb Result The non steer tires should stay in firm contact with the ground TestAuxiliaryControls 53 Shut the engine off 54 Pull out the red Emergency Stop button to the on position 55 Press down the foot switch ...

Page 34: ... at the bottom of the platform 10 cm in any direction 61 Activate each function control handle or toggle switch Result All boom and steer functions should not operate 62 Move the function override switch to either side 63 Activate each function control handle or toggle switch Result All boom and steer functions should operate Inspections ...

Page 35: ... and practice the principles of safe machine operation contained in this operator s manual 1 Avoid hazardous situations 2 Always perform a pre operation inspection 3 Always perform function tests prior to use 4 Inspect the workplace Know and understand the workplace inspection before going on to the next section 5 Only use the machine as it was intended Fundamentals The workplace inspection helps ...

Page 36: ... Boom 1 72867 Label Lights option 1 82238 Platform Control Panel 1 82240 Label 105 dB 1 82472 Label Crushing Hazard 4 82473 Label Compartment Access 1 82487 Label Read the Manual 2 82487 Label Read the Manual Pipe Cradle 2 82487 Label Read the Manual Panel Cradle 2 Part No Decal Description Quantity 82548 Label Platform Rotate 2 82589 Label Tire Pressure 4 82601 Label Maximum Capacity 227 kg 1 826...

Page 37: ...Operator s Manual Seventh Edition First Printing PartNo 133083 Z 60 34 35 Drive Chassis Platform Shading indicates decal is hidden from view i e under covers Ground Controls Side Engine Side Inspections ...

Page 38: ... responsibility to follow all the safety rules and instructions in the operator s safety and responsibilities manuals Using the machine for anything other than lifting personnel along with their tools and materials to an aerial work site is unsafe and dangerous Only trained and authorized personnel should be permitted to operate a machine If more than one operator is expected to use a machine at d...

Page 39: ...inutes before operating to prevent hydraulic system damage In extreme cold conditions 18 C and below machines should be equipped with optional cold start kits Attempting to start the engine when temperatures are below 18 C may require the use of a booster battery Gasoline LPG models In cold conditions 6 C and below the machine should be started on gasoline and warmed for 2 minutes then switched to...

Page 40: ...ngine Do not press down the foot switch when starting the engine To Position Platform 1 Press down the foot switch 2 Slowly move the appropriate function control handle or toggle switch according to the markings on the control panel To Steer 1 Press down the foot switch 2 Slowly move the control handle in the direction indicated by blue or yellow triangles OR press the thumb rocker switch located ...

Page 41: ...hine on incline symbol To determine the slope grade Measure the slope with a digital inclinometer OR use the following procedure You will need carpenter slevel straight piece of wood at least 1 m long tapemeasure Lay the piece of wood on the slope At the downhill end lay the level on the top edge of the piece of wood and lift the end until the piece of wood is level While holding the piece of wood...

Page 42: ...he foot switch is not pressed the engine will idle at the lowest rpm Turtle symbol Foot switch activated low idle Rabbit symbol Foot switch activated high idle Generator if equipped To start the generator move the generator toggle switch to the on position Plug a power tool into the power to platform GFCI outlet To turn off the generator move the generator toggle switch to the off position Note Ma...

Page 43: ...tform bumpers come in contact with aircraft components the machine will shut down and no functions will operate Move the function override toggle switch to either side to operate the machine After Each Use 1 Select a safe parking location firm level surface clear of obstruction and traffic 2 Retract and lower the boom to the stowed position 3 Rotate the turntable so that the boom is between thenon...

Page 44: ...n each side of the platform Refer to the illustration on the left Make sure the bottom of the pipe cradle tube rests on the platform floor 2 Install two U bolts from the outside of the platform rails through each pipe cradle mount 3 Secure each U bolt with 2 washers and 2 nuts The pipe cradle assembly consists of 2 pipe cradles positioned at either side of the platform and mounted to the guardrail...

Page 45: ...ylon strap over the load Depress the buckle and slide the strap through Tighten the strap 5 Gently push and pull on the load to make sure the pipe cradles and load are secure 6 Keep the load secured when the machine is moving Tip over hazard The weight of the pipe cradle assembly and the load in the pipe cradles will reduce the rated platform capacity of the machine and must be factored into the t...

Page 46: ...nel cradle base 6 Secure the U bolt with 2 nuts and 2 washers Proceed to step 9 7 If the panel cradle is not installed at a platform floor support tube use the aluminum tube provided 8 Place the tube between the panel cradle and the platform floor Insert the U bolt through the floor around the tube and into the panel cradle base 9 Repeat above for the second set of parts Installation of Padding 1 ...

Page 47: ...adle base hook piece decal U bolt mounting slots padding clamp hook Panel Cradle Operation 1 Secure both panel cradles to the platform 2 Place the load so that it rests in both panel cradles 3 Center the load on the platform 4 Secure the load to the platform using the strap Tighten the strap Operating Instructions ...

Page 48: ...nie product should source a qualified freight forwarder with expertise in preparing loading and securing construction and lifting equipment for international shipment Only qualified aerial lift operators should move the machine on or off the truck The transport vehicle must be parked on a level surface The transport vehicle must be secured to prevent rolling while the machine is being loaded Be su...

Page 49: ...curing the Chassis Use chains of ample load capacity Use a minimum of 5 chains Adjust the rigging to prevent damage to the chains Truck bed Transport and Lifting Instructions Turntable rotation lock pin Securing the Platform Make sure the jib and platform are in the stowed position Place a wooden block under the platform rotator Do not allow the block to contact the platform cylinder Secure the pl...

Page 50: ...ns Lifting Instructions Fully lower and retract the boom Move the jib perpendicular with the ground Remove all loose items on the machine Use the turntable rotation lock to secure the turntable Determine the center of gravity of your machine using the picture on this page Attach the rigging only to the designated lifting points on the machine There are four lifting points on the chassis Adjust the...

Page 51: ...e symbols appear at the beginning of a maintenance procedure it conveys the meaning below Indicates that tools will be required to perform this procedure Indicates that new parts will be required to perform this procedure Indicates that a cold engine is required before performing this procedure Check the Engine Oil Level Maintaining the proper engine oil level is essential to good engine performan...

Page 52: ... the top 5 cm of the sight gauge 2 Add oil as needed Hydraulic oil specifications Hydraulic oil type Chevron Rykon Premium MV equivalent Check the Engine Coolant Level Ford and Perkins Models Maintaining the engine coolant at the proper level is essential to engine service life Improper coolant level will affect the engine s cooling capability and damage engine components Daily checks will allow t...

Page 53: ... cable connections are tight and free of corrosion 3 Be sure that the battery hold down bracket is secure Note Adding terminal protectors and a corrosion preventative sealant will help eliminate corrosion on the battery terminals and cables Check the Tire Pressure Tip over hazard An over inflated tire can explode which may compromise machine stability and cause the machine to tip over Tip over haz...

Page 54: ...rly annually and every two years must be completed by a person trained and qualified to perform maintenance on this machine according to the procedures found in the service manual for this machine Machines that have been out of service for more than three months must receive the quarterly inspection before they are put back into service ...

Page 55: ... 1 5 m width x length 76 cm x 1 5 m Platform dimensions 1 8 m width x length 76 cm x 1 8 m Platform dimensions 2 4 m width x length 91 cm x 2 4 m Platform leveling self leveling Platform rotation 180 AC outlet in platform standard Vibration value does not exceed 2 5 m s2 Hydraulic pressure maximum 166 bar boom functions System voltage 12V Tires 15 x 19 5 16 ply Ground clearance 40 1 cm Fuel tank c...

Page 56: ...Operator s Manual Seventh Edition First Printing 54 Z 60 34 PartNo 133083 Specifications Z 60 34 Range of Motion 0 m 3 1 m 6 1 m 9 2 m 12 2 m 21 4 m 18 3 m 15 3 m 12 2 m 9 2 m 6 1 m 3 1 m 0 m ...

Reviews: