


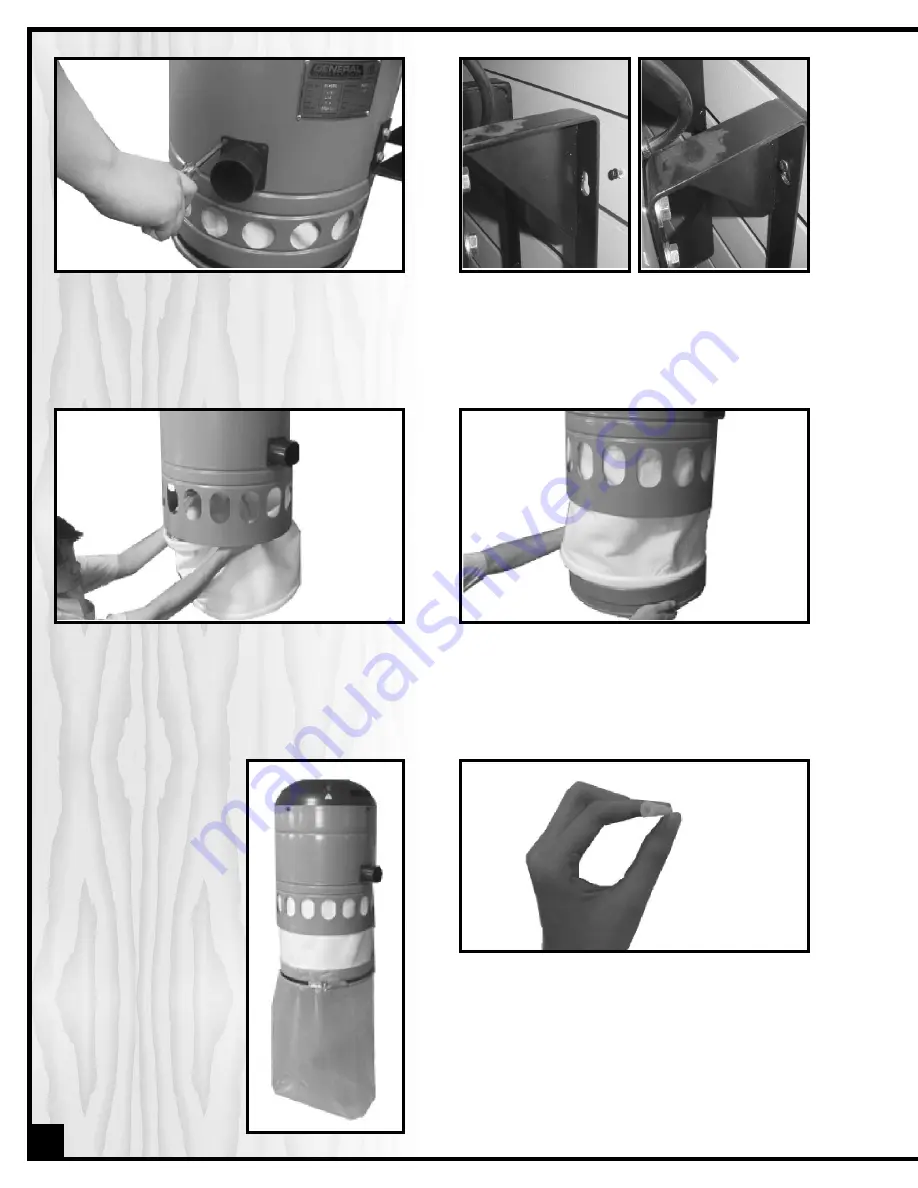
STEP 3
Align the four holes in the dust intake port with the
mounting holes and using the four pan-head screws,
attach the dust intake port to the unit as shown.
STEP 4
Mount the dust collector to the wall as shown. Ensure that
the exposed heads of the four screws fit into the narrow
portion of the mounting slots and then tighten the four
screws.
STEP 5
Fit the filter up into in the housing of the unit as shown.
Make sure to position the filters’ flexible steel band in the
channel near the bottom of the housing.
STEP 6
Fit the steel collar onto the bottom of the filter making
sure to position the filters flexible steel band in the upper
channel of the steel collar.
STEP 7
Using the included bag
clamp fit the collection bag
to the steel collar and
secure it in place as shown.
Make sure to position the
bag clamp in the lower
channel of the steel collar.
N
No
otte
e::
The bottom of the col-
lection bag should sit flat on
the floor, so that the floor
supports the weight of the
dust in the bag.
STEP 8
Mark & install the wall anchors for the piping. To install the
anchors, drill a 1/8” hole 1-1/4” deep at each anchor
mark and then hammer the anchors into the holes until
flush with the wall.
N
No
otte
e::
use the hole spacing from a wall hanger to locate
the holes placement for the anchors. Hangers should be
positioned roughly 6” from each end of each pipe.
7
Summary of Contents for 10-030 M1
Page 23: ...1 11...
Page 24: ...1 11...


