– 13 –
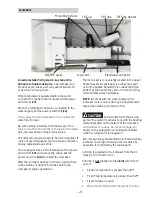
All models have 4-point leveling. The front is
supported by leveling legs, the rear is supported
by adjustable wheels. Both are accessible from the
front of the refrigerator.
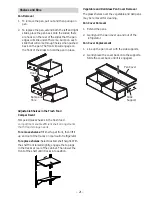
• To level the back of the refrigerator, turn the
7/16 in. hex nut located above the front wheels.
Turn clockwise to raise, or counter-clockwise to
lower the refrigerator.
• For front leveling, use a 1-1/4 in. open-end
wrench.
• Adjust the height of refrigerator to match
installation cutout opening 83-1/2 inches to 84-
1/2 inches. The refrigerator should be level and
plumb with the cabinetry.
The rear leveling wheels and front leveling legs are
limited to a maximum height adjustment of 1 inch.
If the installation requires more than 84-1/2 inch
height, the installer should elevate the refrigerator
on a sheet of plywood or runners. Cabinetry trim
could also be added across the top of the opening
to shorten the opening. Any attempt to raise the
refrigerator more than 1 inch will damage the front
leveling legs and the rear leveling wheels.
CAUTION
Level Refrigerator
Hex Nut Adjusts
Rear Wheels
Leveling
Leg
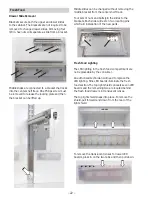
1. Locate and bring tubing to the front of the
cabinet.
2.
7XUQWKHZDWHURQWRÀXVKDQ\GHEULVIURPWKH
line. Run about a quart of water through the
WXELQJLQWRDEXFNHWWKHQVKXWRȺWKHZDWHU
Copper Tubing:
3. Slip a 1/4 in. nut and ferrule (provided) over both
ends of the copper tubing. Insert tube into the
XQLRQ¿WWLQJRQWKHXQLWDQGWLJKWHQWKHQXWWR
the union.
4. Turn on the water to check for leaks.
GE SmartConnect™ Tubing:
3. Insert the molded end of the tubing into
the refrigerator connection. Tighten the
compression nut until it is just hand-tight.
4. Tighten one additional turn with a wrench.
Overtightening can cause leaks!
5. Turn on the water to check for leaks.
NOTE: Make sure any excess tubing length does
not interfere with drawer closing or the toe kick
installation.
Connect Water Supply
House Water
Supply
Refrigeration
Water Supply


