


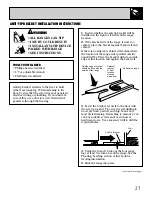
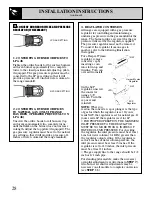


INSTALLATION INSTRUCTIONS
(continued)
30
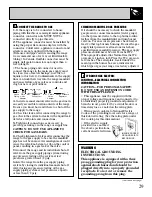
IF RANGE HAS STANDING PILOTS—
LIGHT AND ADJUST SURFACE BURNER PILOTS
1. Purge all air from supply system by turning
one top burner valve fully ON for 15 seconds.
2. Turn valve OFF and light pilot burners.
Adjust pilot flames using the adjusting screw on
the back of the thermostat, so that each flame is
approximately 1/4-inch in height.
3. To light any top burner, push and turn burner
knob to the lite position.
4. When burner has ignited, rotate knob to
desired flame setting.
7
IF RANGE HAS ELECTRIC IGNITION—
There are separate ignition devices for the left
and right hand surface burners. Both of these
ignitors are ON when any knob is turned to the
LITE setting. The ignitors will “spark” as long as
any of the top burner knobs are at the LITE
setting.
In the event of an electrical power failure, the top
burners can still be used. To light a burner, hold
a lighted kitchen match adjacent to the top
burner to be used and turn valve knob to LITE.
USE EXTREME CAUTION.
8
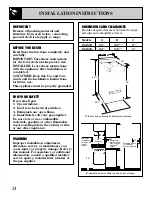
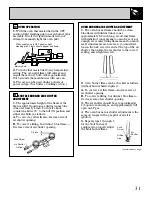
OVEN PILOT ADJUSTMENT
On pilot models remove thermostat knob.
Check position of pilot gas selector to make sure
selector is turned to the correct position for the
type of gas that is to be used. To change to LP,
insert small blade screwdriver in slot and turn
fully clockwise so that indicator points to LP. To
change to NAT, turn fully counterclockwise so
that indicator points to NAT.
• If desired, the gas to the oven pilot can be
turned off by turning the selector so the
pointer is at the OFF position, midway
between the LP and NAT settings.
(Thermostat on your range may not appear
exactly as shown in diagram.)
• On electric ignition models the gas to the
oven burner can be turned off. A manual
shut-off valve is provided on manifold pipe.
9
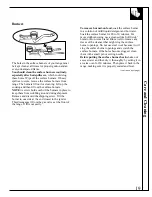
Top Burner Pilots
Top pilots
adjustment screw
controls the rate
of gas to the top
burner pilots.
Manifold Pipe
Thermostat
To
Safety V
alve
To
Oven Pilots
Thermostat
Sensor
ON
Oven pilot selector key
switches from LP to NAT
(vise versa).
Pointer
Front View
Summary of Contents for JGAS24
Page 34: ...34 NOTES...


