

9
Changing a Device Code
NOTE: All settings of the current device (Key Mover, Learning,
and all other user-programmed features) will be retained.
1. From
INITIAL SETUP
press
OK
. The remote displays
ADD
DEVICE
. Use the
ARROW
keys to scroll to
CHANGE DEVICE
CODE
. Press
OK
.
2. The remote displays the device name in the center of the 2nd
line. Use the
ARROW
keys to scroll to the desired device and
press
OK
.
3. The four digit code can be entered using the number keys or
you can use the
ARROW
keys to scroll through the codes for
this type of device (see “Adding a Device by Searching for its
Code” above)
4. If you manually entered the code with the number keys or
found the correct code using the search method, press
OK
to save it.
5. If using the search method and none of the codes work for
your device, you are offered the option of using the “Learn
Function” (see the instructions for learning in the “Advanced
Functions” section of this manual) Press
OK
to learn or
SET
to
go back one level in the menu.
Deleting a Device
6. From
INITIAL SETUP
press
OK
. The remote displays
ADD
DEVICE
. Use the
ARROW
keys and scroll to
DELETE DEVICE
.
Press
OK
.
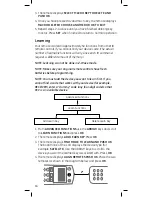
7. The remote displays the device name and its code (for example,
CABLE BOX 1376). Use the
ARROW
keys to scroll to the other
devices you have set up.
8. To delete the displayed device, press
OK
. The remote displays
ARE YOU SURE? IF SO PUSH OK
. Press
OK
.
9. The remote displays the name of the deleted device (for
example, CABLE BOX 1376 Has Been Deleted).
10.Press
OK
to delete another device or
SET
to exit.
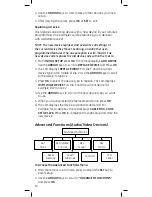
Viewing a Programmed Device Code
1. From
INITIAL SETUP
press
OK
. The remote displays
ADD
DEVICE.
Use the
ARROW
keys to scroll to
VIEW CODE
and
Press
OK
.
2. The first line of the LCD displays the long device name of the
current device. The second line displays the abbreviated name
of the current device in the middle.
3. The third line displays the 4-digit code number (for example
0010) programmed for the current device.


