


Page 5
C h o o s e a F i l e t o P r i n t
1.
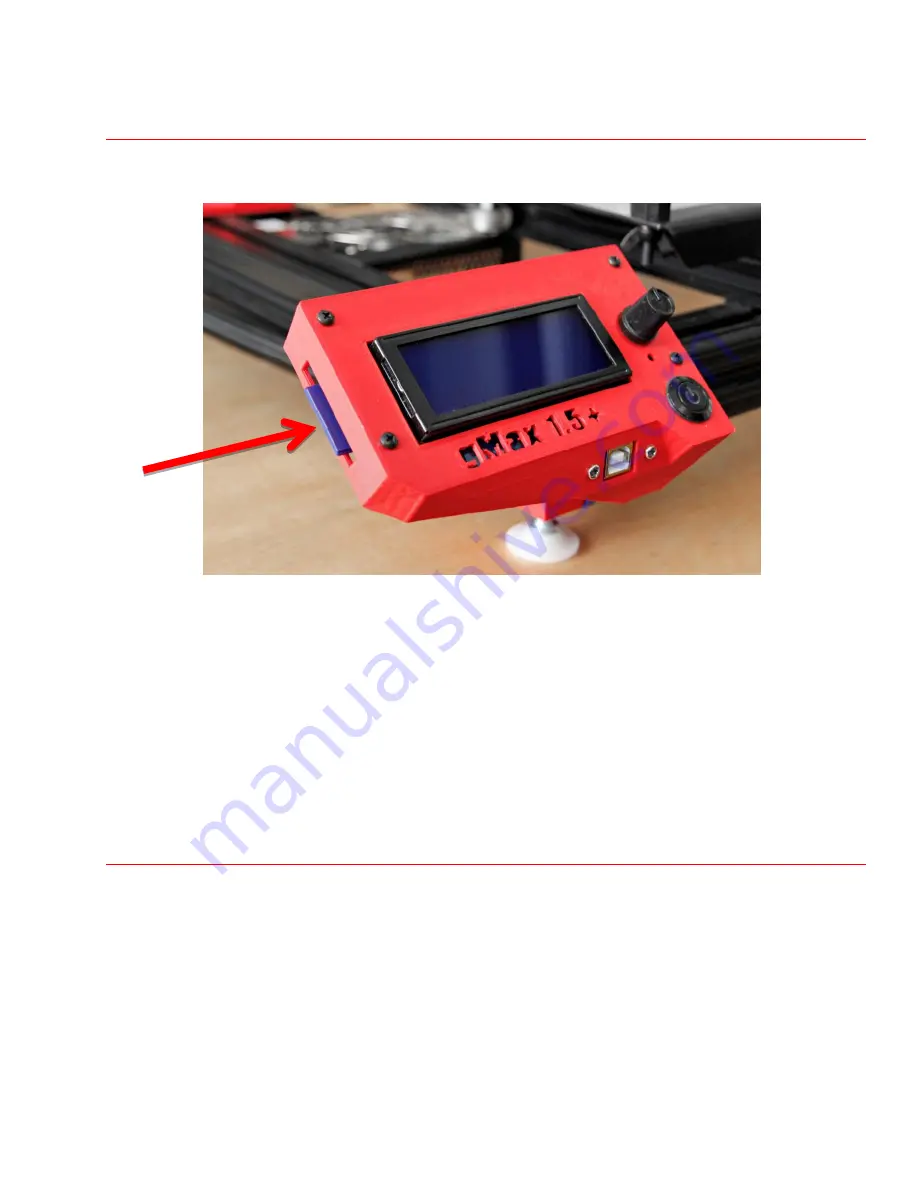
Slide the SD card (
upside-down
) into the left side of the LCD screen. It slides in just below the
circuit board and it should push-click into place. You should also push-click when removing it.
2.
Using the LCD screen, the bottom line should now say “Card Inserted”. If not, try removing the
SD card and reinserting it.
3.
Push in the LCD screen knob (this is your accept button) and scroll down to “Print from SD” and
push in the knob again.
4.
Select the file you wish to print and push the knob.
Y o u r f i r s t P r i n t
1.
First, you will see the extruder move to the left until it hits the left (
x-axis
) endstop.
2.
Secondly, the bed will move forward until it hits the front (
y-axis
) endstop.
3.
Finally the z axis will lower until it hits the left (
z-axis
) endstop attached to the aluminum frame.
Note: If the printer stops at any of these steps or misses the endstop,
refer to the troubleshooting portion of the forum for help or contact us.


