


2-4
4.
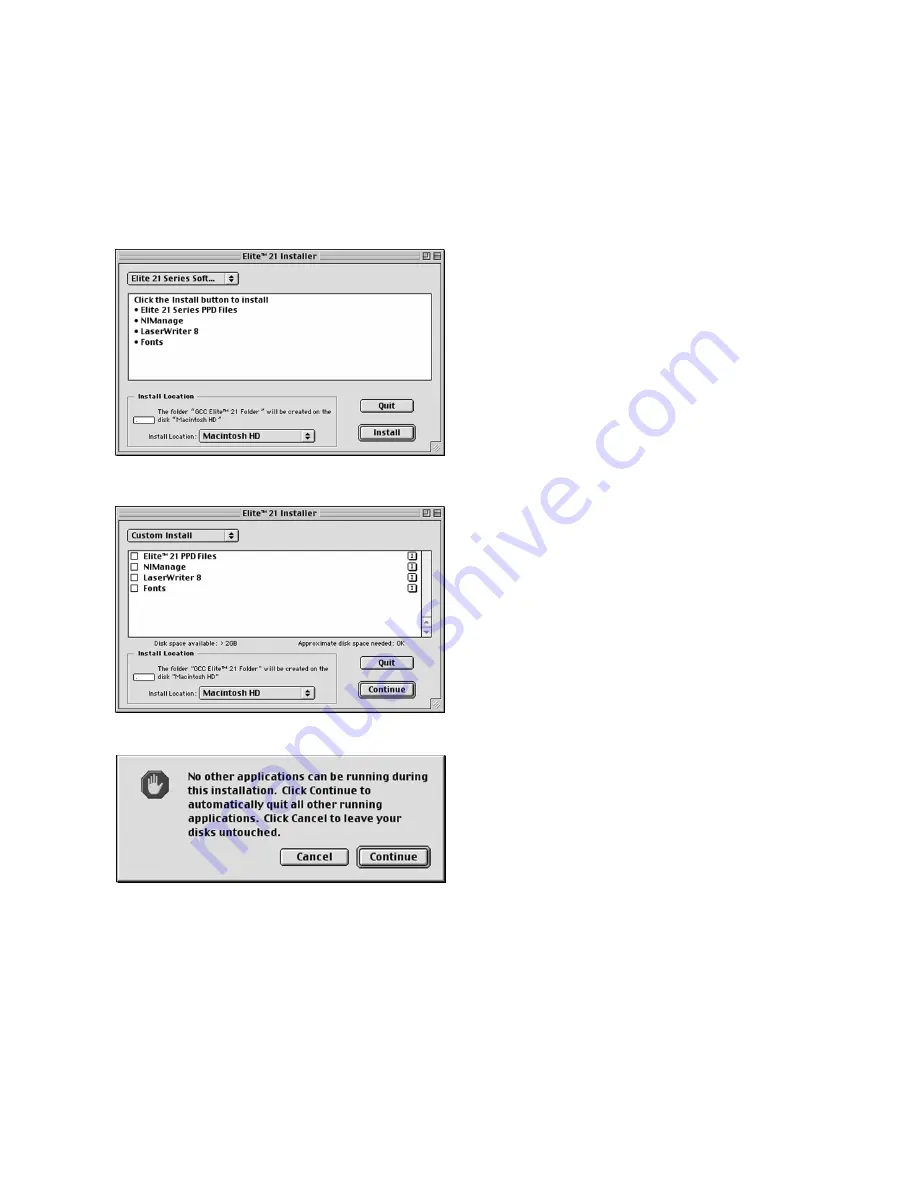
A window will appear listing the
components that will be installed and
asking for an Install Location. Choose the
disk that you wish to install the software
onto (the startup disk of the Mac in most
cases) and click Continue.
5.
A Custom Install option is also available. If
you only wish to install certain components
of the printing software, click on the Elite 21
Software pull-down menu and select
Custom Install. Select the items you wish to
install by clicking on the check boxes next
to them, and click Continue.
6.
A dialog box may appear informing you that
no other applications can be running during
the software installation. Click Continue to
quit any other applications and continue
with the installation.
Summary of Contents for 21 Series
Page 1: ......
Page 14: ...1 6 Step 4 Remove Tape 1 Remove packaging tape from the front and rear covers of the printer...
Page 125: ...4 20 Clicking on Device Settings brings up the following window...
Page 140: ...5 13...
Page 144: ...5 17...


