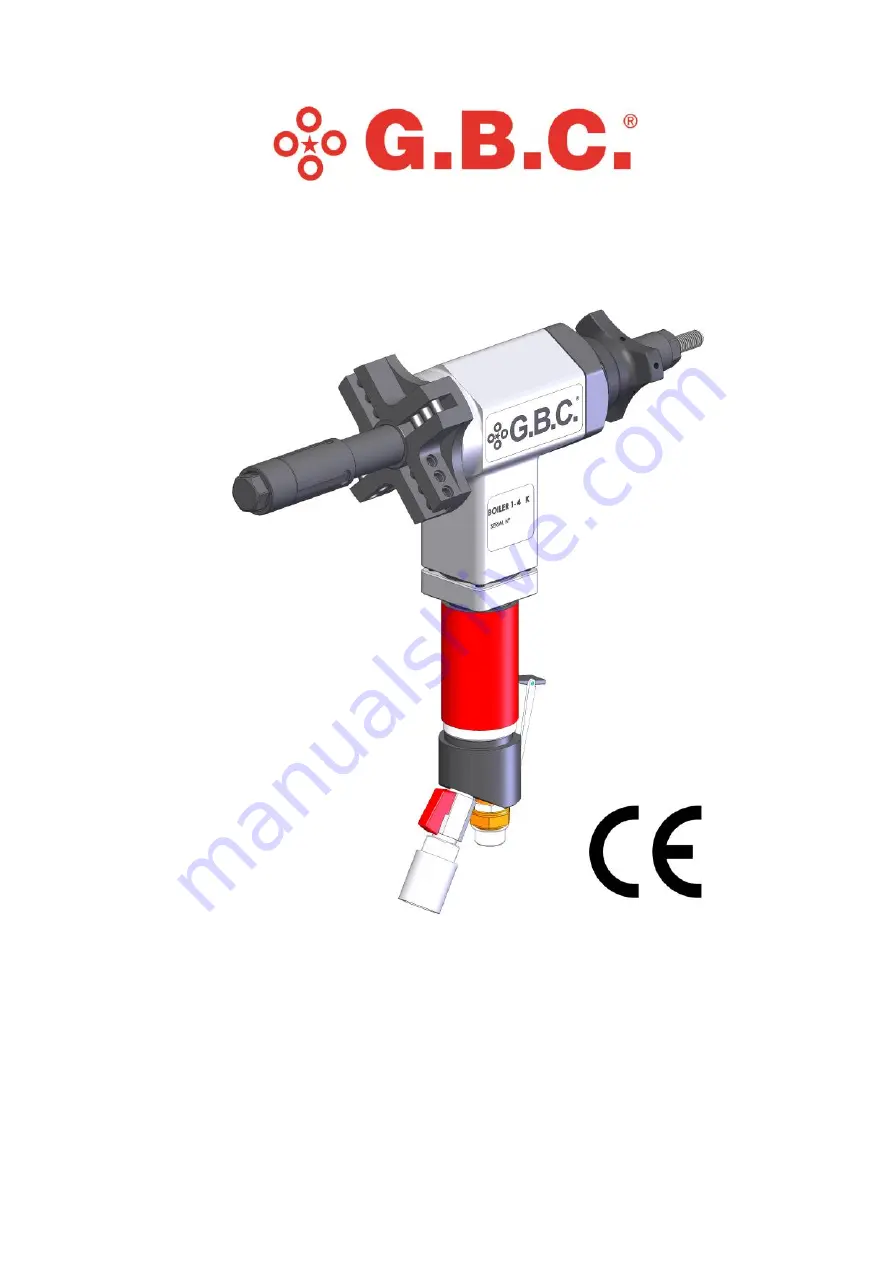
BOILER 1
-
4 K
INSTRUCTION MANUAL
V
er
sio
ne
0
1
. 2
01
6
Range
Ø 23 / 108 mm
(0,90”
—
4,25”)
G.B.C. Industrial Tools S.p.A.
Via Sandro Pertini 41/43 –
25046
Cazzago San Martino (Bs) –
Italia –
Tel. + 39 030 7451154 –
Fax. + 39 030 73 56 629
Page 1: ...ILER 1 4 K INSTRUCTION MANUAL Versione 01 2016 Range Ø 23 108 mm 0 90 4 25 G B C Industrial Tools S p A Via Sandro Pertini 41 43 25046 Cazzago San Martino Bs Italia Tel 39 030 7451154 Fax 39 030 73 56 629 ...
Page 2: ...s 4 Intended Use Of The Machine 5 Technical Data 6 Machine Configuration Models 7 Machine Standard Equipment 9 Optional Equipment 10 Safety Prescriptions 11 Transport recommendations 12 Machine Stability 13 Workplace 13 Emergency Stop Installation Exemption 13 Machine Setup For Beveling 14 Reduced Shaft Kit Assembly 21 Elbow Shaft Kit Assembly 29 Pneumatic Locking Device Assembly 38 Converting The...
Page 3: ... quality system regulations UNI EN ISO 9001 SGS ITALIA S R L N IT 96 088 1996 This Manual is supplied together with the machine it makes reference to The customer may ap ply for further copies to G B C Industrial Tools S p a Our company owns the copyright of this document and any partial or complete copy or distribution to natural persons or to corporate bodies is strictly forbidden unless our pri...
Page 4: ...ndustrial Tools S p A and MSS obligations will cover the defect resolution the general maintenance and the inspection of the parts subject of the claim only The component replacement is at G B C Industrial Tools S p A discretion only The ship men to costs from and to the MSS as well as the direct and indirect costs rising from repair of the product are at user s charge Any warranty repair or extra...
Page 5: ...TED ONLY BY SPECIALIZED OPERATORS WHO HAVE BEEN DULY TRAINED ON THE UNIT FOLLOWING TO A SPECIFIC FORMATION WE DO NOT ENVISAGE ANY REASONABLY PREDICTALBE MISUSE OF THE UNIT The machine shown in the drawing is conceived for beveling pipe ends and to prep the for the subsequent welding process It works gripped into the ID of the pipe The bevel is obtained by bevelling tools of various shape and mater...
Page 6: ... 82 8 bar 124 116 Stroke mm inches 40 1 57 40 1 57 40 1 57 Pneumatic Motor Power Hp W 1 07 800 Air Consumption Nl min cfm 1000 35 31 Air Pressure Bar psi 6 8 87 116 Air Hose Connection Pollici inches 1 2 1 2 Electric Motor Power W 1300 720 Tension Volt 110 230 18V 4 0 Ah Frequency Hz 50 Max Acoustic Emission Db 75 75 75 Machine Weight Kg 9 10 10 MACHINE DIMENSIONS PNEUMATIC PN LOCK ELECTRIC BATTER...
Page 7: ...rdo al 1 7 4 della direttiva macchine 2006 42 CE G B C Industrial Tools S p A Via Sandro Pertini 41 43 25046 Cazzago San Martino Bs Italia Tel 39 030 7451154 Fax 39 030 73 56 629 BOILER 1 4 K BOILER 1 4 K E BOILER 1 4 K With Autolock BOILER 1 4 K Ratchet ...
Page 8: ... Bs Italia Tel 39 030 7451154 Fax 39 030 73 56 629 The machine is supplied with Locking jaws complete kit from 23 to 108 mm one measure of which is already mounted on the unit 4 mm Allen Key 24 mm Double Ended Hexagon Tubular Socket Wrench 14 17 mm wrench Storage Case Instruction Manual And Exploded Drawings Boiler 1 4 K Service Tools Case Instruction Manual And Exploded Drawings ...
Page 9: ...accordo al 1 7 4 della direttiva macchine 2006 42 CE G B C Industrial Tools S p A Via Sandro Pertini 41 43 25046 Cazzago San Martino Bs Italia Tel 39 030 7451154 Fax 39 030 73 56 629 INTERCHANGEABLE ELBOW SHAFTS FOR CURVED ID PIPES FROM 46mm to 103mm ...
Page 10: ...ions and all the instructions and that they are qualified to operate the unit Strictly attain to the indications given by the international symbols applies on the ma chine and or on its case Do not perform any maintenance operation when the machine is plugged to the power supply Before every use ensure the power supply connections to be conform to the specifics given by our manual The authorized o...
Page 11: ...0x480x240 Shipping Weight kg 35 Under 25 Kgs no lifting machines are required 1 Always wear protective gloves and eyewear 2 Always disconnect the machine from the power source during the setup 3 Always use both hands while operating the machine one on the security lever and one on the feeding hand wheel 4 The Instruction Manual and the drawings will supply quick and easy ex planations Using proper...
Page 12: ...ax 39 030 73 56 629 Considering the mass of the machine no particular problem has been detected in regard to the operator safety By always using both hands for operating the machine the operator is unable to reach the bevelling tools as the unit would suddenly stop motor brake As provided for the paragraph 1 2 4 3 of the attachment 1 of the Machinery Di rective portable machines are exempt to have...
Page 13: ...6 Cazzago San Martino Bs Italia Tel 39 030 7451154 Fax 39 030 73 56 629 Ensure the vane expansion nut is not abutted then unscrew the vane abutment cap and the vane abutment bush WARNINIG DO NOT MOVE THE EXPANSION SHAFT The expansion shaft can be moved by the vane expansion nut after having replaced the locking jaws Remove the locking jaws you want to replace ...
Page 14: ... Bs Italia Tel 39 030 7451154 Fax 39 030 73 56 629 Select the LOCKING JAWS according to the diameter of the pipe and install them on the expansion shaft as shown in the picture While holding the three LOCKING JAWS you have just mounted unscrew the VANE EXPANSION NUT in order to let them enter their seat If the procedure is correctly made the locking jaws should have a little play ...
Page 15: ... Via Sandro Pertini 41 43 25046 Cazzago San Martino Bs Italia Tel 39 030 7451154 Fax 39 030 73 56 629 Screw back on clockwise the vane expansion bush all way down and then the vane expansion nut While keeping the machine in axis with the pipe insert the SHAFT in the pipe about 15 20mm Firmly screw clockwise the VANE EXPANSION NUT ...
Page 16: ...a Sandro Pertini 41 43 25046 Cazzago San Martino Bs Italia Tel 39 030 7451154 Fax 39 030 73 56 629 Select the BEVELLING TOOL in regard to the bevel you need to perform and insert it on the CHUCK locking it with the two grub screws by using the Allen key You will want to use two paired cutting tools and one facing tools when required ...
Page 17: ...006 42 CE G B C Industrial Tools S p A Via Sandro Pertini 41 43 25046 Cazzago San Martino Bs Italia Tel 39 030 7451154 Fax 39 030 73 56 629 Connect the machine to the air hose Press the button lever upwards to actuate the machine WARNING You will need to apply a constant pressure on the lever ...
Page 18: ... S p A Via Sandro Pertini 41 43 25046 Cazzago San Martino Bs Italia Tel 39 030 7451154 Fax 39 030 73 56 629 The machine feeding is actuated by turning the hand wheel clockwise as shown in the picture Maintain a constant and continuous action to obtain a uniform feeding The motor will automatically stop by releasing the lever ...
Page 19: ...ro Pertini 41 43 25046 Cazzago San Martino Bs Italia Tel 39 030 7451154 Fax 39 030 73 56 629 WARNING DURING THE OPERTIONS PAY ATTENTION NOT TO TOUCH THE LOCKING JAWS WITH THE TOOLS AS THESE MAY GET DAMAGED 1 2 REMOVING THE MACHINE FROM THE PIPE 1 Unscrew the vane expansion nut using the wrench supplied with the machine 2 Remove the machine ...
Page 20: ...4 della direttiva macchine 2006 42 CE G B C Industrial Tools S p A Via Sandro Pertini 41 43 25046 Cazzago San Martino Bs Italia Tel 39 030 7451154 Fax 39 030 73 56 629 Unscrew the vane abutment cap and the vane abutment bush counter clockwise Remove the locking jaws ...
Page 21: ...ine 2006 42 CE G B C Industrial Tools S p A Via Sandro Pertini 41 43 25046 Cazzago San Martino Bs Italia Tel 39 030 7451154 Fax 39 030 73 56 629 Screw the vane expansion nut until it s butted to the machine By using long nose pliers rotate clockwise the expansion shaft until it comes out ...
Page 22: ... macchine 2006 42 CE G B C Industrial Tools S p A Via Sandro Pertini 41 43 25046 Cazzago San Martino Bs Italia Tel 39 030 7451154 Fax 39 030 73 56 629 Remove the vane expansion nut Remove the grub screw cap and the grub screw from the cover case in order to release the guiding shaft ...
Page 23: ...ial Tools S p A Via Sandro Pertini 41 43 25046 Cazzago San Martino Bs Italia Tel 39 030 7451154 Fax 39 030 73 56 629 Remove the shaft by rotating the hand wheel clockwise Take the guiding shaft from the reduced shaft kit and mark the groove of the lap joint as well as the far end of the shaft as shown in the picture ...
Page 24: ... p A Via Sandro Pertini 41 43 25046 Cazzago San Martino Bs Italia Tel 39 030 7451154 Fax 39 030 73 56 629 Insert the expansion shaft in the machine and align it s lap joint with the hole of the cover case where you will want to insert the two grub screws previously removed Rotate the hand wheel to get the shaft in the machine ...
Page 25: ...direttiva macchine 2006 42 CE G B C Industrial Tools S p A Via Sandro Pertini 41 43 25046 Cazzago San Martino Bs Italia Tel 39 030 7451154 Fax 39 030 73 56 629 Reassemble the grub screw and the grub screw cover locking them tight Screw in all way down the vane expansion nut ...
Page 26: ...ools S p A Via Sandro Pertini 41 43 25046 Cazzago San Martino Bs Italia Tel 39 030 7451154 Fax 39 030 73 56 629 Insert the reduced expansion shaft By using a inserted in the vane expansion nut screw the vane expansion shaft until it s positioned 2mm inside from the end of the reduced guiding shaft as shown in the picture ...
Page 27: ... Italia Tel 39 030 7451154 Fax 39 030 73 56 629 Select the correct locking jaws according to the ID of the pipe you need to work and place them in the shaft as shown in the picture While holding the three LOCKING JAWS you have just mounted unscrew the VANE EXPANSION NUT in order to let them enter their seat If the procedure is correctly made the locking jaws should have a little play ...
Page 28: ... direttiva macchine 2006 42 CE G B C Industrial Tools S p A Via Sandro Pertini 41 43 25046 Cazzago San Martino Bs Italia Tel 39 030 7451154 Fax 39 030 73 56 629 Screw back on the vane expansion nut all the way Rotate the shaft clockwise with long nose pliers and extract it ...
Page 29: ...tiva macchine 2006 42 CE G B C Industrial Tools S p A Via Sandro Pertini 41 43 25046 Cazzago San Martino Bs Italia Tel 39 030 7451154 Fax 39 030 73 56 629 Remove the vane expansion nut Remove the grub screw cap and the grub screw from the cover case in order to release the shaft ...
Page 30: ...hine 2006 42 CE G B C Industrial Tools S p A Via Sandro Pertini 41 43 25046 Cazzago San Martino Bs Italia Tel 39 030 7451154 Fax 39 030 73 56 629 Remove the shaft by rotating the hand wheel clockwise Extract the tool abutment chuck by using the special tool not supplied with the machine ...
Page 31: ...S p A Via Sandro Pertini 41 43 25046 Cazzago San Martino Bs Italia Tel 39 030 7451154 Fax 39 030 73 56 629 Insert the tool abutment bush supplied with the elbow locking kit Take the shaft from the reduced shaft kit and use a marker to mark the groove of the lap joint as well as the far end of the shaft as shown in the picture ...
Page 32: ... S p A Via Sandro Pertini 41 43 25046 Cazzago San Martino Bs Italia Tel 39 030 7451154 Fax 39 030 73 56 629 Insert the elbow shaft in the machine and align its lap joint with the hole of the cover case where the two grub screws should then be screwed back in Rotate the hand wheel in order to get the shaft inside the machine ...
Page 33: ...ttiva macchine 2006 42 CE G B C Industrial Tools S p A Via Sandro Pertini 41 43 25046 Cazzago San Martino Bs Italia Tel 39 030 7451154 Fax 39 030 73 56 629 Screw back in all way down the vane expansion nut Screw back in the grub screw and the grub screw cover locking them tight ...
Page 34: ...6 42 CE G B C Industrial Tools S p A Via Sandro Pertini 41 43 25046 Cazzago San Martino Bs Italia Tel 39 030 7451154 Fax 39 030 73 56 629 Slide in the elbow shaft Screw by using long nose pliers in the elbow shaft using a screwdriver until it extends 20mm from the head as shown in the picture 20 ...
Page 35: ...ne 2006 42 CE G B C Industrial Tools S p A Via Sandro Pertini 41 43 25046 Cazzago San Martino Bs Italia Tel 39 030 7451154 Fax 39 030 73 56 629 Slide the selected locking jaws in the expansion shaft Fix the cover with the special screws supplied with it The machine is now ready to be used ...
Page 36: ...e 2006 42 CE G B C Industrial Tools S p A Via Sandro Pertini 41 43 25046 Cazzago San Martino Bs Italia Tel 39 030 7451154 Fax 39 030 73 56 629 Ensure the vane expansion nut is not abutted then unscrew the vane abutment cap and the vane abutment bush counter clockwise Remove the locking jaws ...
Page 37: ... direttiva macchine 2006 42 CE G B C Industrial Tools S p A Via Sandro Pertini 41 43 25046 Cazzago San Martino Bs Italia Tel 39 030 7451154 Fax 39 030 73 56 629 Screw back on the vane expansion nut all the way Rotate the shaft clockwise with long nose pliers and extract it ...
Page 38: ... G B C Industrial Tools S p A Via Sandro Pertini 41 43 25046 Cazzago San Martino Bs Italia Tel 39 030 7451154 Fax 39 030 73 56 629 Unscrew the vane expansion nut In replacement of the vane expansion nut you will need to screw the counter nut and then the pneumatic locking device as shown in the picture ...
Page 39: ...2 CE G B C Industrial Tools S p A Via Sandro Pertini 41 43 25046 Cazzago San Martino Bs Italia Tel 39 030 7451154 Fax 39 030 73 56 629 Screw the locking device and fix it in position with the counter nut As shown in the picture Unscrew the nipple and install the air connector supplied with the kit ...
Page 40: ...ine 2006 42 CE G B C Industrial Tools S p A Via Sandro Pertini 41 43 25046 Cazzago San Martino Bs Italia Tel 39 030 7451154 Fax 39 030 73 56 629 After having supplied the pneumatic locking device with air move the lever downward to move the locking piston forward Plug the air supply tube ...
Page 41: ... CE G B C Industrial Tools S p A Via Sandro Pertini 41 43 25046 Cazzago San Martino Bs Italia Tel 39 030 7451154 Fax 39 030 73 56 629 Slide the vane expansion shaft into the guiding shaft and screw it counter clockwise until you will obtain a gap of 0 5 1 mm by screwing back on the vane abutment cap ...
Page 42: ...030 73 56 629 After having supplied the pneumatic locking device with air keep the locking jaws pressed with your hand and move the lever upward to get the expansion shaft withdrawn in the machine If the assembling has been correctly executed the locking jaws should a little play in their seat Select the LOCKING JAWS according to the diameter of the pipe and install them on the expansion shaft as ...
Page 43: ...dro Pertini 41 43 25046 Cazzago San Martino Bs Italia Tel 39 030 7451154 Fax 39 030 73 56 629 In the rear part of the locking device you shall now insert the stem and the two grub screws as shown in the pictur making sure not to move the expansion shaft Screw back on the vane abutment bush and the vane abutment cap counter clockwise 2 1 3 ...
Page 44: ...accordo al 1 7 4 della direttiva macchine 2006 42 CE G B C Industrial Tools S p A Via Sandro Pertini 41 43 25046 Cazzago San Martino Bs Italia Tel 39 030 7451154 Fax 39 030 73 56 629 Screw the grub screws and the knobs supplied with the locking device ...
Page 45: ...6 Cazzago San Martino Bs Italia Tel 39 030 7451154 Fax 39 030 73 56 629 Insert the expansion shaft in the machine and align its lap joint with the hole of the cover case where you will want to insert the two grub screws previously removed Rotate the hand wheel to get the shaft in the machine Reassemble the grub screw and the grub screw cover locking them tight ...
Page 46: ...e 2006 42 CE G B C Industrial Tools S p A Via Sandro Pertini 41 43 25046 Cazzago San Martino Bs Italia Tel 39 030 7451154 Fax 39 030 73 56 629 Remove the locking jaws Ensure the vane expansion nut is not abutted then unscrew the vane abutment cap and the vane abutment bush counter clockwise ...
Page 47: ... direttiva macchine 2006 42 CE G B C Industrial Tools S p A Via Sandro Pertini 41 43 25046 Cazzago San Martino Bs Italia Tel 39 030 7451154 Fax 39 030 73 56 629 Screw back on the vane expansion nut all the way Rotate the shaft clockwise with long nose pliers and extract it ...
Page 48: ...tiva macchine 2006 42 CE G B C Industrial Tools S p A Via Sandro Pertini 41 43 25046 Cazzago San Martino Bs Italia Tel 39 030 7451154 Fax 39 030 73 56 629 Remove the vane expansion nut Remove the grub screw cap and the grub screw from the cover case in order to release the shaft ...
Page 49: ...ial Tools S p A Via Sandro Pertini 41 43 25046 Cazzago San Martino Bs Italia Tel 39 030 7451154 Fax 39 030 73 56 629 Remove the shaft by rotating the hand wheel clockwise Take the guiding shaft from the reduced shaft kit and mark the groove of the lap joint as well as the far end of the shaft as shown in the picture ...
Page 50: ...ls S p A Via Sandro Pertini 41 43 25046 Cazzago San Martino Bs Italia Tel 39 030 7451154 Fax 39 030 73 56 629 Assemble the reduction inside the locking device like you see here above In replacement of the vane expansion nut you will need to screw the counter nut and then the pneumatic locking device as shown in the picture ...
Page 51: ...rettiva macchine 2006 42 CE G B C Industrial Tools S p A Via Sandro Pertini 41 43 25046 Cazzago San Martino Bs Italia Tel 39 030 7451154 Fax 39 030 73 56 629 Screw the locking device and fix it in position with the counter nut As shown in the picture Plug the air supply tube ...
Page 52: ...C Industrial Tools S p A Via Sandro Pertini 41 43 25046 Cazzago San Martino Bs Italia Tel 39 030 7451154 Fax 39 030 73 56 629 By using a tongs inserted in the vane expansion nut screw the vane expansion shaft until it is positioned 2mm inside from the end of the reduced guiding shaft as shown in the picture ...
Page 53: ... Tel 39 030 7451154 Fax 39 030 73 56 629 Select the correct locking jaws according to the ID of the pipe you need to work and place them in the shaft as shown in the picture After having supplied the pneumatic locking device with air move the lever downward to move the locking piston forward that must be 2mm inside from the end of the reduced guiding shaft as show in the picture here below ...
Page 54: ...vice you shall now insert the stem and the two grub screws as shown in the picture making sure not to move the expansion shaft by use the key to lock the nut in the back of the locking device After having supplied the pneumatic locking device with air keep the locking jaws pressed with your hand and move the lever upward to get the expansion shaft with drawn in the machine If the assembling has be...
Page 55: ...v 2011 in accordo al 1 7 4 della direttiva macchine 2006 42 CE G B C Industrial Tools S p A Via Sandro Pertini 41 43 25046 Cazzago San Martino Bs Italia Tel 39 030 7451154 Fax 39 030 73 56 629 Screw the nut as show in the picture here above ...
Page 56: ...ial Tools S p A Via Sandro Pertini 41 43 25046 Cazzago San Martino Bs Italia Tel 39 030 7451154 Fax 39 030 73 56 629 Remove the screws from the motor flange Hold the motor and pull it applying a little rotating movement until it comes off N B While performing this operation ensure that the pinion remains in its seat ...
Page 57: ... B C Industrial Tools S p A Via Sandro Pertini 41 43 25046 Cazzago San Martino Bs Italia Tel 39 030 7451154 Fax 39 030 73 56 629 Insert the electric drive device making sure that the key on its shaft fits the seat on the pinion placed into the machine After a successful positioning fix the flange screws ...
Page 58: ...ned is supplied by G B C In dustrial Tools S p A only Perform a compressed air periodical cleaning on the threaded part of the guid ing shaft and in the rear part of the machine Always ensure that the seats of the tools on the chuck are clean Every 20 30 hours ensure the security valve has no air leaks Ensure no air leaks are present on the air supply system nearby the connection between the machi...
Page 59: ...ne does not run properly Check the condition of the shaft and verify it to perfectly spins around its axis of rotation The machine does not bevel Check the beveling tools condition and ensure that the pipe you are working does not require special bevelling tools due to its composition Always ask suggestions to your referent in G B C as we are at your complete disposal The acoustic emissions are wi...