C300 MKII Operation
Page 38
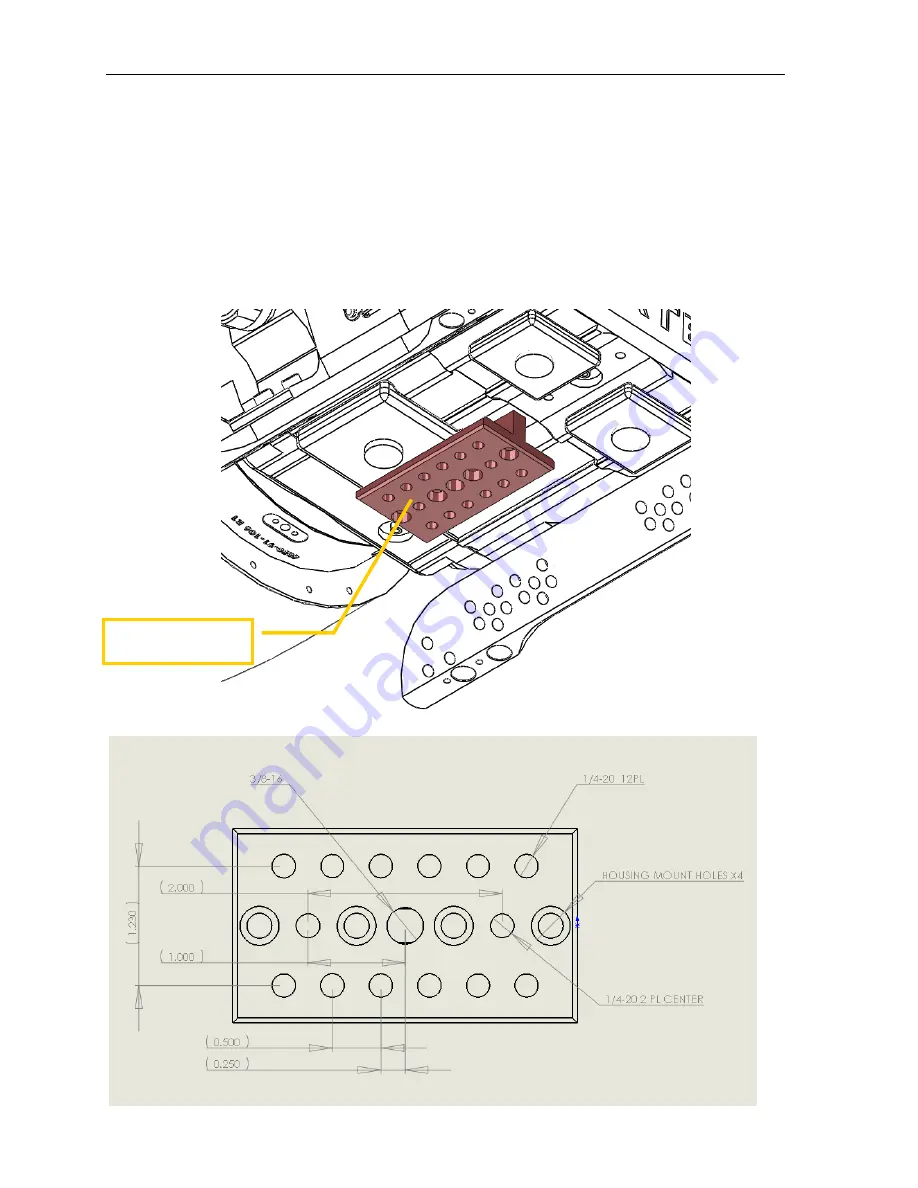
Tripod Mount (Optional)
An optional Tripod Mount (for use with third party tripods) can be secured to the base of
the shell. The Tripod Mount has additional ¼-20 threaded holes for mounting other
items as you need.
Tripod Mount
(Optional)


