


SV12
User Manual & Install Guide
21 of 26
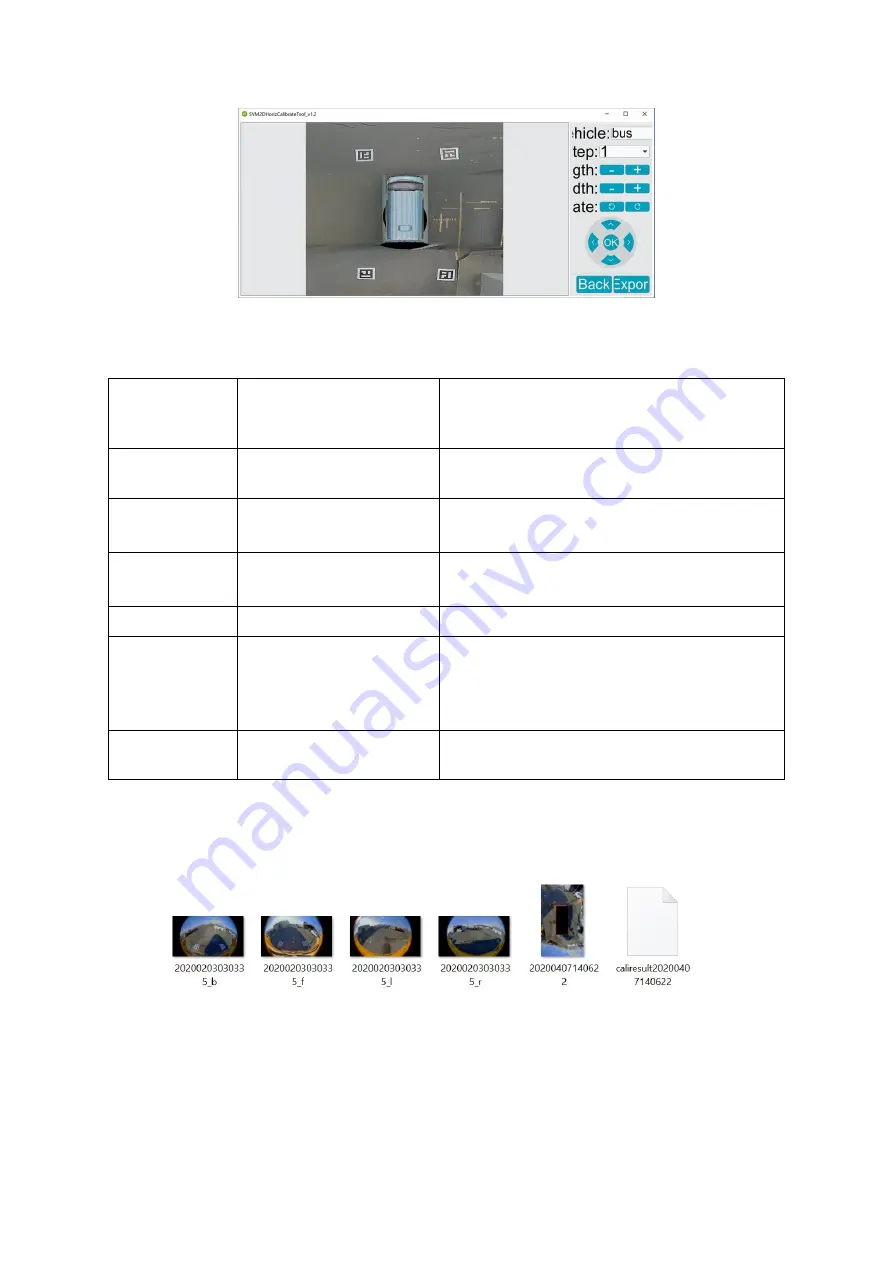
After calibration, the blind spots need to be covered around the graphic model of the vehicle. Use the
tools to increase or decrease the size of graphic
model of the vehicle.
Vehicle
Select the type of the vehicle.
▪
Bus
▪
Car
Step
Default value:
▪
1
Width
Click on “
-
“ to decrease the size of model vehicle.
Click on “+” to increase the size of model vehicle.
Length
Click on “
-
“ to
decrease the size of model vehicle.
Click on “+” to increase the size of model vehicle.
Rotate
Click on the rotate icons to rotate.
Arrow Keys
Click on the arrows to centre the vehicle model.
Then press “Ok”.
SVM2DHorizCalibrateTool_v1.2 will show the
overview of the calibration.
Export
Select on “Export” to export the settings to the
USB flash drive.
After exporting, open the USB flash drive
▪
You must see a folder with name
“
import
XXX”.
▪
When you open the folder, you must see pictures and the caliresultXXXX file.
▪
Note the name of the file, it will help you wile importing to the video processing unit.
3.3.3.2.3
Manual Calibration
After exporting the files to SVM2DHorizCalibrateTool_v1.2 softw
are, and after clicking on “Calibration”,
sometimes the software will not calibrate by itself. The user needs to mark the points on the boards
manually.


