background image

33

Note

The kettle will switch OFF automatically, when removed from the power base during 

operation. Thus, you can stop operation at any time by simply removing the kettle 

from the power base. If you wish to use the kettle again, simply place the kettle onto 

the power base and select the desired temperature function (see: ‘Properties of Your 

New Water Kettle’). 

1.   Remove the kettle from the power base, and press the lid lock buttons to remove the 

lid. Fill in at least 0.2 litres (1 large coffee cup) of cold, clear drinking water via the 

top opening. You may fill the kettle up to the MAX filling mark (1.7 litres) within the 

kettle. After filling, place the lid in correct orientation onto the kettle (pouring button 

over the handle) and press the lid down until it settles with a click.

2.   Place the power base onto a suitable table or counter. Ensure that the exterior of the 

power base and kettle are clean and dry. Then place the kettle on the power base. 

3.   Insert the power plug into a suitable wall power outlet. A signal sounds and the dis-

play illuminates.

Note

With the kettle on the power base, the display shows the current temperature within the 

kettle. If you remove the kettle, the display will show 3 dashes. However, for saving 

energy, the display will go out after approx. 30 seconds, if the appliance is left idle. 

In this case, simply touch any button to reactivate the display. When selecting a tem-

perature not more than 5°C different from the current water temperature shown on the 

display, the heating plate will not be activated.

4.   Select the desired function, as described below. You may select a special tempe-

rature or bring the water to the boil. Additionally, you may use the Keep Warm 

Function. However, you can cancel any heating process at any time by touching the 

ON/OFF button or removing the kettle from the power base. The indicators “HEAT” 

or “WARM” will be deleted from the display and the heating plate will be switched 

off.

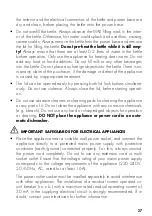
Important:

 Keep in mind, that hot steam can escape from the spout und under the 

lid, especially when opening the lid. Always stay in appropriate distance to the kettle 

during operation and shortly thereafter. Always ensure to hold the kettle level when it 

is filled with water, to avoid overflow. Avoid opening the lid, while the water within 

the kettle is still hot. Pour with the lid closed by pressing the pouring button.

Summary of Contents for 42426

Page 1: ...anleitung vor Gebrauch unbedingt lesen Modell und Zubeh r nderungen vorbehalten Nur f r den Hausgebrauch Art Nr 42426 Design Wasserkocher Advanced Thermo DESIGN WASSERKOCHER ADVANCED THERMO BEDIENUNGS...

Page 2: ...anced Thermo kennenlernen 4 Sicherheitshinweise 5 Allgemeine Hinweise zur Sicherheit 5 Wichtige Sicherheitshinweise Elektrizit t 8 M gliche Gef hrdungen durch hohe Temperaturen 9 Technische Daten 10 E...

Page 3: ...d sinnvoll ist sollten Sie den Design Wasser kocher Advanced Thermo beim Erhitzen von Trinkwasser bevorzugen Durch die elektronische Steuerung k nnen Sie das Wasser auf eine beliebige Tempera tur erw...

Page 4: ...HER ADVANCED THERMO KENNENLERNEN T lle Isolierender Deckel mit Gie taste Verriegelungstasten Gie taste Henkel Doppelwandiger Kessel Basisstation mit Netzkabel Ein Aus Taste Temperaturwahltasten und Di...

Page 5: ...en zu Sachsch den sowie zu schweren Personensch den durch gef hrliche elektrische Spannung Feuer und hohe Temperaturen f hren F hren Sie ausschlie lich diejenigen Arbeiten am Ger t durch die in diesen...

Page 6: ...cker aus der Steckdose wenn w hrend des Betriebes ein ernstes Problem auftritt Beispiel Wasser l uft aus berhitzung Die Arbeitsfl che muss gut zug nglich w rmebest ndig fest eben tro cken und ausreich...

Page 7: ...um Betrieb m ssen immer mindestens 0 2 Liter Wasser im Kessel sein Benutzen Sie den Wasserkocher ausschlie lich zum Erhitzen von sauberem Trinkwasser Niemals Lebensmittel oder Lebensmittelzus tze in d...

Page 8: ...b dort m glich ist Niemals am Kabel ziehen oder rei en Das Kabel nicht knicken ein klemmen quetschen oder verknoten Achten Sie darauf dass das Netz kabel nicht ber die Tischkante herunterh ngt Achten...

Page 9: ...ers beim Ausgie en spritzen und zu Verbr hungen f hren Der Deckel muss w hrend des Betriebes immer fest geschlossen sein Beim Deckel kann w hrend des Betriebes und kurz danach hei er Dampf austreten N...

Page 10: ...weichen muss der sich beim Erhitzen des Wassers bildet Wenn Sie den gef llten Kessel nach dem Betrieb tragen dann achten Sie deshalb darauf den Kessel aufrecht zu halten um Personen und Sachsch den du...

Page 11: ...en und das Ger t verbraucht unn tig viel Energie Au er dem besteht bei ge ffnetem Deckel die Gefahr sich am austretenden Dampf oder Spritzern des kochenden Wassers zu verbr hen Wichtig Das Ger t muss...

Page 12: ...e Pflege und Reinigung Zu wenig Wasser im Kessel F llen Sie zum Betrieb immer mindestens 0 2 Liter Was ser ein 1 gro er voller Kaffeebecher bevor Sie den Kessel auf die Basisstation stellen Bedenken S...

Page 13: ...leine Kinder unzug nglich ist Achten Sie w hrend des Betriebes darauf dass niemand am Kabel des Ger tes ziehen kann Stellen Sie das Ger t nur auf einer ausreichend festen sta bilen und waagerechten Ar...

Page 14: ...en Sie den Kessel wieder auf die Basisstation und schalten das Ger t ein 1 Nehmen Sie den Kessel von der Basisstation und dr cken Sie die beiden Verriegelungs tasten zusammen um den Deckel abzunehmen...

Page 15: ...hmen Sie den Kessel gleich nach Erreichen der gew nschten Temperatur von der Basisstation herunter Wenn Sie das Wasser zum sofortigen Trinken oder zur Zubereitung von Babynahrung erw rmt haben dann ve...

Page 16: ...hne zus tzliches Heizen bis zu 1 Stunde warm Die maximale Laufzeit der Warmhalte Funktion ist auf 4 Stunden begrenzt um unn tigen Energieverbrauch zu vermeiden NACH DEM HEIZVORGANG WARNUNG Wenn Sie da...

Page 17: ...en Sie den Wasserkocher aus ziehen Sie den Netzste cker aus der Steckdose und lassen Sie den Kessel abk hlen bevor Sie das Ger t rei nigen Trocknen Sie bergelaufenes Wasser oder Kondenswasser immer so...

Page 18: ...der ein handels bliches fl ssiges Mittel f r elektrische Boiler sie he Entkalken Abh ngig von der Wasserh rte des verwendeten Wassers bilden sich unterschiedlich schnell Kalkablagerungen Kesselstein u...

Page 19: ...gesch tzt und f r kleine Kinder unzug nglich ist Legen Sie keine schweren oder harten Gegenst nde auf das Ger t oder seine Bauteile Legen Sie keine Fremdk rper in den Kessel Stellen Sie den Kessel am...

Page 20: ...wicklung m chten wir Sie bitten Gastroback Produkte an folgende Anschrift zu senden Gastro back GmbH Gewerbestr 20 21279 Hollenstedt Kunden anderer L nder Bitte kontaktieren Sie Ihren H ndler Bitte ha...

Page 21: ...ovided instructions before first usage Model and attachments are subject to change For household use only Art No 42426 Design Water Kettle Advanced Thermo DESIGN WATER KETTLE ADVANCED THERMO OPERATING...

Page 22: ...NTENTS Knowing Your Design Water Kettle Advanced Thermo 24 Important Safeguards 25 General Safety Instructions 25 Important Safeguards for Electrical Appliances 27 High Temperatures Risk of Burns 28 T...

Page 23: ...ter Kettle Advanced Thermo for heating clear drinking water The electronic control enables heating the water up to a desired temperature in the ran ge of 40 C to 100 C The display will show the actual...

Page 24: ...ouring lock Lid lock buttons Pouring lock Handle Double walled vacuum kettle Power base including power button On OFF button Temperature selection buttons und Display Keep warm button KNOWING YOUR DES...

Page 25: ...amage by electric shock heat or fire Do not leave the appliance unattended when it is connected to the power supply Any operation repair and technical maintenance of the appliance or any part of it e...

Page 26: ...arge table or counter Do not place the appliance on inclined surfaces where it can tilt overflow or fall Ensure that the base will stand stable before placing the kettle on it and operating the applia...

Page 27: ...before starting operati on Do not use abrasive cleaners or cleaning pads for cleaning the appliance or any part of it Do not clean the appliance with any corrosive chemicals e g bleach Do not use any...

Page 28: ...sharp edges Do not place the appliance on a power cord If the power cord is obviously damaged and or gets hot during operation replace the power cord completely DO NOT attempt to repair any power cord...

Page 29: ...e could still rise even after the kettle automatically switched off When heating water for immediate con sumption or for preparing baby food always ensure that the water has the desired temperature To...

Page 30: ...ds regular de scaling see Care and Cleaning Otherwise the temperature con trol will not work properly there will be an increasing energy loss and overheating of the heating plate could occur FUNCTIONS...

Page 31: ...s case remove the kettle from the power base and pour out the water Then leave the kettle cool down by waiting approx 15 minutes Thereafter you can reactivate the appliance BEFORE FIRST USE WARNING DO...

Page 32: ...ensate and steam when pouring hot water and or opening the lid shortly after operation Do not hold your hands or face over the kettle during operation and shortly there after and when pouring hot wate...

Page 33: ...the power base the display shows the current temperature within the kettle If you remove the kettle the display will show 3 dashes However for saving energy the display will go out after approx 30 sec...

Page 34: ...s on the display Thereafter the appliance starts heating The current water temperature and the indicator HEAT are displayed You may change the set temperature any time For this simply touch the temper...

Page 35: ...ke the kettle off the power base Be aware that the water could still be boiling within the kettle thus splashing out of the spout Thus press the pouring button several times before pouring Pour hot wa...

Page 36: ...ttle with clear tap water after usage and descale the kettle regularly If required wipe the exterior of the appliance using a soft damp cloth moistened with a little dishwater Then wipe with clear wat...

Page 37: ...AX Using the ON OFF button bring the water to the boil Then discard the hot water Rinse again with clear tap water 5 If you notice still some smell of descaler within the kettle repeat step 4 until th...

Page 38: ...n landfills dumps or refuse incineration hazardous substances can leak into the groundwater or can be emitted into air thus getting into the food chain and damaging your health and well being as well...

Page 39: ...countries Please contact your dealer Please agree that we cannot bear the charge of receipt Submission of appliances Please ensure packing the appliance ready for shipment without accessories Add the...

Page 40: ...GASTROBACK GmbH Gewerbestra e 20 21279 Hollenstedt Germany Telefon 49 0 4165 2225 0 Telefax 49 0 4165 2225 29 info gastroback de www gastroback de 20180207...

Reviews: