background image

2

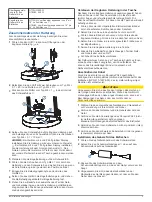
Attach the handle to the portable mount using two 

M4×0.7×40 mm screws 

Â

 and M4×7 nuts 

Ã

.

3

Press the M6×1 nut 

Ä

 into the bottom of the swivel-mount 

base 

Å

.

4

Place the swivel-mount base on the portable mount and 

fasten the swivel-mount base using the three M4×0.7×10 mm 

screws 

Æ

.

NOTE: 

For 4" and 5" units, install the mount on the front hole 

pattern 

Ç

. For 6" and 7" units, install the mount on the rear 

hole pattern 

È

. The rear hole pattern allows more room in 

front of the unit to close the front zipper of the bag.

5

Place the bail-mount bracket on the swivel-mount base.

6

Install the M6×1.0 mm screw through the bracket and base, 

and tighten to the preferred position.

7

Screw the bail-mount knobs into the sides of the device.

8

Place the device in the bail mount bracket and tighten the 

bail-mount knobs.

9

If necessary, pull out enough slack from the power and 

transducer cables so the mount can fully tilt to the preferred 

positions when the cables are connected.

Placing the Portable Mount in the Bag

After you have assembled the portable mount, you can place it 

in the bag, which makes it easier to carry and protects it from 

the elements. The bag contains loops that allow you to tether 

the bag as needed.

1

Slide two of the included hook and loop straps through the 

narrow slots beside the battery compartment.

2

Place the battery into the battery compartment under the 

handle.

3

Pull the straps under and around the bottom of the portable 

mount, and wrap them tightly around the battery.

4

Place the transducers into the recessed spaces in front of the 

bail mount.

5

Place the portable mount into the bag.

6

If necessary, wrap the excess power cable and transducer 

cables around the handle.

7

Close all of the zippers.

You can use the zipper at the back of the bag for quick access 

to charge the battery. You can store the wall charger in the 

interior zippered pocket.

Connecting the Cables

If you are connecting the unit to a Panoptix

 PS22, you must 

have a compatible unit and an ice fishing power cable (GPN 

010-12676-35), which is not included with some models.

 CAUTION

Ensure that you connect the correct spade connector to the 

correct battery terminal. Damage to the battery or device, or 

bodily harm may occur if the device is improperly connected to 

the battery.

1

Select the appropriate power cable and transducer cable to 

use with your device and transducer.

2

Connect the power cable and transducer cables to the 

device.

3

Connect the Panoptix PS22 (not included) power wires to the 

gray bare wire connectors on the ice fishing power cable.

4

Slide the red spade connector onto the positive (red) terminal 

on the battery.

5

Slide the black spade connector onto the negative (black) 

terminal on the battery.

Installing the Ice Fishing Transducer

1

Insert the transducer cable through the float.

2

Snap the float stop 

À

 onto the transducer cable, on the top of 

the float.

3

Adjust the float and float stop so the transducer is hanging 

beneath the ice.

4

With the transducer cable connected to the back of the 

device, drop the transducer into the water.

Installation Instructions

3

Summary of Contents for PORTABLE ICE FISHING KIT

Page 1: ...nstalaci n 10 Instru es de instala o 12 Installationsvejledning 14 Installeringsinstruksjoner 16 Installationsinstruktioner 18 Garmin and the Garmin logo are trademarks of Garmin Ltd or its subsidiari...

Page 2: ...battery You should always use the all in one cable to charge the battery 1 Connect the red and black spade connectors from the all in one cable onto the corresponding battery terminals 2 Connect the...

Page 3: ...mount and wrap them tightly around the battery 4 Place the transducers into the recessed spaces in front of the bail mount 5 Place the portable mount into the bag 6 If necessary wrap the excess power...

Page 4: ...F et 122 F Chargement de la batterie ATTENTION Assurez vous de brancher le connecteur cosse plate appropri sur la borne de la batterie qui lui correspond Si vous n effectuez pas le branchement correc...

Page 5: ...ntes situ es proximit du compartiment de la batterie 2 Placez la batterie dans le compartiment de la batterie sous la poign e 3 Tirez les sangles dessous et autour de la base du support portable puis...

Page 6: ...batteria utilizzare sempre il cavo multifunzione 1 Collegare i connettori rosso e nero del cavo multifunzione ai terminali corrispondenti della batteria 2 Collegare il cavo multifunzione al caricabatt...

Page 7: ...pazi di fronte alla staffa 5 Inserire il supporto portatile nella custodia 6 Se necessario avvolgere il cavo di alimentazione e i cavi del trasduttore in eccesso intorno alla maniglia 7 Chiudere tutte...

Page 8: ...gen Verwenden Sie den Akku nicht wenn die Temperatur au erhalb des Bereichs von 15 C und 50 C 5 F und 122 F liegt Aufladen des Akkus ACHTUNG Vergewissern Sie sich dass Sie den richtigen Kabelschuh an...

Page 9: ...e bei Bedarf befestigen k nnen 1 F hren Sie zwei der mitgelieferten Klettverschluss B nder durch die schmalen Schlitze neben dem Akkufach 2 Setzen Sie den Akku in das Akkufach unter dem Griff 3 F hren...

Page 10: ...ones f sicas Debes utilizar siempre el cable todo en uno para cargar la bater a 1 Conecta los conectores de pala rojo y negro del cable todo en uno en los polos correspondientes de la bater a 2 Conect...

Page 11: ...dura 3 Tira de las cintas por debajo de la parte inferior del soporte port til y alrededor del mismo de forma que la bater a quede bien sujeta 4 Coloca los transductores en los huecos de la parte dela...

Page 12: ...a correto ao terminal correto da bateria Danos bateria ao dispositivo ou les es corporais podem ocorrer se o dispositivo for conectado incorretamente bateria Use sempre o cabo multifuncional para carr...

Page 13: ...ranhuras estreitas ao lado do compartimento da bateria 2 Coloque a bateria no compartimento da bateria sob a al a 3 Puxe as tiras por baixo e ao redor da parte inferior do suporte port til e enrole a...

Page 14: ...batteriet kan det medf re beskadigelse af batteriet eller enheden eller personskade Du skal altid benytte alt i t ledningen til opladning af batteriet 1 Slut det r de og sorte spadestik fra alt i t le...

Page 15: ...der og rundt om bunden af den b rbare holder og vikl dem stramt om batteriet 4 Placer transduceren i de neds nkede pladser foran b jlemonteringen 5 Placer den b rbare holder i tasken 6 Vikl om n dvend...

Page 16: ...l Hvis enheten kobles til batteriet eller enheten p feil m te kan det f re til skader p batteriet eller enheten eller personskader Du b r alltid lade batteriet med alt i ett kabelen 1 Koble den r de o...

Page 17: ...aketten og pakk dem godt rundt batteriet 4 Plasser svingerne i de innfelte rommene foran b ylemonteringsbraketten 5 Plasser den b rbare braketten i vesken 6 Du kan vikle str mkabelen og svingerkablene...

Page 18: ...tt kabeln n r du byter batteriet 1 Anslut den r da och den svarta gaffelkontakten fr n allt i ett kabeln till motsvarande batteripol 2 Anslut allt i ett kabeln till v ggladdaren 3 Anslut v ggladdaren...

Page 19: ...mmarna under och l ngs nederdelen p det b rbara f stet och linda dem h rt runt batteriet 4 Placera givarna i de urtagna utrymmena framf r bygelf stet 5 Placera det b rbara f stet i v skan 6 Om det beh...

Page 20: ...2018 Garmin Ltd or its subsidiaries support garmin com...

Reviews: