GNS 430 Quick Reference
DEFAULT NAV PAGE
11
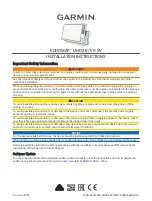
DEFAULT NAV PAGE
Course Deviation Indicator (CDI)
User-selectable
Data Fields
Active Leg of Flight Plan
TO/FROM Flag
The following symbols are used on the Default NAV
Page (directly below the CDI), to depict the ‘active leg’ of
a flight plan or direct to:
Direct-to a Waypoint
Course to a Waypoint, or Desired
Course between Two Waypoints
Procedure Turn
Procedure Turn
Vectors-to-Final
DME Arc to the Left
DME Arc to the Right
Left-hand Holding Pattern
Right-hand Holding Pattern
TO QUICKLY DISPLAY THE DEFAULT NAV
PAGE
From any page, press and hold the
CLR
Key for
approximately two seconds.
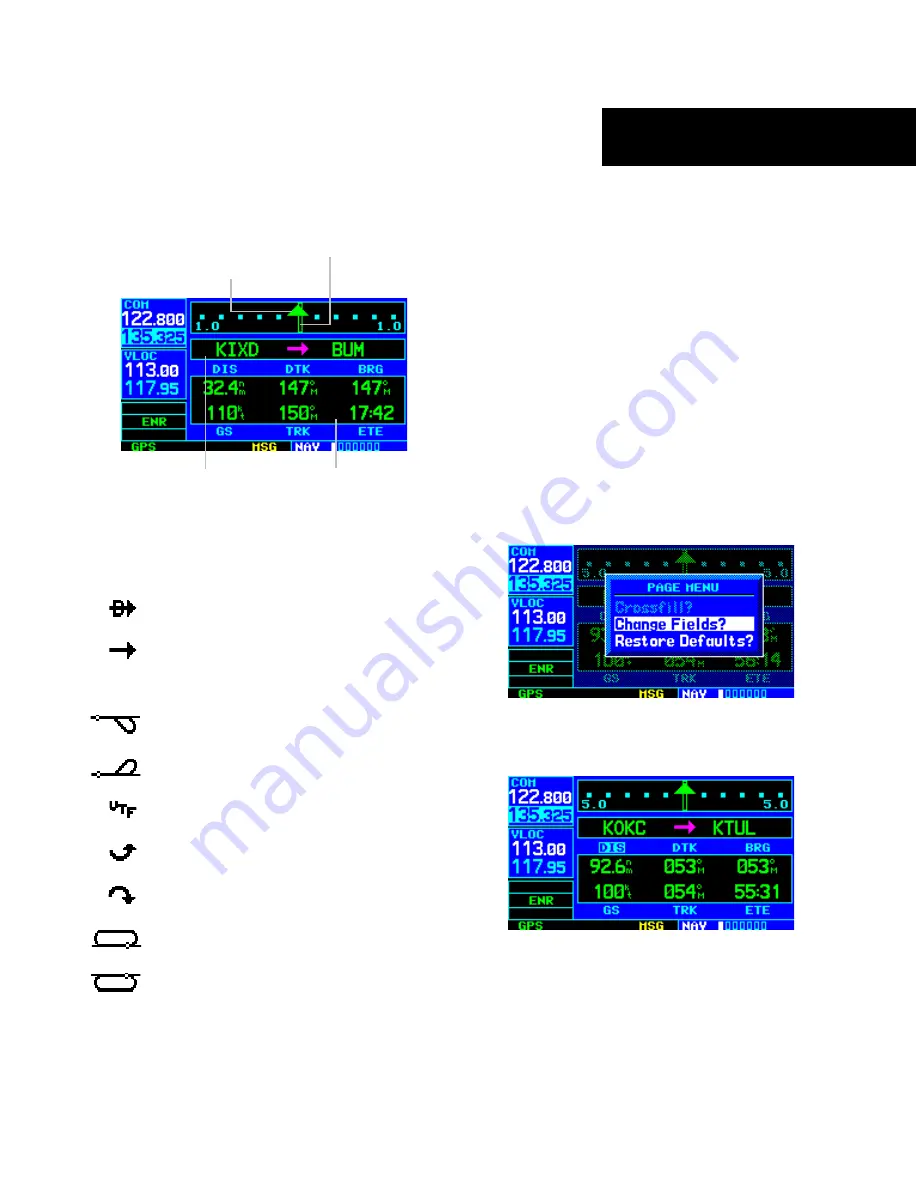
TO SELECT A DIFFERENT DATA ITEM FOR
ANY DATA FIELD
1) With the Default NAV Page displayed, press the
MENU
Key to display the Default NAV Page
Menu.
2) The ‘Change Fields?’ option is already
highlighted, so press the
ENT
Key to select
this option.
3) Use the large
right
knob to highlight the data
field to be changed.