background image

5

Step 4: Connect the GA 31 Antenna to the GDL 30/30A

Since antenna mounting locations and methods vary, you will need to obtain an antenna mount to install 

the antenna. The antenna base fi ts a standard 1-inch, 14 threads-per-inch marine mount. Check with your 
Garmin dealer or a marine supply retailer for this item.

Temporarily place the antenna at your desired installation location. Then, check its operation with poten-

tial interfering equipment turned on and off. (For example, other electronic equipment, fan motors, engine 
ignition, alternators, generators, radars, and VHF radio transmissions can be sources of interference.)

Position the antenna so that it obtains the clearest possible view of the sky and horizon in all directions. 

Avoid mounting the antenna next to large areas of conductive material (such as metal and aluminum) as this 
may cause poor signal reception. The GA 31 antenna is supplied with a 30-foot cable. When routing the 
cable, avoid routing it near the vessel’s alternator or ignition system components or parallel to other power 
lines. Do not cut or shorten the cable; doing so can harm the weather and radio reception.

After you have found a suitable location, permanently install the antenna. Then, connect the antenna cable 

to the GDL 30/30A connector that is labelled ANTENNA.

If you have a GDL 30A:

 Connect the Audio cable (included) to the GDL 30/30A connector that is 

labelled AUDIO and to the audio inputs on your stereo receiver.

Step 5: Turn on the GDL 30/30A

Once you connect the GDL 30/30A to your boat’s power supply and to a Chartplotter (either directly or 

via a Garmin GMS 10 Network Port Expander), the GDL 30/30A automatically turns on or off whenever you

automatically turns on or off whenever you 

turn on/off a Chartplotter.

turn on/off a Chartplotter.

Turn on your Chartplotter. Check the blinking lights on the front of the GDL 30/30A to ensure that it is 

on (see Appendix A to view the blink codes).

(see Appendix A to view the blink codes). 

You are now ready to subscribe to XM WX Weather (and XM Radio if you have a GDL 30A). Subscription 

instructions begin on the following page.

Installing the GDL 30/30A

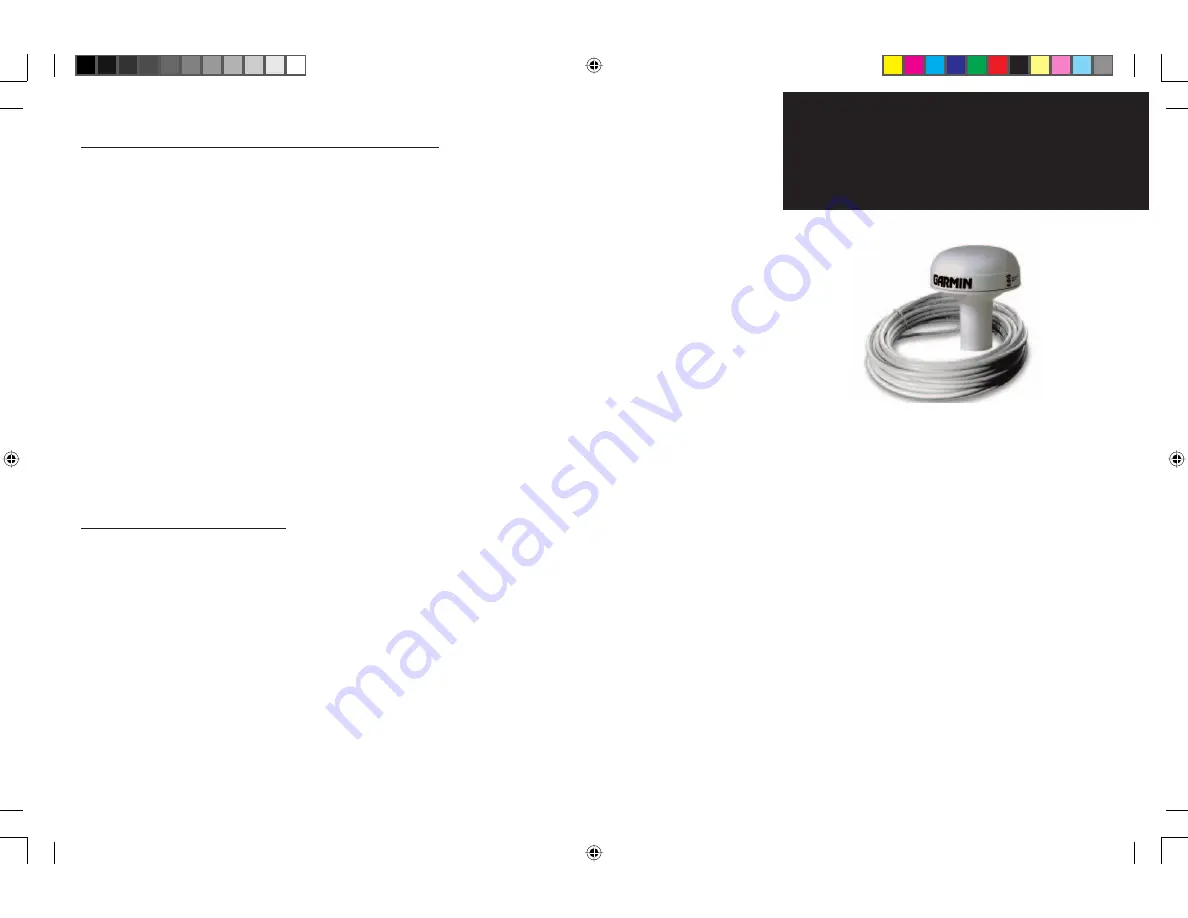
GA 31 Antenna with cable

Need More Cable?

Your GDL 30/30A ships with a 6-foot Garmin 
marine network cable so that you can connect 
the unit to a Chartplotter or Network Port 
Expander (not included). Contact Garmin or 
your Garmin dealer if you need to purchase 20- 
or 40-foot cables. 

Do not cut the GA 31 cable under any circumstance.

190-00336-00_0B.indd   5

8/17/2004, 9:56:27 AM

Summary of Contents for GDL 30

Page 1: ...GDL 30 GDL 30A audio marine weather satellite receiver owner s manual 190 00336 00_0B cover indd 1 8 16 2004 11 50 03 AM ...

Page 2: ...ect to change without notice Garmin reserves the right to change or improve its products and to make changes in the content without obligation to notify any person or organization of such changes or improvements Garmin is a registered trademark of Garmin Ltd or its subsidiaries and may not be used without the express permission of Garmin XM Satellite Radio Inc Hardware and required monthly subscri...

Page 3: ...arine Weather Satellite Receiver as GDL 30 and the GDL 30A Marine Weather Audio Satellite Receiver as GDL 30A It covers instructions for both units GDL 30 30A Unless otherwise specified unit operations are the same on both models Garmin Marine Network Chartplotters are Multi Function Display units such as the GPSMAP 3006C 3010C They are referred to as Chartplotters throughout this manual Garmin Cus...

Page 4: ...wing Multiple Maps 21 Finding Current Weather Forecast and Sea Surface Conditions 22 Finding Weather Conditions at other Locations 23 Customizing Radio Stations for GDL 30A only 24 Viewing and Selecting Channels 24 Adding Favorites 25 Deleting Favorites 25 Scanning Stations 26 Disabling the Audio Output 27 Appendix A Blink Codes 28 Appendix B Broadcast Rates 29 Appendix C Specifications 30 Appendix...

Page 5: ...he following items If any parts are missing contact your Garmin dealer immediately Standard Package GLD 30 or 30A unit 7 pin power cable Garmin marine network cable 6 ft Owner s Manual GA 31 Antenna with cable Audio cable GDL 30A only Grommet Optional Accessories GMS 10 Network Port Expander Garmin marine network cables 20 ft and 40 ft Power Data Connector LED Status Indicator Mounting Holes Weath...

Page 6: ...our Chartplotter s Connect the GDL 30 30A to one Chartplotter by using the Garmin marine network cable included Simply align the cable heads with the opening of the network port on both the GDL 30 30A and the Chartplotter Do not cut the Garmin marine network cable if you need to drill a hole in your boat use use the included grommet that is specially designed to cover holes that are drilled for th...

Page 7: ...found a suitable location permanently install the antenna Then connect the antenna cable to the GDL 30 30A connector that is labelled ANTENNA If you have a GDL 30A Connect the Audio cable included to the GDL 30 30A connector that is labelled AUDIO and to the audio inputs on your stereo receiver Step 5 Turn on the GDL 30 30A Once you connect the GDL 30 30A to your boat s power supply and to a Chart...

Page 8: ... continue to ARROW DOWN the list until the XM tab becomes visible Then ARROW RIGHT to display the Information submenu tab If you have a GDL 30 Weather Satellite Receiver or a GDL 30A Weather Audio Satellite Receiver From the Information submenu tab verify that you have an XM Weather Radio ID Have this information Have this information handy as well as your billing address and other billing informa...

Page 9: ...e Radio the XM customer care representative will send out an XM signal to activate your radio s XM WX Weather Keep your Chartplotter powered on to ensure you receive the XM signal You will know the signal has been received once you see each service component displayed in the Weather Products box and finally the name of the service package you have selected Master Mariner Fisherman or Sailor display...

Page 10: ...re system using the Chartplotter s power key This means turning off all Chartplotters to which your weather audio receiver is connected Do not shut down the system by using the breaker Step 7 Add Features to your Chartplotter When you turn on the GDL 30 30A after completing Step 6 above you are ready to add weather fea tures to your Chartplotter s Map page see page 9 If you have a GDL 30A you are ...

Page 11: ...ature s data to appear on a map and then press the ENTER MARK key If your Chartplotter displays a numbered list press the number associated with the range such as 4 30 ft The selected range appears in the box next to the weather feature The selected range appears in the box next to the weather feature Note Note Depending on the weather feature field ranges may be defined as greater than or less than...

Page 12: ...enu page Additionally you can use options to access the Setup tabs on the Main Menu page Additionally you can use options from the Adjustment menu to activate other weather related functions from the Adjustment menu to activate other weather related functions Hide Weather Hide Weather This function removes weather images from a map This is This function removes weather images from a map This is us...

Page 13: ...ional Weather Service and the Hydrometerologi cal Prediction Center See the XM WX Satellite Weather Web site at http weather xmradio com weather specifications html for more information Any weather feature can change in appearance or interpretation if the source that provides the information changes NEXRAD NEXRAD is an acronym for NEXt Generation Weather RADar The NEXRAD feature displays precipitat...

Page 14: ... cone indicates the projected path of the storm cell The red bars that appear in the middle of the cone indicate where the storm will be in the future Each bar represents 15 minutes Weather Features The red bars that appear in the middle of the cone in this Cheyenne Wyoming storm indicate where the storm will be for the next 1 1 2 hours 190 00336 00_0B indd 12 8 17 2004 9 56 38 AM ...

Page 15: ...tning bolt icons as shown in the images below Lightning appears on the map if strikes have been detected within the last seven minutes This image displays lightning strikes on a map that also displays NEXRAD storm cells and wind 190 00336 00_0B indd 13 8 17 2004 9 56 39 AM ...

Page 16: ...flag equals 5 knots A darkened pennant equals 50 knots Wind direction is represented by the direction of the circle Weather Features 20 knot winds blowing to the Southwest In this example NEXRAD data storm cells and lightning are displayed in addition to wind Note how the wind shifts direction around this Midwestern storm mass 190 00336 00_0B indd 14 8 17 2004 9 56 41 AM ...

Page 17: ...sobars are to each other the faster the change in pressure Pressure units can be configured from the Main Menu page go to the System tab and then to the Units submenu tab See your Chartplotter s Owner s Manual for more information Weather Features NEXRAD data is displayed in addition to pressure 190 00336 00_0B indd 15 8 17 2004 9 56 43 AM ...

Page 18: ...at 12 hour intervals as well as a fifth forecast at a 24 hour interval Weather Features In the example above this hurricane is projected to travel West Southwest before moving in a Northwesterly direction The example below shows Hurricane Charley s projected path through Florida in August 2004 Wind and storm cells are also visible In this example NEXRAD data wave height and wind are displayed in ad...

Page 19: ...nges from 5 miles to 3 miles Weather Features The inset displays NEXRAD weather data in addi tion to visibility This provides a clearer picture of the true weather conditions in this area You can get a general idea of reduced visibil ity across a wide area when the map view is significantly zoomed out as shown in the image above 190 00336 00_0B indd 17 8 17 2004 9 56 46 AM ...

Page 20: ... Blue fronts indicate cold fronts red fronts indicate warm fronts and alternating red and blue fronts indicate stationary fronts Dashed orange lines indicate dry lines Weather Features Alternating red and blue fronts are stationary fronts Blue fronts indicate cold fronts 190 00336 00_0B indd 18 8 17 2004 9 56 48 AM ...

Page 21: ...o com weather specifications html for more information Temperature The Temperature feature displays the temperature of the water at the sea s surface Wave Height The Wave Height feature provides the height of waves Sea Surface Features To select which Sea Surface features you d like to appear on various map displays on your Chartplotter select the Map tab from the Main Menu page and ARROW RIGHT to ...

Page 22: ...moving as indicated by the direction of the red arrow Sea Surface Features This map displays all four sea surface features To avoid a cluttered look try zooming in to a specific area so that the weather data will display farther apart Or consider displaying fewer features at the same time Wave Period feature Wave Direction feature 190 00336 00_0B indd 20 8 17 2004 9 56 51 AM ...

Page 23: ...data on one map display and non weather related information on the other Viewing Features Consider zooming in to a specific area to display clearer weather data as shown in the example above Chartplotters such as the 3006C 3010C also feature a Soft Key that enables you to easily hide or display weather See your Chartplotter s Owner s Manual 190 00336 00_0B indd 21 8 17 2004 9 56 52 AM ...

Page 24: ...high low temperature precipitation and weather conditions for the next few days forecast The number of days that appear in this panel depend on the data available from the responding weather service center If more than four days of forecasts appear use the ARROW KEYPAD to move down the list The bottom panel on the Forecast submenu tab features a detailed 24 hour forecast for winds wind gust and vi...

Page 25: ...ysical location To find information at other places highlight the Nearest To box on the Current submenu tab Then press ENTER A Find page appears Follow the instructions for finding places as are described in your Chartplotter s Owner s Manual Forecast and Current Conditions From the Current submenu tab above left highlight the Nearest To box A Find page above right appears Another way to find other p...

Page 26: ...dio Output box You will also see a station as well as the current song from that station in the Radio Tuning box If CHECK ANTENNA appears in the Radio Tuning box double check to make certain the GA 31 antenna has been properly installed and that the audio cable is securely connected to your GDL 30A and to your stereo receiver Viewing and Selecting Channels From the Audio submenu tab ARROW DOWN to ...

Page 27: ...he names change periodically At any time you want to select a song ARROW DOWN to it in the Favorites list high light it and press ENTER Or type in the station number while the Radio Tuning box is highlighted and then press ENTER The maximum number of favorites you can list is 16 You will not be able to add more until you delete a few current favorites Deleting Favorites ARROW DOWN to the Favorites...

Page 28: ... is set Next highlight the Start Scanning button and press ENTER The GDL 30A scans stations according to your preference When you settle on a selection press ENTER to quit the scan and play the currently dis played song Customizing Radio Stations Scan box Highlight your scanning pref erence and then press ENTER Once you start scanning your unit scans through the stations until you press ENTER to s...

Page 29: ... Output box and press ENTER Highlight Off and then press ENTER Your sound remains disabled until you repeat the above steps and select On While you are listening to one station you can view what songs are currently playing on stations in your Favorites list Audio Output box To disable the audio highlight Off and then press ENTER 190 00336 00_0B indd 27 8 17 2004 9 57 06 AM ...

Page 30: ...le Codes are Green blinking on for 1 second off for 1 2 second slow blink Status GDL 30 30A is on and is receiving an XM signal Solid Red no blink Status Software failure Call Garmin Customer Support Red blinking on for 1 10 second off for 1 10 second very fast blink Status System alarm The display device gives a message indicating the type of failure Appendix A Blink Codes 190 00336 00_0B indd 28...

Page 31: ... 12 Hurricanes 12 Visibility 12 Fronts 12 Sea Surface Temperature 12 Wave Height 12 Wave Period 12 Wave Direction 12 Current Conditions 12 Forecasts 12 Sea Surface Conditions 12 Appendix B Broadcast Rates Weather Related Broadcast Rates Appendix 190 00336 00_0B indd 29 8 17 2004 9 57 08 AM ...

Page 32: ...nge 40 F to 176 F 40 C to 80 C Waterproof 1 meter submersion for 30 minutes IEC 60529 IPX7 Mount Thread Size 1 diameter at 14 threads inch Cable Foil shielded center conductor 18 AWG Dynamics 999 knots 40g Note When using the Chartplotter and GDL 30 30A on battery power only engines off for extended periods of time be sure there are enough avail able amperage to run the units for the time period R...

Page 33: ...n of the product Title ownership rights and intellectual property rights in and to the Software remain in Garmin You acknowledge that the Software is the property of Garmin and is protected under the United States of America copyright laws and international copyright treaties You further acknowledge that the structure orga nization and code of the Software are valuable trade secrets of Garmin and ...

Page 34: ...e GDL 30 30A complies with Part 15 of the FCC interference limits for Class B digital devices FOR HOME OR OFFICE USE These limits are designed to provide more reasonable protection against harmful interference in a residential installation and are more stringent than outdoor requirements Operation of this device is subject to the following conditions 1 This device may not cause harm ful interferen...

Page 35: ...m prop65 Map Data Information One of the goals of Garmin is to provide customers with the most complete and accurate cartography that is available to us at a reasonable cost We use a combination of governmental and private data sources which we identify as required in product literature and copyright messages displayed to the consumer Virtually all data sources contain inaccurate or incomplete dat...

Page 36: ... EXCLUSIVE REMEDY FOR ANY BREACH OF WARRANTY To obtain warranty service call your local Garmin authorized dealer Or call Garmin Customer Service at one of the numbers listed on the right for shipping instructions and for an RMA tracking number The unit should be securely packed with the tracking number clearly written on the outside of the package The unit should be sent freight charges prepaid to...

Page 37: ...g 24 Deleting Favorites 25 Muting the audio 27 Scanning stations 26 Selecting 24 Radio tuning box 24 Registration Product 1 Regulatory information 32 S Scanning stations 26 Sea Surface Maps Adding to map displays 19 Temperature 19 Wave Direction 20 Wave Height 19 Wave Period 20 Sea Surface submenu tab 23 Serial Number 1 Software license agreement 31 Specifications product 30 Storm Cells map 12 Subs...

Page 38: ...190 00336 00_0B cover indd 2 8 16 2004 11 50 39 AM ...

Page 39: ...190 00336 00_0B cover indd 2 8 16 2004 11 50 39 AM ...

Page 40: ...e Abbey Park Industrial Estate Romsey SO51 9DL U K Garmin Corporation No 68 Jangshu 2nd Road Shijr Taipei County Taiwan www garmin com Part Number 190 00336 00 Rev B For the latest free software updates excluding map data throughout the life of your Garmin products visit the Garmin Web site at www garmin com 190 00336 00_0B cover indd 4 8 16 2004 11 50 40 AM ...

Reviews: