


G1000 Supplemental Maintenance Manual
Page 8-2
Textron Nav III Series
Revision 3
190-02128-04
9. If no other service is to be performed, continue to the return-to-service checks in Section
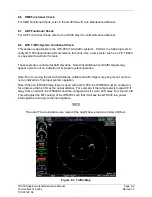
8.4 ChartView Functional Check
ChartView must be enabled using a ChartView Enable Card. Reference Section 3.8.1 for
enabling procedures.
NOTE
The required ChartView databases are subscription-based and are to be
procured by the aircraft owner directly from Jeppesen.
1. Ensure ChartView are set as the preferred charts.
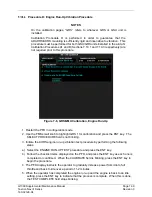
2. With the G1000 in Normal Mode, use the MFD FMS knob to s
elect ‘
Aux
– System
Status
’ page, then select MFD1 DB softkey.
3. Use the small FMS knob to scroll to CHART.
4. Ver
ify “ChartView” is displayed in blue text adjacent to CHART.
5. Verify the ChartView database cycle number is displayed in blue text and the ChartView
database is current.
6. Deactivate the cursor and use the large MFD FMS knob to select the Navigation Map
Page then press the Charts softkey.
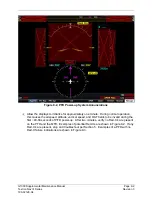
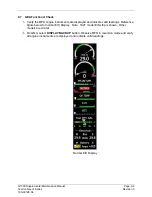
7. Verify the airport chart is displayed and the following softkeys are displayed(some
softkeys may be grayed out):
•
CHRT OPT
•
APR
•
Show Map
•
WX
•
INFO-1
•
NOTAM
•
DP
•
Go Back
•
STAR
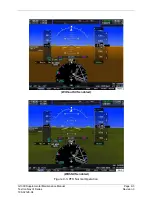
8. Press CHRT OPT softkey and verify the following softkeys are displayed (some softkeys
may be grayed out):
•
All
•
Header
•
Plan
•
Profile
•
Minimums
•
Fit WDTH
•
Full SCN
•
Back
9. If no other service is to be performed, continue to the return-to-service checks in Section
Summary of Contents for G1000 NXi
Page 61: ......