


Reducing the Clutter
You can quickly change the settings to reduce noise and clutter
on the sonar screen.
1
From a sonar view, hold
CLUTTER
.
2
Select one or more options:
• To adjust the sensitivity to reduce the effects of
interference from nearby sources of noise, select
Interference
.
• To hide sonar returns near the surface of the water, select
Surface Noise
.
• To adjust the time varying gain, which can reduce noise,
select
TVG
.
Sonar Frequencies
NOTE:
The frequencies that are available depend on the
transducer being used.
Adjusting the frequency helps adapt the sonar for your particular
goals and the present depth of the water.
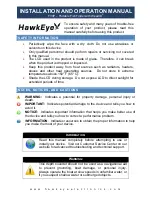
Selecting Frequencies
NOTE:
You cannot adjust the frequency for all sonar views and
transducers.
You can indicate which frequencies appear on the sonar screen.
1
From a sonar view, select
MENU
>
Frequency
.
2
Select a frequency suited to your needs and water depth.
For more information on frequencies, see
.
Sonar Gain
The gain setting controls the sensitivity of the sonar receiver to
compensate for water depth and water clarity. Increasing the
gain shows more detail, and decreasing the gain reduces screen
clutter.
NOTE:
Setting the gain on one sonar view applies the setting to
all the views.
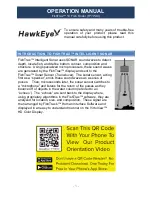
Setting the Gain Automatically
NOTE:
To set the gain on the split-frequency screen, you must
set each frequency separately.
1
From a sonar view, select
GAIN
.
2
Select >
Enable Auto Gain
.
3
Select an option:
• To display higher-sensitivity, weaker sonar returns with
more noise automatically, select
Auto High
.
• To display medium-sensitivity sonar returns with moderate
noise automatically, select
Auto Med
.
• To display lower-sensitivity sonar returns with less noise
automatically, select
Auto Low
.
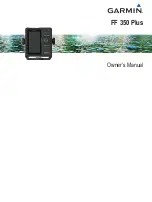
Setting the Gain Manually
1
From a sonar screen, select
GAIN
.
2
Select or until you begin to see noise in the water
portion of the screen.
3
Select or to decrease the gain.
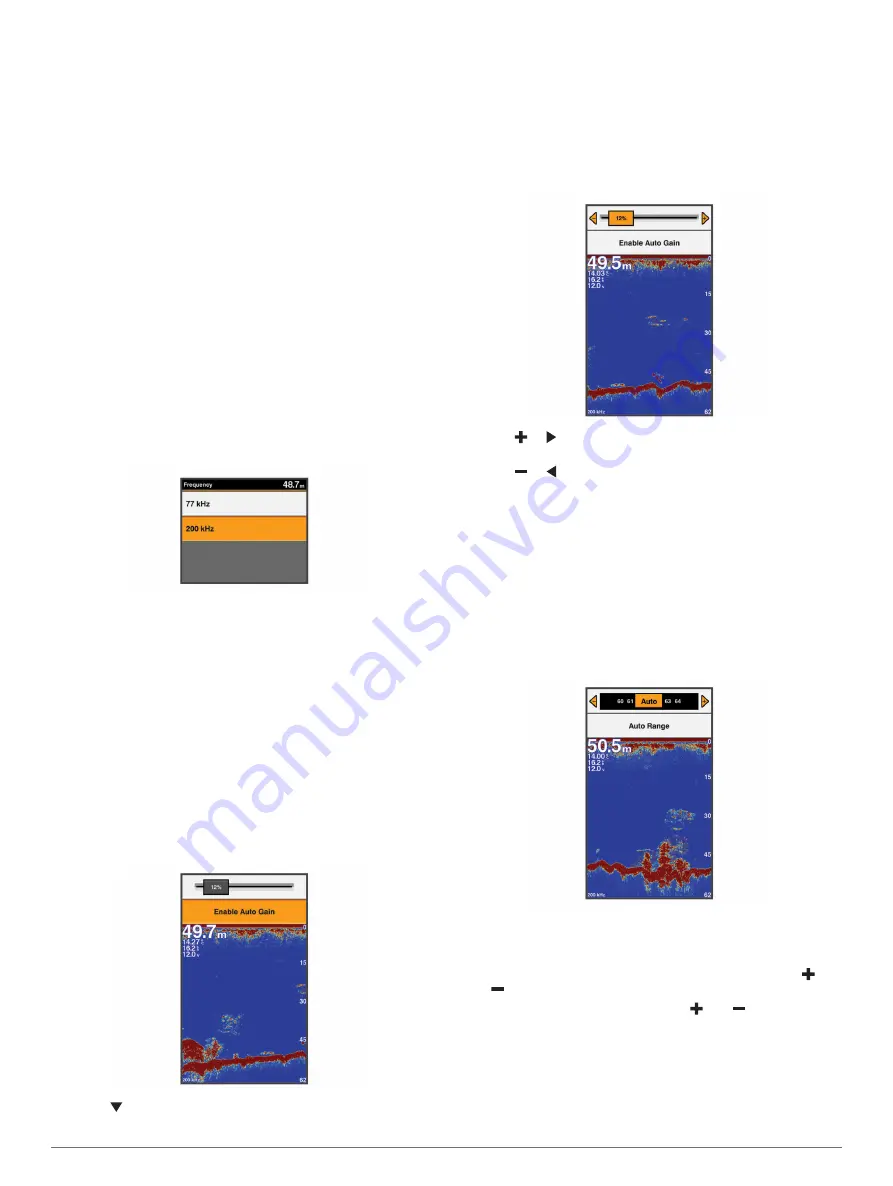
Adjusting the Range of the Depth Scale
You can adjust the range of the depth scale that appears on the
right side of the screen. Automatic ranging keeps the bottom
within the lower third of the sonar screen, and can be useful for
tracking the bottom where there are slow or moderate terrain
changes.
When the depth changes dramatically, like a drop off or cliff,
manually adjusting the range allows a view of a specified depth
range. The bottom is shown on the screen as long as the bottom
is anywhere within the manual range established.
1
From a sonar screen, select
RANGE
.
2
Select an option:
• To allow the device to adjust the range automatically
based on the depth, select Auto Range.
• To increase or decrease the range manually, select or
.
NOTE:
From a sonar screen, select and to quickly
manually adjust the range.
Showing and Customizing the Overlay
Numbers
You can customize the data shown on the screen.
1
From an applicable screen, select
MENU
.
4
Sonar
Summary of Contents for FF 350 Plus
Page 1: ...FF 350 Plus Owner s Manual...
Page 4: ......