background image

Tolls and Fees

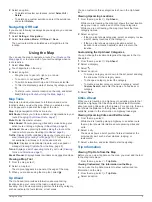
: Sets preferences for avoiding toll roads and toll 

stickers.

NOTE: 

This feature is not available in all areas.

Restricted Mode

: Disables all functions that require significant 

operator attention.

GPS Simulator

: Stops the device from receiving a GPS signal, 

and saves battery power.

Calculation Mode Settings

Select 

Settings

 > 

Navigation

 > 

Calculation Mode

.

The route calculation is based on road speeds and vehicle 

acceleration data for a given route.

Faster Time

: Calculates routes that are faster to drive but can 

be longer in distance.

Shorter Distance

: Calculates routes that are shorter in distance 

but can take more time to drive.

Off Road

: Calculates a direct line from your location to your 

destination.

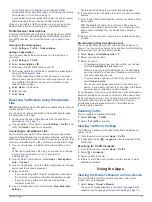
Setting a Simulated Location

If you are indoors or not receiving satellite signals, you can use 

the GPS simulator to plan routes from a simulated location.

1

Select 

Settings

 > 

Navigation

 > 

GPS Simulator

.

2

From the main menu, select 

View Map

.

3

Tap the map twice to select an area.
The address of the location appears at the bottom of the 

screen.

4

Select the location description.

5

Select 

Set Location

.

Driver Assistance Settings

Select 

Settings

 > 

Driver Assistance

.

Driver Alerts

: Allows you to enable or disable alerts for 

upcoming zones or road conditions (

Driver Awareness 

Features and Alerts

, page 2

).

Speeding Alert

: Alerts you when you are exceeding the speed 

limit.

Break Planning

: Reminds you to take a break and shows 

upcoming services after you drive for an extended time. You 

can enable or disable break reminders and upcoming service 

suggestions.

Proximity Alerts

: Alerts you when you approach speed 

cameras or red light cameras.

Proximity Alerts Settings

NOTE: 

You must have custom points of interest (POIs) loaded 

for proximity points alerts to display.

NOTE: 

This feature is not available in all areas.

Select 

Settings

 > 

Driver Assistance

 > 

Proximity Alerts

.

Audio

: Sets the style of alert that plays when you approach 

proximity points.

Alerts

: Sets the type of proximity points for which alerts are 

played.

Backup Camera Settings

The backup camera settings allow you to manage paired 

Garmin backup cameras and camera settings. This menu 

appears on your navigation device only when the device is 

connected to a wireless camera receiver cable. See the owner's 

manual for your backup camera for detailed information about 

pairing cameras and camera settings. Go to 

garmin.com

/backupcamera

 to purchase a Garmin backup camera.

Select 

Settings

 > 

Backup Camera

, and select a paired camera.

Unpair

: Removes the paired camera. You must pair the camera 

again before you can view it using this device and cable.

Rename

: Allows you to rename the paired camera.

Guidance Lines

: Shows or hides guidance lines and allows you 

to adjust the position of the guidance lines.

Display Settings

Select 

Settings

 > 

Display

.

Color Mode

: Allows you to select day or night color mode. If you 

select the Auto option, the device automatically switches to 

day or night colors based on the time of day.

Brightness

: Allows you to adjust the display brightness.

Display Timeout

: Allows you to set the amount of idle time 

before your device enters sleep mode while using battery 

power.

Screenshot

: Allows you to take a picture of the device screen. 

Screenshots are saved in the Screenshot folder of the device 

storage.

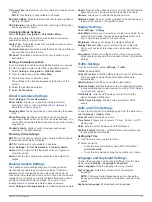
Traffic Settings

From the main menu, select 

Settings

 > 

Traffic

.

Traffic

: Enables traffic.

Current Provider

: Sets the traffic provider to use for traffic data. 

The Auto option selects the best available traffic data 

automatically.

Subscriptions

: Lists the current traffic subscriptions.

Optimize Route

: Enables the device to use optimized alternate 

routes automatically or upon request (

Avoiding Traffic Delays 

on Your Route

, page 8

).

Traffic Alerts

: Sets the traffic delay severity for which the 

device displays a traffic alert.

Traffic Voice Prompts

: Enables voice prompts for traffic 

events.

Units and Time Settings

To open the Units and Time settings page, from the main menu, 

select 

Settings

 > 

Units & Time

.

Current Time

: Sets the device time.

Time Format

: Allows you to select a 12-hour, 24-hour, or UTC 

display time.

Units

: Sets the unit of measure used for distances.

Position Format

: Sets the coordinate format and datum used 

for geographical coordinates.

Setting the Time

1

From the main menu, select the time.

2

Select an option:
• To set the time automatically using GPS information, 

select 

Automatic

.

• To set the time manually, drag the numbers up or down.

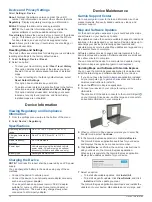
Language and Keyboard Settings

To open the Language and Keyboard settings, from the main 

menu, select 

Settings

 > 

Language & Keyboard

.

Voice Language

: Sets the language for voice prompts.

Text Language

: Sets all on-screen text to the selected 

language.

NOTE: 

Changing the text language does not change the 

language of user-entered data or map data, such as street 

names.

Keyboard Language

: Enables keyboard languages.

Garmin Drive Settings

13

Summary of Contents for DRIVE 52

Page 1: ...GARMINDRIVE 52 GARMINDRIVE5PRO Owner sManual...

Page 2: ...s and myTrends are trademarks of Garmin Ltd or its subsidiaries These trademarks may not be used without the express permission of Garmin Android is a trademark of Google Inc Apple and Mac are tradema...

Page 3: ...Location to Your Route 7 Skipping the Next Destination in Your Route 7 Shaping Your Route 7 Taking a Detour 7 Changing the Route Calculation Mode 8 Stopping the Route 8 Using Suggested Routes 8 Avoid...

Page 4: ...ing the Mount from the Suction Cup 15 Removing the Suction Cup from the Windshield 15 Changing the Fuse in the Vehicle Power Cable 15 Troubleshooting 15 The suction cup will not stay on my windshield...

Page 5: ...f and the device uses very little power but it can wake instantly for use TIP You can charge your device faster by putting it in power saving mode while charging the battery To turn off the device com...

Page 6: ...ble the audible tone for some types of driver alerts The visual alert appears even when the tone is disabled 1 Select Settings Driver Assistance Driver Alerts 2 Select or clear the check box next to e...

Page 7: ...alternate routes to the locations Go Select to start navigating to the location using the recommended route Select to view the search results on the map Location Search Results on the Map You can vie...

Page 8: ...location s history Foursquare Foursquare is a location based social network Your device includes pre loaded Foursquare points of interest which are indicated by the Foursquare logo in your location s...

Page 9: ...iew information about your current location This feature is helpful if you need to tell emergency personnel your location From the map select the vehicle Finding Emergency Services and Fuel You can us...

Page 10: ...map Your Route on the Map page 6 A preview of the major roads in your route appears at the edge of the map for several seconds If you need to stop at additional destinations you can add the locations...

Page 11: ...Active Route Adding a Location to Your Route Before you can add a location to your route you must be navigating a route Starting a Route page 6 You can add locations to the middle or end of your rout...

Page 12: ...ways avoid tolls select Avoid To always allow tolls select Allow 4 Select Save Avoiding Toll Stickers If the map data on your device contains detailed toll sticker information you can avoid or allow r...

Page 13: ...es information about upcoming locations along your route or the road on which you are traveling You can view upcoming points of interest by category such as restaurants fuel stations or rest areas You...

Page 14: ...tings Map Vehicle Map Layers 2 Select the check box next to each layer you want to show on the map Changing the Map Data Field 1 From the map select a data field NOTE You cannot customize Speed 2 Sele...

Page 15: ...respond to the on screen prompts to complete the pairing process If you are pairing with a smartphone with Android complete steps 5 8 5 On your smartphone with Android select View Bluetooth Settings T...

Page 16: ...start your trip 1 Select Apps Trip Planner Saved Trips 2 Select a saved trip 3 Select Trip Settings 4 Select an option To add shaping points to your trip select Shape Route and follow the on screen in...

Page 17: ...about pairing cameras and camera settings Go to garmin com backupcamera to purchase a Garmin backup camera Select Settings Backup Camera and select a paired camera Unpair Removes the paired camera You...

Page 18: ...You can purchase an approved Garmin AC DC adapter suitable for home or office use from a Garmin dealer or www garmin com The device may charge slowly when connected to a third party adapter Device Ma...

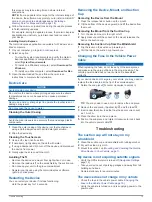
Page 19: ...mpartment Register your device using the Garmin Express software garmin com express Restarting the Device You can restart your device if it stops functioning Hold the power key for 12 seconds Removing...

Page 20: ...stom POIs Connecting the Device to Your Computer You can connect the device to your computer using a USB cable 1 Plug the small end of the USB cable into the port on the device 2 Plug the larger end o...

Page 21: ...9 updating 14 viewing routes 6 7 memory card 1 16 installing 16 microSD card 1 16 mount removing 15 mounting the device automobile 1 removing from mount 15 suction cup 1 15 myTrends routes 8 N nation...

Page 22: ...updating maps 14 software 14 USB disconnecting 16 V vehicle power cable 1 venues 4 volume adjusting 2 W Where Am I 5 wireless camera 13 18 Index...

Page 23: ......

Page 24: ...support garmin com GUID 67DA720E 963D 48A3 B7FA DFEC1248BF79 v3 May 2020...

Reviews: