


53
Remove all device controls
Remove all device controls
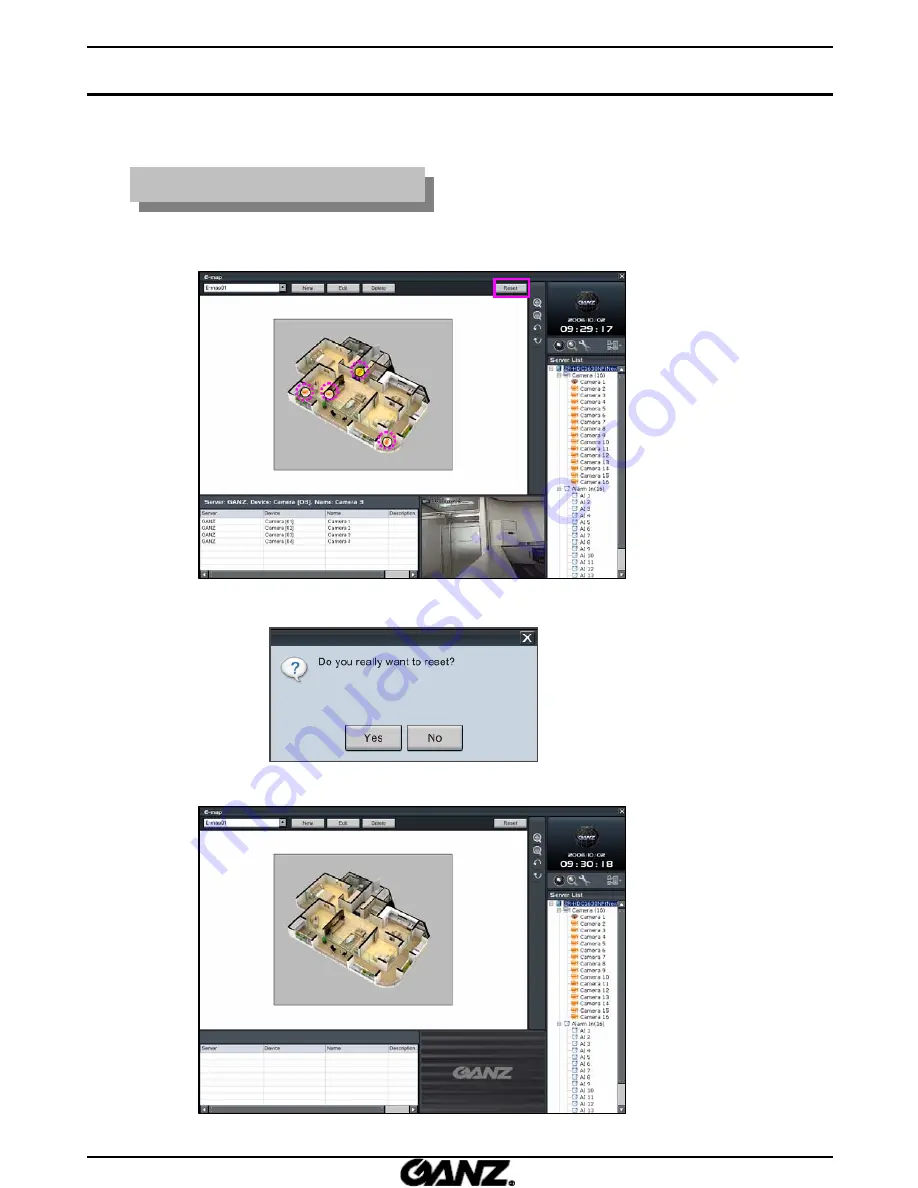
1. Click on the
“Reset”
button to remove all device controls.
2. A box will be shown as below.
3. Click on the
“Yes”
button. Then all device controls will be removed.
5.7 Remove all device controls from E
5.7 Remove all device controls from E
-
-
Map
Map
Summary of Contents for ZR-DHC1630NP
Page 1: ...GMS MANUAL...
Page 96: ......