


G
AMATRONIC
E
LECTRONIC
I
NDUSTRIES
L
TD
.
16
P+ PREMIUM 60, Installation Guide,
rel.
1.4
3.3
Installation procedure
After completing each step in the following installation, go back to the Installation Checklist and check the
corresponding item.
3.3.1
Visual inspection
Perform the following inspection immediately after unpacking the
Power+ Premium 60
.
1.
Inspect the
Power+ Premium 60
from all sides and ensure that there is no visible damage to any
portion of the housings or covers. If any damage is found, contact your distributor immediately.
2.
Ascertain that the number of housings and modules delivered is as ordered, and that a system
controller module was delivered.
3.
Verify that a LCD touch screen was delivered.
4.
Ensure that all components and modules are complete and securely fastened to their shelves.
3.3.2
Site preparation – physical
Perform the following procedures before connecting any external cables to the
Power+ Premium 60
.
1.
Ensure that the ambient temperature in the immediate vicinity of the
Power+ Premium 60
complies
with Gamatronic requirements.
Minimum / maximum operating temperatures: -10 °C / +40 °C (+14 °F / +104 °F).
Recommended temperature: +15 °C ~ +25 °C (+59 °F ~ +77 °F).
2.
Verify that there is no water condensation or dampness at the installation site.
3.
Ensure that sufficient airflow or forced ventilation is present at the location of the battery cabinets.
4.
Verify that the foundation and access routes are adequate for the dimensions and weight of the UPS
and battery cabinets.
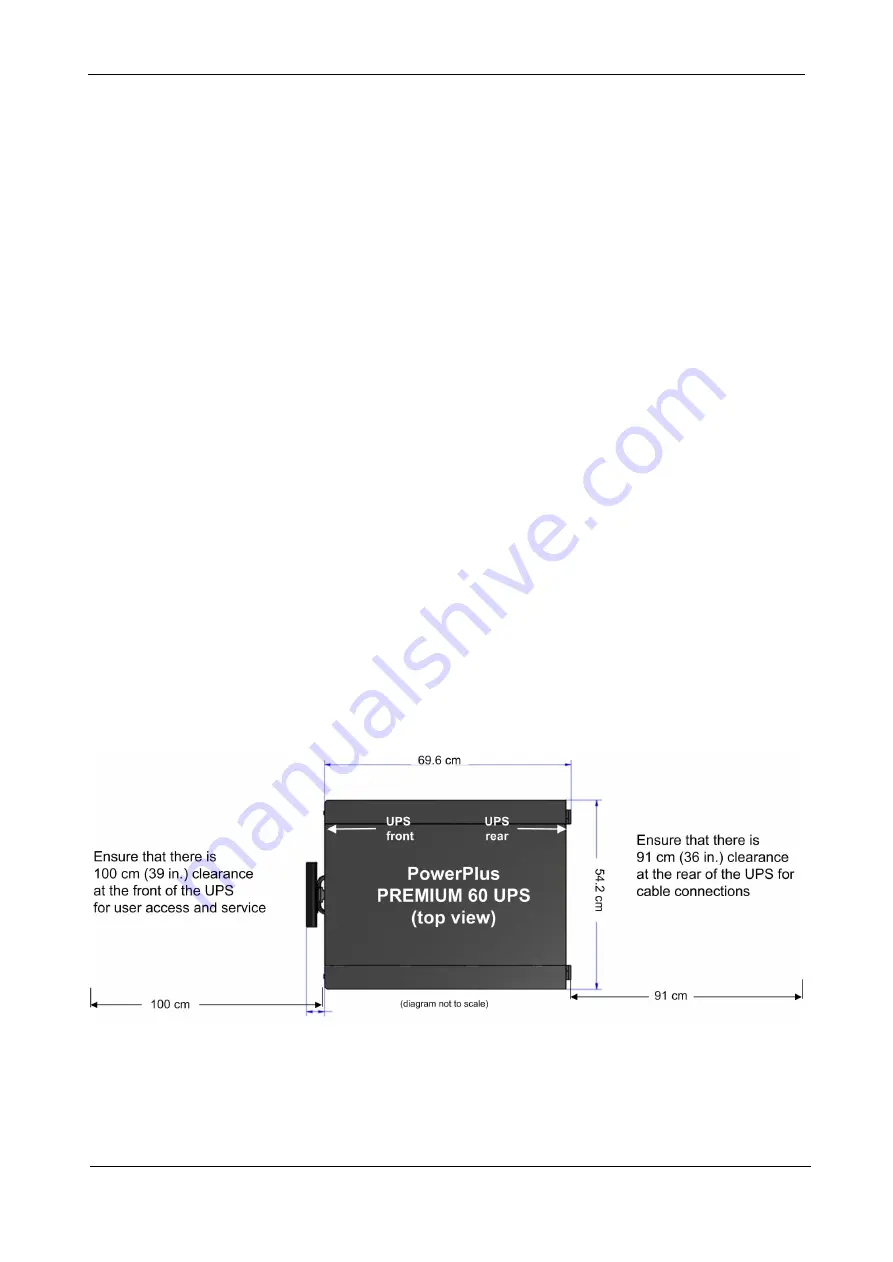
5.
Ensure that there are adequate clearances to allow comfortable access to battery cabinets and
electrical boards. Ensure that there is 36 in. (91 cm) clearance at the rear for cable connections and
39 in. (100 cm) at front for user access and service.
Figure 15: Ensure sufficient free space at front and rear of the UPS