-10-
(Mounting CONT’D)
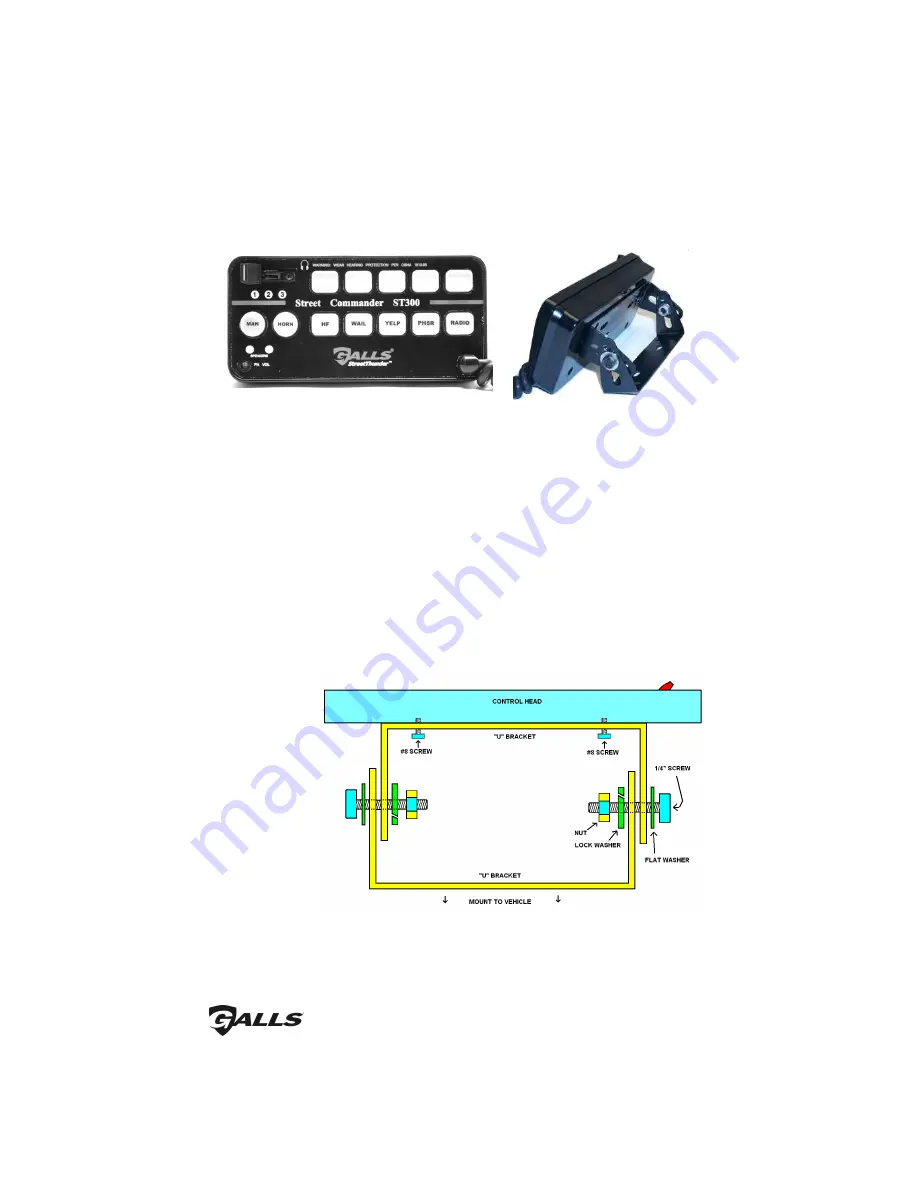
STANDARD CONTROL HEAD
The standard control head comes with two interchangeable “U” brackets.
1. Using one of the two “U” brackets as a template, mark at least two mounting
holes on your mounting surface.
2. Drill the mounting holes in the vehicle taking care to check the backside of the
surface you are drilling into.
3. Mount one of the “U” bracket using installer-supplied hardware.
4. If the control head option jumpers have not been previously set, refer to the
Installer Selectable Options section on pages 7-8.
5. Screw the second “U” bracket to the backside of the control head using the two
#8 screws provided.
6. The “U”
bracket on the
back of the
control head
can
now be fastened to
the “U” bracket
previously
mounted on the
vehicle using the
two ¼” screws,
two flat washers,
two lock washers,
and two nuts
provided.
7. Once fastened together, adjust the control head by rotating the “U” brackets
and/or sliding the “U” brackets closer or farther apart. Tighten ¼” screws.


