background image

00031823.DOC, Version 1.0

53/62

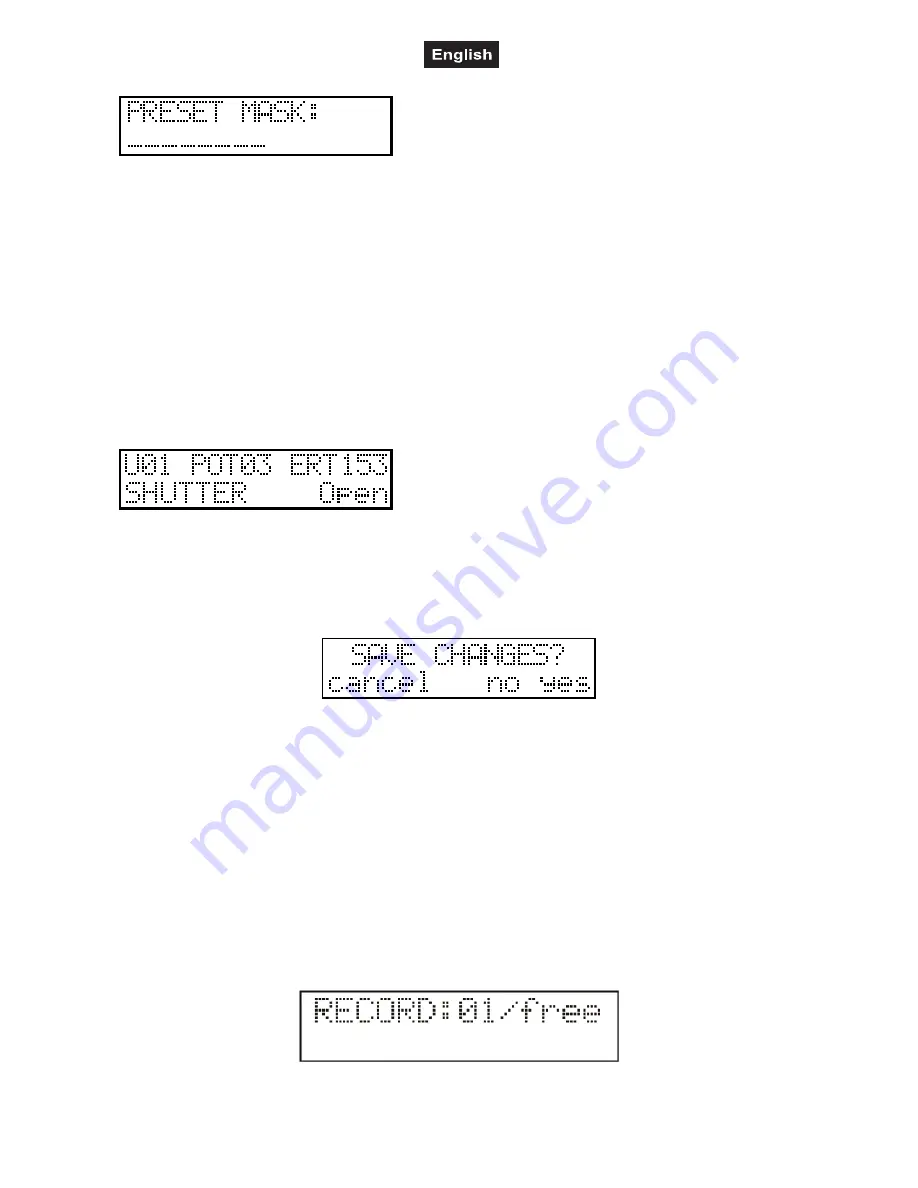
Now set the units you would like to attach to the preset scene. In the lower line you can see the current
setup. If there is no character, no unit is installed for that serial number. The horizontal line means that the
unit will not be part of the preset; it is masked. The units can be masked in and out with buttons 1-16. The
masked units are open and the others are closed, so it is very easy to identify the masked units on stage.
After pressing the button for two seconds the unit name appears in the lower line, then a star is shown at the
place of the masked units.
Mask a channel as follows: Select the unit which contains the channel (1-16 button). Move the slider which
can control the selected channel to the top (over 50%) and display shows the channel name and active mask
info. If you move a slider under 50% then it will switch off from the preset scene mask. It is also possible to
switch all channels in mask by pressing RECORD. The display shows the info: ALL CAHNNEL ON. If you
would like to make a preset scene with only a few channels it is reasonable to press DELETE (ALL
CHANNEL OFF) and to activate only the desired channels.
How do you know if a channel is masked or not? Press and hold the MANUAL button, and select a unit (1-16
button). Now move a slider, hold the MANUAL button pressed then the channel masked state will not
change, only its status will appear on the display.
After masking press ENTER.
Preset edition:

Modifying a preset scene is like modifying a program scene, the only difference is that you cannot move to
the next scene by pressing the ENTER button.
If the modification is completed, you can log off by pressing the ESC button.

Preset saving:
Press the ESC button and the controller asks for the confirmation to save the modification.

Preset deletion:
The preset can be deleted in the preset selection by pressing the DELETE (LEFT) button. The controller
asks for the confirmation to delete, then it executes it after clicking the YES button.

Preset copy:
Events can be copied to vacant places. This could be reasonable if you want to use several events which
have only a few differences. In this case create the first event, then copy it to a vacant place, and then
modify it.
First select the event which you would like to copy, and press the NEW button. Its LED starts blinking and on
the lower line of the display you can read the text to be copied. Select a vacant place with buttons 1-16
where you would like to copy the event to. The display shows the info about source and destination places. If
you press ESC the controller return without copying, press ENTER to copy the event.

MENU 5: RECORD EDITION

The record is an event, which starts programs and lets them run until the programmed time.

Summary of Contents for CP-256 MST

Page 1: ...Copyright Nachdruck verboten Reproduction prohibited F r weiteren Gebrauch aufbewahren Keep this manual for future needs BEDIENUNGSANLEITUNG USER MANUAL CP 256 MST DMX controller...

Page 2: ...TION OF THE DEVICE 36 5 SETUP 38 6 OPERATION 39 SETUP MENU 3 SETTING OF THE SMOKE MACHINE 43 SETUP MENU 2 THE POSITION OF THE UNIT 44 SETUP MENU 1 UNIT INSTALLATION 45 MENU 6 FUNCTION BUTTONS 54 7 PRO...

Page 3: ...er dass Sie lange Zeit Freude an Ihrem Kauf haben werden Nehmen Sie den CP 256 MST aus der Verpackung 2 SICHERHEITSHINWEISE Dieses Ger t hat das Werk in sicherheitstechnisch einwandfreiem Zustand verl...

Page 4: ...herumliegen Sie gef hrden Ihre eigene und die Sicherheit Dritter Das Ger t darf nicht in einer Umgebung eingesetzt oder gelagert werden in der mit Spritzwasser Regen Feuchtigkeit oder Nebel zu rechnen...

Page 5: ...ramme mit bis zu 99 Szenen programmierbar 64 Preset Scenes 10 w hlbare Sprachen Spiegelbewegung umkehrbar Kopierfunktion der Programme und Records 64 Records mit bis zu 85 Programmen programmierbar 64...

Page 6: ...wird da sonst kein Lichtaustritt sichtbar wird R ckseite DMX Ausgangsbuchse Anschluss f r Scanner Moving Heads Dimmer und Nebelmaschinen Spannungsversorgung Die Steuerung kann auch durch Netzteile de...

Page 7: ...Musiksteuerung kann entweder ber die 6 3 mm Stereo Klinkenbuchse oder das eingebaute Mikrofon erfolgen Wenn der CP 256 MST ber ein Musiksignal an der Audio Buchse arbeiten soll verbinden Sie die Klin...

Page 8: ...jektor Startadresse Projektor Startadresse Projektor 1 1 Projektor 7 193 Projektor 13 385 Projektor 2 33 Projektor 8 225 Projektor 14 417 Projektor 3 65 Projektor 9 257 Projektor 15 449 Projektor 4 97...

Page 9: ...System Men code notwendig Wenn der Men code aktiviert wurde m ssen Sie ihn jedesmal vor Aufrufen des System Men s eingeben Die Eingabe erfolgt ber die Projektorwahltasten und die Enter Taste Stimmt d...

Page 10: ...der Men code aktiviert Wenn Sie den aktiven Code wieder l schen m chten dr cken Sie die Delete Taste SETUP MEN 9 STEUERUNGSDATEN In der oberen Zeile der Anzeige erscheint die Seriennummer der Steuerun...

Page 11: ...ch Dr cken der Ja Taste ENTER speichert die Steuerung die Ver nderung und kehrt in das Men zur ck SETUP MEN 5 LED EINSTELLEN In diesem Men punkt kann die Lichtst rke der LEDs ver ndert werden In der o...

Page 12: ...teuerung kann neben den Projektoren auch eine Nebelmaschine angesteuert werden In diesem Men punkt k nnen die 4x8 Kanalwerte eingestellt werden mit denen die angeschlossenen Nebelmaschinen im permanen...

Page 13: ...ahltaste zugeordnet werden DMX Adresse 1 entspricht Projektorwahltaste 1 In diesem Men punkt k nnen Sie die Projektoren den 16 Positionen zuordnen und die DMX Adresse und die Spiegelrichtung einstelle...

Page 14: ...hlen Hier haben Sie auch die M glichkeit einen neuen Projektor durch Dr cken der NEW RIGHT Taste aufzunehmen und einzustellen Insgesamt k nnen die Angaben von 256 Projektoren in der Steuerung gespeich...

Page 15: ...l zugeordnet ist Ein X bedeutet das diesem Kanalfader bereits ein Kanal zugeordnet ist aber nicht der aktuell gew hlte Der Stern bedeutet das der aktuelle Kanal dem Kanalfader mit dieser Nummer zugeor...

Page 16: ...ors zum Ein bzw Ausschalten der Lampe benutzen wollen k nnen Sie hier mit Hilfe der Kanalfader 7 und 8 die entsprechenden Werte einstellen Wenn Sie keinen Lampenwert vorgeben m chten dr cken Sie die D...

Page 17: ...r Steuerung befindlichen Shape Generators kann man den Projektoren 8 verschiedene Bewegungsmuster sogenannte Shapes zuweisen deren Parameter sich noch ver ndern lassen Die 8 verschiedenen Shapes beste...

Page 18: ...ktoren mit der DELETE Taste gestoppt werden Gestoppt werden die angesteuerten Projektoren bei denen die Projektorwahltaste blinkt Dabei werden aber auch die Shapes gel scht Um die Projektoren wieder z...

Page 19: ...n m chten In der unteren Zeile erscheint die aktuelle Einstellung Wo kein Zeichen erscheint ist unter der Nummer keine Projektor installiert Die Striche bedeuten das die entsprechenden Projektoren ger...

Page 20: ...nd die Nummer des aktuellen Bildes In der unteren Zeile erscheint entweder die zum aktuellen Schritt geh rende zugeordnete Shapebezeichnung oder die STOP Aufschrift oder die Zeile ist leer Die leere Z...

Page 21: ...u blinken und die untere Linie im Display zeigt den zu kopierenden Text an W hlen Sie einen freien Speicherplatz ber die Projektorwahltasten aus auf den Sie den Event kopieren m chten Auf dem Display...

Page 22: ...n an freie Pl tze kopiert werden Dies kann sinnvoll sein wenn Sie mehrere Events haben die sich nur gering unterscheiden In diesem Fall erstellen Sie den ersten Event kopieren Sie ihn an einen freien...

Page 23: ...int die Information ber den Kanalnamen und aktive Maskendaten Wird der Fader unterhalb 50 bewegt schaltet sich die Present Scene Maske ab Sie k nnen alle Kan le in die Maske aufnehmen indem Sie die Re...

Page 24: ...r die Enter Taste best tigen Sie die Eingabe MEN 5 RECORD ERSTELLEN In einem Record k nnen mehrere Programme gespeichert werden die dann nacheinander gestartet werden Im CP 256 64 k nnen bis zu 64 Rec...

Page 25: ...MEN 6 FUNKTIONSTASTEN Die Funktionstasten haben die Belegung F1 F8 am Controller Sie k nnen diesen Tasten Funktionen zuweisen Nutzen Sie den Controller optimal indem Sie Ihre wichtigsten Funktionen di...

Page 26: ...torwahltasten von 1 16 auf 17 32 bzw von 33 48 auf 49 64 umgeschaltet werden Ist die Belegung 1 16 bzw 33 48 aktiv leuchtet die LED der Page Taste mit halber Intensit t blinkt die LED ist die Belegung...

Page 27: ...int auf dem Display neben der G Meldung auch ein A Zeichen Das bedeutet das eine Geschwindigkeit oder Bildwechselzeit nderung sich auf alle ALL Projektoren bezieht Wird ein Programm gestartet l uft es...

Page 28: ...iedlichen Lautst rken ein sehr guter Taktempfang erreicht wird Wenn der Takt au erhalb des vorgegebenen Bereiches liegt erfolgt auch ein Programmbildwechsel aber auf der Anzeige wird das durch Striche...

Page 29: ...in die neue Position fahren So werden die K pfe bzw Spiegel w hrend des Programmablaufs nie in einer Position warten In der oberen Zeile rechts wird auf dem Display die Meldung S WAIT erscheinen Seque...

Page 30: ...splay folgende Meldung Nach dem U Zeichen Unit Projektor erscheint immer die Nummer des zuletzt gew hlten Projektors Nach dem POT erscheint immer die Nummer des zuletzt bet tigten Kanalfaders und in d...

Page 31: ...ungsweise ausschalten Das ist aber m glich wenn der Projektor ber diese Funktion verf gt und falls das Ger t nicht in der Steuerung gespeichert ist mu die Lamp Funktion beim Installieren eingestellt w...

Page 32: ...eschriebenen Schritten Beim Preset Macro wird die Farbe bzw das Gobo nicht gespeichert Der Controller hat die Eingaben nicht abgespeichert Bitte nehmen Sie die Einstellungen noch einmal vor und speich...

Page 33: ...uerung entweder ber Klinkenbuchse oder eingebautes Mikrofon Audioeingang 6 3 mm Stereoklinke Audio Eingangsempfindlichkeit 0 3 1 V DMX 512 Ausgang 3 polige XLR Einbaukupplung Freie Programme 64 Ma e L...

Page 34: ...given in this manual we are sure that you will enjoy this device for a long period of time Unpack your CP 256 MST 2 SAFETY INSTRUCTIONS This device has left our premises in absolutely perfect conditio...

Page 35: ...where splash water rain moisture or fog may harm the device Moisture or very high humidity can reduce the insulation and lead to mortal electrical shocks When using smoke machines make sure that the...

Page 36: ...Control of the smoke machine pressing it to get the active values to the dmx line by keeping it pressed down the active values can be set up with the 1 8 potentiometers 6 PAGE button Shifting button...

Page 37: ...hythm so the controller remembers the frequency of pressing down and it will shift the program scenes in such pace 20 BLACK OUT button the controller can be switched on or off by pressing down if for...

Page 38: ...e sound control either works via the mono jack socket or the built in microphone If the CP 256 MST is supposed to work via a sound signal at the Audio In socket connect the jack socket with the sound...

Page 39: ...3 385 Projektor 2 33 Projektor 8 225 Projektor 14 417 Projektor 3 65 Projektor 9 257 Projektor 15 449 Projektor 4 97 Projektor 10 289 Projektor 16 481 Projektor 5 129 Projektor 11 321 Projektor 6 161...

Page 40: ...type it again by pressing the ESC button If you forgot the code you will need the PI code of the controller but first you need to know the serial number of the controller If the controller asks for th...

Page 41: ...OLLER DATA In the upper line of the display the serial number of the controller appears in the lower line the manufacturing date day month year appears You can log off from the menu item by pressing E...

Page 42: ...ter In the lower line the set value is of half intensity This value can be set by the DATA 2 potentiometer and is shown on the 1 8 LEDs If no modification has been made in the menu item press the ESC...

Page 43: ...n to the menu by pressing ENTER you can edit the place of the currently selected smoke machine Press the ENTER button to edit the current place You can provide a name to the place of the smoke machine...

Page 44: ...rs which can be edited by the user as well The position can be selected with buttons 1 16 If no unit is assigned to a position the wording blank appears in the lower line and only the position number...

Page 45: ...ties yet The date of a selected unit can be modified and a unit can be deleted ENTERING A NEW UNIT Press the NEW RIGHT button to enter the new unit It does not matter whether you are in the selection...

Page 46: ...ecified with the 1 8 potentiometers in the way that it is drawn to a value higher than its half Then a star will indicate the potentiometer at the adequate place on the display Press ENTER to advance...

Page 47: ...ough for the unit with all 32 channels In case of the last type the maximum value of 225 has to be set within a channel There is another option as well the percentage indication If it is about a conti...

Page 48: ...button for two seconds the unit name appears then a star is shown at the place of the masked units After masking press ENTER Now the masked units can be selected on buttons 1 16 and shapes can be ass...

Page 49: ...the program has been written Select a program with buttons 1 16 and the PAGE shifting button If you want to select units 1 10 you do not have to press all 10 buttons simply keep button 1 pressed and t...

Page 50: ...the scene appears in the middle of the upper line of the display In the lower line name the shape assigned to the current step or STOP caption appears or the line is empty The empty line means that no...

Page 51: ...f the display you can read the text to be copied Select a vacant place with buttons 1 16 where you would like to copy the event to The display shows the info about source and destination places If you...

Page 52: ...y a few differences In this case create the first event then copy it to a vacant place and then modify it First select the event which you would like to copy and press the NEW button Its LED starts bl...

Page 53: ...ton Now move a slider hold the MANUAL button pressed then the channel masked state will not change only its status will appear on the display After masking press ENTER Preset edition Modifying a prese...

Page 54: ...next step With the DATA ENTRY poti you can select any record step to modify it If the modification is completed you can log off by pressing the ESC button Record saving By pressing the ESC button the...

Page 55: ...to stop during the BLACK OUT or is to run on of course in a closed state These are the STOP or wordings MANUAL BPM The program frame time can be given according to the manual rate on the button set to...

Page 56: ...nt bank button will blink If you press the SEQUENCE button you can start sequences with buttons 1 16 If you press button one its LED will blink and the SEQUENCE buttons LED will also blink If you pres...

Page 57: ...icates the number of the running program which is in the current group as well as the scene number If you select another group the LED indicating the program having run until that time will be flashin...

Page 58: ...in the current group it affects each group in ALL group mode It can be switched off by giving a new wait value or auto bpm 5 AUTO BPM mode In automatic mode if you move the PAN jog wheel a bmp value...

Page 59: ...e minimal position of the wait slider the sequence will stop In the maximal position of the wait slider the sequence will run by music control You can select also an AUTO BPM value with the PAN jog wh...

Page 60: ...els are written on the display The moving speed of the beam depends on the rotating speed of the jog disc SLIDER button The controller is able to manage units with a maximum of 32 channels All 32 chan...

Page 61: ...ESC or ENTER button SMOKE MACHINE control The controller can control a dmx smoke machine with a maximum 8 channels How the configuration can be made on the controller was described in the setup menu I...

Page 62: ...rogram again and save the last scene by pressing the Enter button The individual scenes are not displayed when editing a program The Recall button has not been pressed Press the Recall button in order...

Reviews: