27
G e t t i n g S t a r t e d
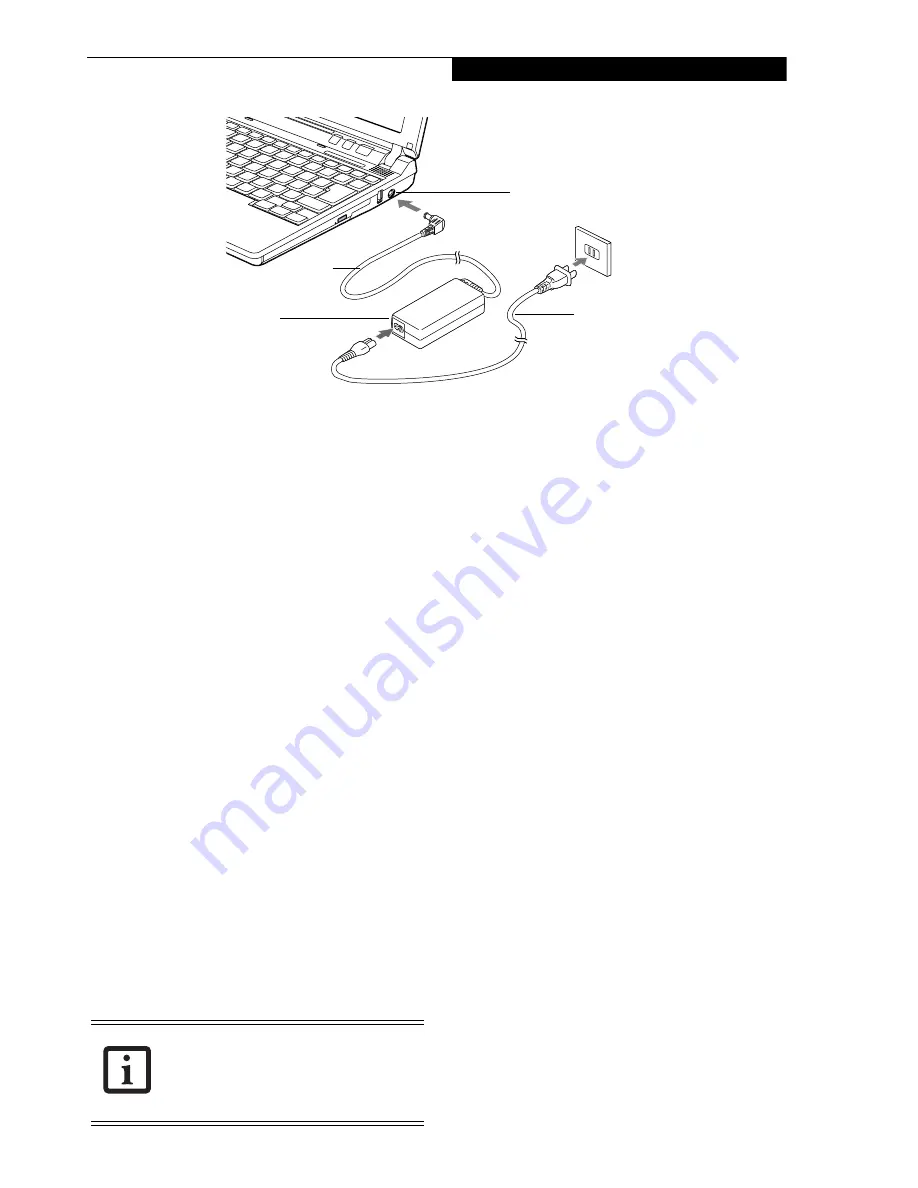
Figure 3-1 Connecting the AC Adapter
Power Sources
Your Fujitsu LifeBook notebook has four possible power
sources: a primary Lithium ion battery, an optional
modular Lithium ion battery, an AC adapter, or an
optional Auto/Airline adapter.
CONNECTING THE POWER ADAPTERS
The AC adapter or optional Auto/Airline adapter
provides power for operating your notebook and
charging the batteries.
Connecting the AC Adapter
1. Plug the DC output cable into the DC power jack
of your LifeBook notebook.
2. Plug the AC adapter into an AC electrical outlet.
(Figure 3-1)
Connecting the Optional Auto/Airline Adapter
1. Plug the DC output cable into the DC power jack
on your notebook.
2. Plug the Auto/Airline adapter into the cigarette
lighter of an automobile with the ignition key in
the On or Accessories position,
or,
Plug the Auto/Airline adapter into the DC power
jack on an airplane seat.
Switching from AC Adapter Power or the
Auto/Airline Adapter to Battery Power
1. Be sure that you have at least one charged
battery installed.
2. Remove the AC adapter or the Auto/Airline adapter.
DC Power Jack
DC Output
AC Adapter
AC Cable
Cable
The Lithium ion battery is not charged
upon purchase. Initially, you will need to
connect either the AC adapter or the
Auto/Airline adapter to use your
notebook.
Summary of Contents for Lifebook P7230
Page 1: ...User s Guide Learn how to use your LifeBook P7230 Notebook ...
Page 2: ...Fujitsu LifeBook P7230 Notebook User s Guide ...
Page 3: ......
Page 9: ...L i f e B o o k P 7 0 0 0 N o t e b o o k ...
Page 10: ...1 Preface ...
Page 11: ...L i f e B o o k P 7 0 0 0 N o t e b o o k ...
Page 13: ...2 L i f e B o o k P 7 0 0 0 N o t e b o o k S e c t i o n O n e ...
Page 14: ...3 2 Getting to Know Your LifeBook Notebook ...
Page 15: ...4 L i f e B o o k P 7 0 0 0 N o t e b o o k S e c t i o n T w o ...
Page 31: ...20 L i f e B o o k P 7 0 0 0 N o t e b o o k S e c t i o n T w o ...
Page 36: ...25 3 Getting Started ...
Page 37: ...26 L i f e B o o k P 7 0 0 0 N o t e b o o k S e c t i o n T h r e e ...
Page 45: ...34 L i f e B o o k P 7 0 0 0 N o t e b o o k S e c t i o n T h r e e ...
Page 46: ...35 4 User Installable Features ...
Page 47: ...36 L i f e B o o k P 7 0 0 0 N o t e b o o k S e c t i o n F o u r ...
Page 53: ...42 L i f e B o o k P 7 0 0 0 N o t e b o o k S e c t i o n F o u r ...
Page 62: ...51 5 Using the Integrated Wireless LAN Optional Device ...
Page 63: ...52 L i f e B o o k P 7 0 0 0 N o t e b o o k S e c t i o n F I v e ...
Page 80: ...69 6 Troubleshooting ...
Page 81: ...70 L i f e B o o k P 7 0 0 0 N o t e b o o k S e c t i o n S i x ...
Page 95: ...84 L i f e B o o k P 7 0 0 0 N o t e b o o k S e c t i o n S i x ...
Page 96: ...85 7 Care and Maintenance ...
Page 97: ...86 L i f e B o o k P 7 0 0 0 N o t e b o o k S e c t i o n S e v e n ...
Page 101: ...90 L i f e B o o k P 7 0 0 0 N o t e b o o k S e c t i o n S e v e n ...
Page 102: ...91 8 Specifications ...
Page 103: ...92 L i f e B o o k P 7 0 0 0 N o t e b o o k S e c t i o n E i g h t ...
Page 110: ...99 9 Glossary ...
Page 111: ...100 L i f e B o o k P 7 0 0 0 N o t e b o o k S e c t i o n N i n e ...
Page 116: ...105 Appendix A Using the Fingerprint Sensor ...
Page 117: ...106 L i f e B o o k P 7 0 0 0 N o t e b o o k A p p e n d i x ...


