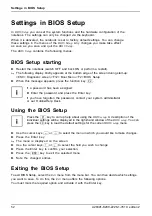
Settings in BIOS Setup
Settings in BIOS Setup
Settings
Systemsettings
Con
fi
guration
BIOS Setup:
Setup,seeBIOSsetup
Systemcon
fi
guration
Hardwarecon
fi
guration
In
BIOS Setup
you can set the system functions and the hardware con
fi
guration of the
notebook. The settings can only be changed via the keyboard.
When it is delivered, the notebook is set to factory default settings. You can change
these settings in the menus of the
BIOS Setup
. Any changes you make take effect
as soon as you save and quit the
BIOS Setup
.
The
BIOS Setup
contains the following menus:
BIOS Setup starting
BIOS Setup:
►
Restart the notebook (switch OFF and back ON or perform a restart).
The following display brie
fl
y appears at the bottom edge of the screen during start-up:
<ESC> Diagnostic screen <F12> Boot Menu <F2> BIOS Setup
►
When this message appears, press the function key
F2
.
If a password has been assigned:
►
Enter the password and press the Enter key.
If you have forgotten the password, contact your system administrator
or our Hotline/Help Desk.
Using the BIOS Setup
BIOS setup
Press the
F1
key to call up help about using the
BIOS setup
. A description of the
individual settings will be displayed in the right-hand window of the
BIOS setup
. You can
press the
F9
key to load the default settings for the current
BIOS setup
menu.
►
Use the cursor keys
←
or
→
to select the menu in which you would like to make changes.
►
Press the Enter key.
The menu is displayed on the screen.
►
Use the cursor keys
↑
or
↓
to select the
fi
eld you wish to change.
►
Press the Enter key to con
fi
rm your selection.
►
Press the
ESC
key to exit the selected menu.
►
Note the changed entries.
Exiting the BIOS Setup
BIOS Setup:
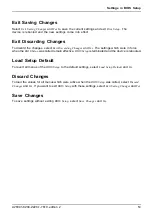
To exit BIOS Setup, select the
Exit
menu from the menu bar. You can then decide which settings
you want to save. To do this, the
Exit
menu offers the following options.
You must mark the required option and activate it with the Enter key.
52
A26391-K200-Z226-1-7619, edition 2
Summary of Contents for CELSIUS H250
Page 1: ...Notebook Operating Manual ...
Page 3: ......


